
redware research ltd.
Redware Connector
Microsoft Dynamics and Power BI
Xero, Sage 50, Sage 200 and QuickBooks Online
Manual
Version 6.93
Author: Stamati Crook
Email: stamati.crook@redware.com
Date: 30 June 2020
Doc: mscrm-connector-manual-6.94.doc
© redware research limited 2018. 2

© redware research limited 2018. 3
1. Contents
1. Contents .............................................................................................................................................. 3
2. Redware Research Limited ............................................................................................................... 5
3. Introduction ........................................................................................................................................ 6
4. Installation ........................................................................................................................................... 7
4.1. Registration ................................................................................................................................. 7
4.2. Download Software .................................................................................................................... 7
4.3. Upgrading to the latest Version ................................................................................................ 7
4.4. License ......................................................................................................................................... 7
4.5. Connect to Microsoft Dynamics 365 CRM ............................................................................... 8
4.6. Connect to Xero – Private Authentication ............................................................................... 9
4.7. Connect to Sage 50 ................................................................................................................... 12
4.8. Multiple Accounting Companies ............................................................................................. 12
5. Power BI Connector ......................................................................................................................... 13
5.1. Configuration and Handholding ............................................................................................. 13
5.2. Installation .............................................................................. Error! Bookmark not defined.
5.3. Connector .................................................................................................................................. 14
5.4. PBIX ............................................................................................................................................. 14
5.5. Service and Gateway ................................................................................................................ 15
5.6. Troubleshooting........................................................................................................................ 15
6. Dynamics 365 CRM Connector ....................................................................................................... 16
6.1. Installation ................................................................................................................................. 16
6.2. Upload Invoices ......................................................................................................................... 17
6.3. Upload Credits .......................................................................................................................... 18
6.4. Upload Customers .................................................................................................................... 18
6.5. Upload Suppliers ...................................................................................................................... 19
6.6. Upload Products ....................................................................................................................... 19
6.7. Upload Purchase Orders ......................................................................................................... 19
7. Batch Setup ....................................................................................................................................... 21
8. Xero Connector ................................................................................................................................. 22
8.1. Xero Limitations ........................................................................................................................ 22
8.1.1. Invoice Address ................................................................................................................ 22
8.1.2. Account Numbers ............................................................................................................ 22
8.1.3. Currency Calculation ........................................................................................................ 22
8.1.4. USA Tax Calculation ......................................................................................................... 22
8.2. Customer Mappings ................................................................................................................. 22
8.3. Product Mappings .................................................................................................................... 22
8.4. Invoice Mappings ...................................................................................................................... 23
8.5. Tax Calculation .......................................................................................................................... 24
8.6. USA Tax Calculation .................................................................................................................. 24
8.7. Nominal Codes .......................................................................................................................... 24
© redware research limited 2018. 4
8.8. Tracking Codes .......................................................................................................................... 24
9. Sage 50 Connector ........................................................................................................................... 26
9.1. Limitations ................................................................................................................................. 26
9.1.1. Multi-Currency .................................................................................................................. 26
9.1.2. Automatic Posting ............................................................................................................ 26
9.2. Sage Mappings .......................................................................................................................... 26
9.3. Sage Third Party Activation ..................................................................................................... 27
9.4. Multi-Currency for Sage ........................................................................................................... 27
9.5. Sage User ................................................................................................................................... 27
9.6. Sage Customer Defaults .......................................................................................................... 27
9.7. Product Defaults ....................................................................................................................... 28
10. Batch Mode .................................................................................................................................... 32
10.1. Create a Shortcut .................................................................................................................. 33
10.2. Run a BAT File ....................................................................................................................... 33
10.3. Create a Scheduled Task ..................................................................................................... 33
11. Configuration................................................................................................................................. 35

© redware research limited 2018. 5
2. Redware Research Limited
Redware Research Limited is a software house specialising in accounting and billing solutions for
Microsoft Dynamics 365 CRM and Sage 50C and Xero and Quickbooks Online.
We also offer consultancy and development services.
Redware has a range of software add-ons for Microsoft CRM including:
• Sage 50 Connector
• Xero Connector
• Telecoms Billing
• Company Credit Reports for UK and EU Companies
• SMS Text Messaging
Please contact us with any enquiries on any of our products or for a discussion on how our
consultancy service might help integrate your business systems and processes.
Redware Research Limited
32 Welbeck Avenue
Brighton BN3 4JL
England
Telephone: +44 (0) 203 1799 444
Web: www.redware.com
Email: [email protected]om

© redware research limited 2018. 6
3. Introduction
Our Connector software provides simple integration from Microsoft Dynamics 365 CRM allowing
Invoices to be pushed into the accounting database without any re-keying.
Our Billing Module extends the Connector to provide Billing functionality within Microsoft
Dynamics 365 CRM for creating regular monthly bills or using workflow to create invoices with
automated emailing of PDF documents to customers.
Our Power BI offering includes a set of reports ready for Power BI Desktop and an data
extraction process producing accounting data in a format that can easily be consumed by Power
BI.
Currently we support three accounting packages:
• Sage 50C (for UK, Ireland, Australia, NZ, and South Africa – not US and Canada).
• Xero – all versions.
• Quickbooks Online.
The functionality of the Connector is the same for all three accounting packages and comprises:
• Data integration with Sage 50, XERO or Quickbooks Online.
• Push invoices from CRM into the accounting package.
• Push Credit Notes from CRM into the accounting package.
• Either way synchronisation of Customers and Products.
• Calculation of VAT – including EU and Worldwide VAT.
• Outstanding invoice amounts tracked in CRM.
• Customer Balance tracked in CRM.
• Product stock quantities are tracked in CRM.
We also provide companion Billing software which allows for the creation and fulfilment of
invoices within CRM packaging up functionality missing from Dynamics 365 CRM enabling you to
produce and email invoices with simple workflow:
• Repeat invoicing for weekly, monthly and annual invoicing.
• Support for multi-company Sage or Xero.
• Calculation of VAT – including EU and Worldwide VAT.
• Creation of HTML or PDF invoice documents from an HTML template.
• Invoice fulfilment via email using CRM email or an external email service.
• Push Purchases, Credit Notes, and Payments into the accounting database using workflow
which might access custom entities (in combination with the Connector).
• Optional Payment services including credit card and direct debit.
The Power BI service creates CSV files for use with a Power BI Desktop PBIX file that we supply to
instantly view and publish your accounting history to Power PI users in the cloud. You have full
access to the datafiles to create or modify the reports and dashboards as you like.
Please view our product videos at www.redware.com or email us at sales@redware.com or call
+44 203 1799 444 for further details.

© redware research limited 2018. 7
4. Installation
Our software is often sold through a reseller together with the Configuration and Handholding
service in which case we take you through the following steps to configure and install your
software properly.
If you a “self-service” customer you can perform these tasks yourself and we recommend you
view our videos to help you on your way.
Please contact support@redware.com if there are any issues or questions.
4.1. Registration
Self-service customers need to ensure they have registered on our website at
http://www.redware.com/account/register or you may log in to our customer area at
http://www.redware.com/account/index. This will give you access to software downloads and
allow you to view the helper videos.
4.2. Download Software
Please download the correct version of the Connector software from the customer area of our
website or from the link on your registration email – http://www.redware.com/customer/index.
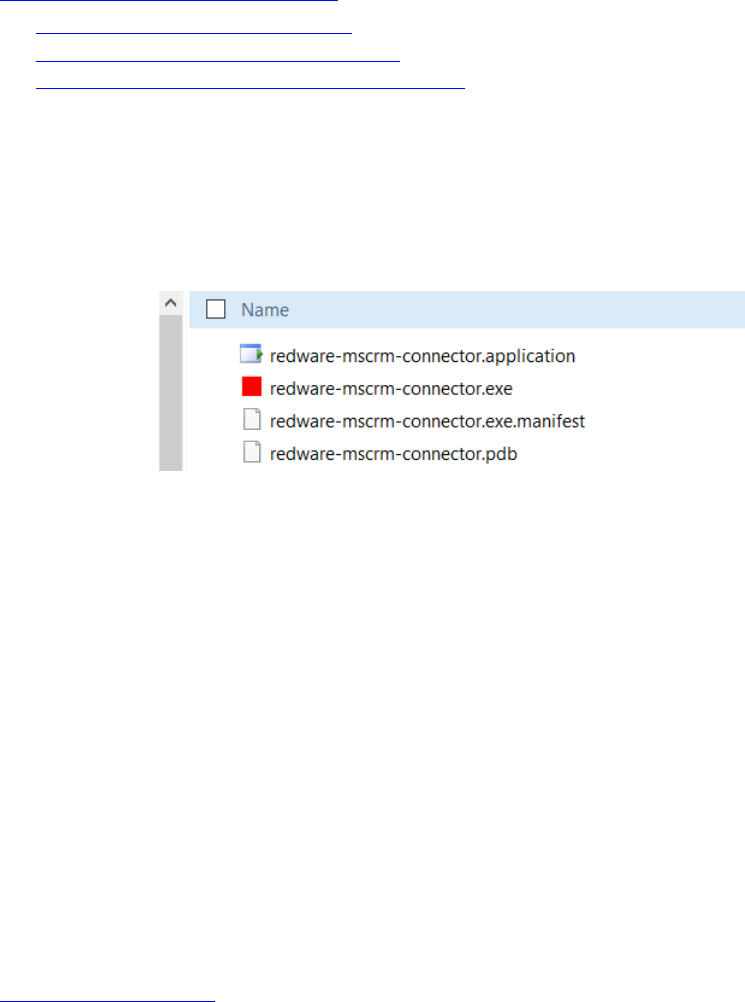
You can unzip the software to a folder of your choice and run the redware-mscrm-
connector.exe program by double-clicking on the icon.
4.3. Upgrading to the latest Version
You can upgrade to the latest version by downloading the latest software and unzipping to a new
folder and copying your existing configuration file over into the new folder.
The configuration is specified in the redware.config file which needs to be copied over from
your existing program folder if you do not want to have to configure all the options again.
If you have installed the “clickonce” version then the software will upgrade automatically.
4.4. License
The license needs to be activated for your software product(s) on the License page and the
process varies slightly depending on the product being activated.
Some products rely on the MAC address of your PC to activate the license and others require you
first to have completed the setup for Dynamics 365 CRM as the licensing takes the “device” from
there.
Enter your login details and LOGON and you should see your product details in the drop down in
the middle of the window so you can select the product to be activated:
• CRMBILLING – is the Billing Connector

© redware research limited 2018. 8
• CRMXERO – the Xero Connector
• CRMSAGE50 – the Sage Connector
• CRMQBO – the Quickbooks Online Connector
The following products are for Power BI
• POWERBIXERO – is the Power BI Connector for Xero
• POWERBISAGE50 – is the Power BI Connector for Sage 50
• POWERBICRM – is the Power BI Connector for Dynamics 365
• POWERBIQBO – is the Power BI Connector for Quickbooks Online
If your product does not appear please check with your reseller or log into your account at
www.redware.com and confirm that all is as it should be. To license your software – press EDIT-
FIX-SAVE and the software will:
• Connect to CRM to fill your device details if required.
• Connect to www.redware.com and validate your details and the number of users to license
your software.
Press SAVE when completed and TEST to make sure all fine with the license.
You can refresh your license details at any time with EDIT-FIX-SAVE if necessary. Note that the
expiry date should update autmatically as your monthly payments are processed.
Please log into www.redware.com/customer/index if you want to view the status of your account
or make a payment or increase the number of users on your license or email
sales@redware.com or talk with your reseller.
If you switch CRM installations or machines in the case of Power BI you need to contact us to
refresh your license on s[email protected].
4.5. Connect to Microsoft Dynamics 365 CRM
Connection to Microsoft CRM varies according to your region and whether you are online or on
premise.

© redware research limited 2018. 9
Please select your region and enter the Server URL, the username and password and press the
SHOW ORGANISATIONS button to complete the registration. You will also need the domain if you
are on premise.
We support all versions of CRM since 2011 but please get in touch if you have problems
connecting to earlier versions.
You can press the TEST button at any time to check connectivity to Microsoft CRM in case the
internet is down or your password has changed.
4.6. Connect to Xero – Private Authentication
Private authentication with Xero involves the generation of an encryption key and certificate. We
provide everything you need to generate the certificates and keys required. We generate new
security keys for each installation so that they are unique to keep access secure.
Be aware that Xero has a limit of two private application keys per accounting database and you
should be able to configure our software to use an existing key if you need to.
You need to have successfully activated your license with the LICENSE tab before setting up your
Xero Connection and also first connected to Dynamics 365 if you are setting up the Conenctor.
To start the process click EDIT and then click the GENERATE XERO CERTIFICATE button to create
the certificates in your program folder.

© redware research limited 2018. 10
The file will be in the format XERO-YOURDOMAN-COM and the file ending in -64.CER is the
certificate file to be uploaded into XERO (and you can remove or store this file for safe keeping)
whilst the PFX file is the private key kept in the program folder and requried for successful
authentication to Xero (keep this file safe to prevent others from accessing Xero using the API).
Use the following URL to enter the developer part of the Xero site and log on with your standard
Xero credentials.
http://app.xero.com
Now select the MY APPS option from the menu at the top of the screen and ADD APPLICATION.
Make sure you select a PRIVATE APPLICATION and load up the xero-mydomain-com-64.cer file
you generated earlier from your program folder as the X502 Certificate requested by the
registration process. If all goes well you can see your CONSUMER KEY and CONSUMER SECRET
KEY which you need to paste and save into the XERO SETUP page of the application.

© redware research limited 2018. 11
Choose a sensible name for the application because this will show up in Xero on the Invoice form
to provide a link back to CRM (you will need to log in to view the Invoice).
Copy the CONSUMER KEY and the CONSUMER SECRET KEY into the relevant settings on the XERO
SETUP tab and SAVE and try to connect to Xero (restart the software if you have to). Now you
should connect to Xero without any browser prompt.
You can remove the *.CER files from the program folder, but the PFX file is required to connect
to the XERO API. If you delete the values for the keys you can repeat the certificate installation
for more convinient access. You can also delete the *.CER and *.PFX files and repeat if you want
to be sure of security.
Test the Xero Connection by pressing the CONNECT button which should now connect to Xero
without prompting you to logon and paste the authorisation code.

© redware research limited 2018. 12
4.7. Connect to Sage 50
Once you have successfully licensed your software you will see the Sage 50 SETUP form and can
set up the connection to Sage. We ship software for several different versions of Sage 50 so
please download the appropriate version for your version of Sage. Sage recommend you always
run to correct DLLs against your version of Sage.
You can find most of these settings in the SETTINGS-ABOUT menu in Sage. Note that the
database folder for Sage always has an ACCDATA suffix and Sage has version numbers
corresponding to the year so that 2019 is V25, 2018 V24, and so on.
If you are setting up the Connector you can optionally choose a Sage Report and Output Folder
for generating the Invoice PDF documents from Sage either for your own reference or to upload
and email from Dynamics 365:
• The LAYOUT file is the default report that you use to print out your invoices. This same
report can double for a Credit Note if designed appropriately and you can add conditional
logic there if you need the same report to print out different terms and conditions for
example. We can offer consultancy here if required or consult your reseller or Sage directly if
required.
• The output folder is used to store PDF documents generated as each invoice is processed.
These can be useful for copying to a custom portal or sharepoint if required and you can
prevent upload into Dynamics 365 to save on storage charges.
4.8. Multiple Accounting Companies
We support multiple accounting companies although we expect you to have taken part in the
Configuration and Handholding process with ourselves or your reseller to activate this feature.
You can view a video on our website for configuring this feature which involves configuring the
XERO.COMPANIES, SAGE.COMPANIES or QBO.COMPANIES setting in the config file.
© redware research limited 2018. 13
5. Power BI Connector
Skip this section if you are not installing the Power BI Connector.
The Power BI Connector is essentially a data extraction program that exports CSV files to an
output folder from your accounting data - either Dynamics 365, Xero, Sage 50, Sage 200 or
Quickbooks.
We supply you with a PBIX file so you can instantly use Power BI Desktop to create and upload
reports for other Power BI users in your organisation to access.
Please note that we have accompanying videos for the Power BI Connector available on our
Redware PowerBI Connector playlist. The videos include:
• Power BI Connector and Sage 50C
• Power BI Personal Gateway Installation
• Microsoft Power BI Gateway Schedule Refresh
5.1. Installation and Quckstart
Please see section 4 for installation – you need to:
• Download our PBIX file from the redware website using the link provided.
• Download the Connector using the link provided and unzip.
• If you have been sent a config file – copy the redware.config file into the folder.
• Click on the redware-mscrm-connector.exe to run the program.
We offer an optional configuration and handholding and consultancy (either directly or with one
of our resellers) to guide you through the installation process and begin your Power BI journey.
Once the software is running:
• Make sure the appropriate license is showing on the SETUP-LICENSE form (there may eb
more than one!). If not you need to either log in to your account to download the serial
number or drop in or modify your redware.config file to contain the following setting.
<add key="powerbisage50.serial" value="XXX-39309-393" />
• Set up and test the connection to the accounting data by configuring the appropriate
SETUP page for DYNAMCIS365, XERO, SAGE, SAGE200 or QBO.
• Activate the license by pressing EDIT-FIX-SAVE for the appropriate license (you must
connect successfully to the accounting data first).
• Navigate to the POWERBI page, create a folder called c:\temp\powerbi and press the
CREATE DATAFILES button.
• Once complete, you can open your PBIX file with the desktop version of Power BI and
REFRESH before uploading into the cloud.
If you have trouble with any aspect of your installation and configuration you may contact us at
support@redware.com if anything is unclear or just not happening for you:

© redware research limited 2018. 14
5.2. Power Connector
The Power BI Connector allows you to select the appropriate source for the data extraction and
specify an output folder. The associated PBIX file is set to accept datafiles from c:\temp\powerbi
so best create this folder if you are starting out.
If you have a very large amount of accounting data you might enter a recent date, perhaps the
beginning of the month or year, to restrict the initial download. Press CREATE DATAFILES to
begin generating the CSV files.
5.3. PBIX
You can download Power BI Desktop for free from Microsoft here -
https://powerbi.microsoft.com/en-us/desktop/
Once the data extraction process is finished you simply use POWER BI DESKTOP to open the
PBIX file we supplied to you by email when you registered and press the REFRESH button to
refresh with your own data.

© redware research limited 2018. 15
You can publish the reports immediately and share with other Power BI users or create your
own Power BI reports by adapting this file or creating your new reports using the CSV files in
c:\temp\powerbi.
5.4. Service and Gateway
You will need to configure the Connector Service to run the extraction process regularly to
overwrite the CSV files and download the Power BI Gateway from Microsoft to update the data
model shared with other users regularly (up to 8 times a day).
5.5. Troubleshooting
This software manual has general tips on troubleshooting our software but please email us on
[email protected]om if you have issues you cannot resolve.
To get started you will need the links to download the software and the PBIX file and you will
need to get your serial number into the configuration file (redware.config) either by dropping the
file provided by your reseller into the program folder – or by logging in to your redware account
on the SETUP-LICENSE page.
Issues with connecting to each type of accounting data are covered in the separate parts of this
manual for each software package. Note for Sage 50 – you have the correct version for your
Sage.

© redware research limited 2018. 16
6. Dynamics 365 CRM Connector
6.1. Installation
There are a small number of fields to be created in CRM on the INVOICE and ACCOUNT entities
for a new installation and also we can add ACCOUNTNUMBER to CONTACT if you require B2C
invoicing.
The software creates a CRM Solution programmatically and adds some fields to the INVOICE
entity in CRM and also creates some picklist values for you.
For a first time install please press each the CEREATE ATTRIBUTES and CREATE PICKLISTS on the
CRM SETUP window shown above. The system will create a SAGE 50 CONNECTOR or XERO
CONNECTOR solution for you and show progress in the MESSAGES tab of the form.
If you have problems at this stage it is likely that you need to temporarily log on with a CRM user
that has the SYSTEM CUSTOMIZER role and is able to create fields on these entities.
The solution creates the attributes only and you need to drag these on to the relevant form. You
can do this by selecting the FORM EDITOR when you are on the form and drag the new fields
over on to the form.
The attributes for INVOICE might comprise:
• REDWARE_SAGEREFERENCE – Xero/Sage/QGO Invoice
• REDWARE_TAXPOINT – Invoice Date
• REDWARE_OUTSTANDING – Amount Outstanding
• REDWARE_PAYMENTDUEDATE – Payment Due Date
On ACCOUNT we use the following fields to determine an account:
• CUSTOMERTYPECODE – Relationship Type
• ACCOUNTNUMBER – Account Number
Also the following optional fields:
• REDWARE_BALANCE - Balance
If you are using CONTACT then we use the following fields for the account number (if required):
• CUSTOMERTYPECODE – Relationship Type
• REDWARE_ACCOUNTNUMBER – Account Number
• REDWARE_BALANCE - Balance

© redware research limited 2018. 17
Apart from the additional fields – we add STATUS REASON codes to INVOICE.
If you have the configuration and handholding service – we will have added these attributes on
to the relevant data entity forms for you. Otherwise you might add the forms into the Solution
we created for the additional attributes and add them in to the form so you can export and
import into another installation for example if you are testing in a sandbox environment
(although you need us to reset your license details if you switch CRM installations).
6.2. Upload Invoices
The basic functionality of the Connector is to upload invoices and their associated Customer and
Product records from CRM into the Accounting database.
The CREATE status reason must be specified against the required Invoices in CRM which will then
show up on the CONNECTOR tab when you SHOW INVOICES.
You can view invoice information and select some or all of the invoices for processing (with
CTRL+CLICK or SHIFT+CLICK) and press UPLOAD to upload into the acounting database.
The application will connect to both CRM and the accounting database and process the
Customer, Product, and Invoice records outputting messages to the MESSAGES window (and to
the log file in the program folder).
The status reason of each INVOICE will be updated as “UPLOADED” and the ACCOUNTS
REFERENCE and TAXPOINT fields populated with the details of the newly created INVOICE in the
acounts system. If VAT is being recalculated then the tax values will be set into the Invoice Items
also.
If the process fails for any reason, the error messages are output to the log file and the status
reason of the invoice is likely to remain as “PROCESSING”. If this happens, investigate and fix the
error if possible and double check the Invoice has not already been created in accounts. If not –
you can reset the status reason in CRM to “CREATE” and reprocess.

© redware research limited 2018. 18
6.3. Upload Credits
We support a “fake” credit note in CRM which you can create by specifying a negative value for
the QUANTITY in the INVOICE entity. The Connector will recognise this as a credit note and push
into the accounting database accordingly.
6.4. Upload Customers
Customers associated with an Invoice are automatically pushed into the accounting database
immediately before creating an invoice. For data migration purposes and if your specific
requirements dictate – you can push customers into the accounting database (or into CRM)
according to the modification date.
Select the CUSTOMERS option and an account number prefix or modification date if required
and SHOW the required customers. Select some or all of the records and press UPLOAD to push
into the accounts database.
The CRM ACCOUNT entity is designed to contain all organisations that have been promoted from
a LEAD and is a superset of the customers that are pushed in to accounting. There are several
configurations possible to define a customer for the purposes of our Connector:
• The default configuration is to simply populate the ACCOUNTNUMBER field with a value to
identify these accounts as customers (or suppliers).
• Another option is to use the RELATIONSHIP TYPE field (or a custom multi-option field) to
specify a customer or a supplier and in this case the account number is optional (for Xero).
• Finally, a combination of the ACCOUNTNUMBER and the RELATIONSHIP type field can be
used to specify customers.
A similar configuration is possible on the CONTACT entity if required except that a custom
REDWARE_ACCOUNTNUMBER field is used to specify the account number.
Note that Xero and Quickbooks can function without an account number and we support this by
matching on the account name instead. However, we believe that a robust accounting system
should have an account number to print on the invoice and we recommend that you activate this

© redware research limited 2018. 19
option and use account numbers throughout. You can have the numbers automatically
generated or enter the values yourself (or with an auto-number field).
See the BATCH SETUP for details on how to change the synchronisation mode.
6.5. Upload Suppliers
This functionality is identical to the UPLOAD CUSTOMERS except that the RELATIONSHIP TYPE
field is set to SUPPLIER if you are using that configuration.
6.6. Upload Products
Select the PRODUCT dropdown and a prefix if required to SHOW the products from the CRM
database. You can upload into the accounting package by pressing the UPLOAD button. This is
especially useful if you need to specify additional details in the accounting package against a
Product before uploading invoices.
6.7. Upload Purchase Orders
The Connector allows you to create “back to back” purchase orders for an invoice item through
the addition of a few fields. This is not a perfect solution and not for everyone but useful for
many sales organisations – a much more advanced solution is provided in our Billing Module.
Only one purchase order item can be defined for each item although different suppliers can
apply to different line items on a single order. The PO REFERENCE is used to group Purchase
Orders for each supplier. Specify a reference unique to the invoice if you want a separate PO for
each invoice or choose a common reference to group PO items from different invoices on to the
same Supplier PO.

© redware research limited 2018. 20
The optional purchase order fields on each line item are:
• Quantity (shared with the invoice quantity)
• Cost per Unit (the quantity and product are already entered as part of the sales order).
• Purchase Order Tax (leave null if you want the system to calculate)
• Supplier (a link to an account with a relationship type of supplier)
• Purchase Order Reference
• Purchase Order Status to trigger an upload into Sage if required.
• Purchase Order Number is the PO Number generated by Sage (read only).
If purchase order processing is specified – the SHOW button will show all the PO records with
status CREATE currently specified in the system and will group together records with the same
SUPPLIER and the same PO REFERENCE to place on a single Purchase Order in Sage.
The PO STATUS is changed to UPLOADED once processed and the PO NUMBER and PO TAX
written back to the line item.
Note that is it possible in CRM to add INVOICE ITEM as an entity on the Dynamics 365 menu and
filter so that the PO records can be seen.

© redware research limited 2018. 21
7. Batch Setup
The Connector is designed to run in Batch mode as described in the installation section.
However, it is recommended that you run the application manually in the first instance to
become familiar with the configuration and any error messages.
Batch mode is essentially the same as SHOW and UPLOAD of all INVOICES using the invoices
window and requires that the status reason be set to CREATE on any Invoice ready for uploading
into the accounting database. The associated Customer and Product records will also be
updated into Accounts.
The default is just to process INVOICES and CREDIT NOTES from Dynamics 365 into the
accounting database but this automatically pulls in any CUSTOMERS and PRODUCTS and
calculates VAT as required.
If the ACCOUNT NUMBERS option is specified then all accounts are automatically assigned a
unique account number as they are pushed into the accounting database.
The UPDATE EXISTING CUSTOMERS-SUPPLERS-PRODUCTS allows Dynamics 365 to synchronise
any changes to the entity values each time the BATCH process runs. The BATCH DATE is used to
select all records modified since the date specified and this date is automatically updated so that
only freshly updated records are selected each time. You can also see this date on the standard
Connector window in the previous section.
© redware research limited 2018. 22
8. Xero Connector
8.1. Xero Limitations
8.1.1. Invoice Address
Xero has a serious limitation in that currently it is not possible to vary the INVOICE ADDRESS and
there is no DELIVERY ADDRESS. This means that you have to set up a Xero CONTACT for each
address that you want to send an Invoice to with consequent difficulties in splitting and
allocating payments. We will implement mapping from the BILLTO and SHIPTO addresses in CRM
as soon as Xero make an improvement – although there is no sign currently of that happening.
8.1.2. Account Numbers
Xero can work happily without account numbers but this can cause problems if the account
name is changed. We recommend you leave the account number feature activated and
automatically assign account numbers to all your accounts.
8.1.3. Currency Calculation
Xero works very well with multi-currency and calculates exchange rates on the fly using rates
downloaded each day from XE.COM. However these rates are not made available to us so we are
unable to convert foreign currency figures back to base currency which affects our ability to
calculate some figures (for example the account total in base currency).This does not affect the
ability to push invoices into Xero and is more of an inconvenience.
8.1.4. USA Tax Calculation
Xero use connect to a third party to automatically look up the tax code for USA State Sales Tax
but this functionality is not available when pushing invoices into Xero.
We offer a consultancy service to implement USA tax in Dynamics 365.
8.2. Customer Mappings
The data taken from the CUSTOMER record in CRM (which can be an ACCOUNT or CONTACT) is
shown in the grid on the CONNECTOR tab of the software.
There are a few issues to be aware of with Xero:
• Xero can operate without account numbers and validates the account name so you cannot
have two different accounts with the same name.
• An account (called a Contact in Xero) can be both a Customer and a Supplier but the
CUSTOMER/SUPPLIER status is not set until an invoice or purchase order is created.
• The Invoice Address is determined solely by the Contact Address so you need a Xero Contact
for each billing address which is a major limitation and inconvenience.
• TAX RATE and NOMINAL can be specified against a Customer in Xero and will override the
settings for the invoice items. This is so you can easily specify EU or WORLDWIDE tax rates
for all invoice items for a particular customer.
Note that for EU tax – a business customer will be subject to UK VAT if there is no record of the
VAT number and the tax applied depends on the destination country (and as Xero does not
support a delivery address this is difficult to calculate within Xero).
8.3. Product Mappings
The data extracted from the PRODUCT record in CRM can be viewed in the data grid on the
CONNECTOR tab. These are standard fields in the PRODUCT entity in CRM except for the
following two additions:
• TAX RATE specifies the rate for the product. A tax rate is always specified for a product in
Xero and the default settings are used if these are blank.

© redware research limited 2018. 23
• SALESNOMINAL specifies the Xero ACCOUNTCODE for the product. This is always specified
for a product in Xero and the default settings are used if blank.
It is possible to map either the TAX RATE or the NOMINAL (called SALES ACCOUNT in Xero) using
custom fields on the INVOICE PRODUCT entity.
8.4. Invoice Mappings
A sample invoice created in Xero is shown below.
The installation process added some custom fields into the INVOICE table for CRM to allow some
of these values to pass through:
• The SALES ACCOUNT is taken from the customer in CRM which could be an ACCOUNT or
CONTACT.
• The REFERENCE field is taken from the INVOICEID field at automatically generated by CRM to
allow you to cross-reference with CRM. Note that you can override this in the configuration
to push through from a custom field.
• The REDWARE_TAXPOINT date is used to specify the DATE of the Invoice and defaults to the
date the invoice was created if blank.
• The DUE DATE is specified by the REDWARE_DUEDATE field or the number of payment days
specified in the XERO SETUP used if blank.
The INVOICE ITEM data is taken from the corresponding INVOICE PRODUCT record in CRM:
• The PRODUCT record is created in Xero if required.

© redware research limited 2018. 24
• An artificial product record (perhaps called WRITEIN) is created for any write-in products
from CRM.
• The DESCRIPTION is taken from the DESCRIPTION field In CRM or from the product record in
Xero if this is blank.
• QUANTITY and UNIT PRICE taken directly from CRM and may need to be manipulated if there
is a DISCOUNT so that the total is correct to two decimal places.
• The Xero ACCOUNT CODE is referred to as a NOMINAL in this documentation and is taken
from the INVOICE PRODUCT in CRM if specified, or the Xero PRODUCT if blank, or from the
Default set up in the XERO SETUP in the Connector.
• The TAX RATE is taken from the INVOICE PRODUCT, PRODUCT, or from CUSTOMER in CRM or
from the Xero PRODUCT record or the default in XERO SETUP if blank.
• The setting in XERO SETUP determines if the TAX is recalculated as the invoices is pushed
into Xero and then updated in CRM or whether the CRM value is taken without recalculation.
8.5. Tax Calculation
If the Tax is left NULL in CRM then the Connector will recalculate Tax according to set setup in
Xero. To determine the Tax Code:
• First, we look against the ACCOUNT or CONTACT in CRM and take the Tax Code if
specified. The idea is you only specify non-standard tax codes here – for example an EU
or Worldwide Tax Code.
• Second, we look against the PRODUCT in Xero and take the SALES TAX CODE if specified.
• Third, we look against the NOMINAL (Sales Account) and use that TAX CODE if specified
although we do not quite understand when this would be useful.
• Finally, we take the value specified in the XERO SETUP.
8.6. USA Tax Calculation
Xero calculates Tax for the USA using a third-party tool which is not available when pushing
invoices programmatically.
Xero requires you to set up all the states in which you have a presence after which a compound
Sales Tax is determined taking into account the address and Zip code of the Contact and the
states in which your organisation has a presence. This is tax added automatically to Xero – for
example CA TAX for California in some cases this is specific down to the City as well as the State.
We can ourselves connect to a third party and look up the sales tax based on the Xero Contact
address (specifically the Zip Code and City) but the API that we use does not take into account
your tax presence in each State. We have an extra charge for this service and you may prefer to
calculate the Tax within CRM using our Tax Calculator for Dynamics 365.
8.7. Nominal Codes
The are called Sales Accounts in Xero and we look first against the PRODUCT in Xero and then
against the XERO SETUP to assign a value. Note we do not use the Tax Code assigned here
currently.
8.8. Tracking Codes
Xero allows for additional analysis fields to be specified against an INVOICE ITEM and these
custom tracking fields can be added in Dynamics 365 as either a string or option set. You need to
make sure the correct options are specified in CRM because a 100% match is required on the
text description before these tags are recognised.
We provide three analysis codes on each invoice items as well as a department, nominal and
project code all of which can be populated and used to determine the tracking code in Xero. This
© redware research limited 2018. 25
feature will be configured for you during the configuration and handholding process resulting in
an entry similar to the following in your config file.
<add key="xero.invoice.tracking.catagories" value="event|region" />
<add key="xero.invoice.tracking.mappings" value="canalysis01|canalysis02" />
<add key="xero.invoice.tracking.dynamic" value="YES" />
© redware research limited 2018. 26
9. Sage 50 Connector
9.1. Limitations
Sage 50 is very flexible and allows invoice and delivery addresses to be specified from the Invoice
BILLTO and SHIPTO addresses.
9.1.1. Multi-Currency
You must set up the Foreign Trader wizard and enter Currency Exchange Rates before Sage
becomes multi-currency – but you can only have invoices with the account currency so you will
need to set up more than one account if the same customer has invoices in different currencies.
9.1.2. Automatic Posting
We only post invoices and credit notes automatically with Sage 2017 and above.
9.2. Sage Mappings
An invoice is loaded from CRM into Sage when the appropriate status reason is set and the
associated product and customer records also created in Sage as required.
The account number of the CRM Customer (an ACCOUNT or a CONTACT) is used to match
against the CUSTOMER in Sage and a new record is created if required. The default
synchronisation behaviour is only to add records so existing accounts in Sage are not touched if
there is a match.
The Product is matched against Sage using PRODUCTNUMBER and the TAX CODE and the
NOMINAL CODE and DEPARTMENT from the Sage Product record are used to create the values
for the invoice item record in Sage along with the QUANTITY, UNITPRICE and DISCOUNT.
Sometimes the discount is manipulated to get an exact match to the penny for the invoice totals.
Tax is calculated if the TAX value is NULL in CRM and the values are written back into CRM
against the INVOICE ITEM.
The text that appears on the invoice is taken directly from the product description in the product
database in Sage unless the DESCRIPTION field on the INVOICE PRODUCT entity contains text.
The default for Sage is to have 3 lines of text each 60 characters wide.
Write in products are given a product value (usually WRITEIN) and the PRODUCTDESCRIPTION
field used to populate the invoice description. In this case use the | character if you need a line
break.
The Invoice Address is taken directly from the CUSTOMER details in SAGE unless the BILLTO
address is specified on the INVOICE in CRM with the delivery address taken from the SHIPTTO
ADDRESS.
The CUSTOMER ORDER NUMBER is taken by default from the INVOICE NAME field but any
custom field can be specified here usually for the customer purchase order number to be
specified.
The DESCRIPTION field against the CRM INVOICE is set into the SAGE NOTES fields and the
ANLYSIS01-03 values can also be set which is very useful as these appear in the grid in Sage that
displays invoices.
If specified the PDF of the invoice produced from Sage is uploaded as a note against the invoice
and there are options here simply to generate the PDF on disk for use in SharePoint or
elsewhere or to email the invoice to the PRIMARY CONTACT using a Dynamics 365 email
template.

© redware research limited 2018. 27
9.3. Sage Third Party Activation
Sage Line 50 may need THIRD PARTY ACTIVATION on each workstation running the Connector
and the following keys can be used to activate the functionality from the SETTINGS-ACTIVATION-
ENABLE 3
RD
PARTY ACTIVATION menu.
The Serial Number and Activation Keys are freely available from Sage on the internet from Sage
Version 21 onwards (otherwise you can phone Sage for a free serial number.
More information from Sage at https://my.sage.co.uk/public/help/askarticle.aspx?articleid=9342.
9.4. Multi-Currency for Sage
You must run the Foreign Trader Wizard and enter currency exchange rates before Sage 50 will
work with multi-currency.
You may see sterling values for your foreign currency invoices when you begin testing against
the demo database in Sage. This is because you have not yet run the foreign trader wizard or
entered Currency Exchange Rates.
Note that Sage requires the account currency and each invoice currency to match so you will not
be able to upload invoices with a different currency to the account.
9.5. Sage User
We recommend that you create a specific Sage user (from SETTINGS-ACCESS RIGHTS) for the
Connector program.
9.6. Sage Customer Defaults
New Customers are created in Sage using the data from CRM but also respecting the defaults
setup from the Settings-Customer Defaults option shown below. Currently we have no way of
changing the Country against the Account programmatically.

© redware research limited 2018. 28
9.7. Product Defaults
We recommend that you create products initially in Sage and export them to CRM. Products
created in CRM are brought over into the Sage database as required and respect the defaults
available from the Settings-Product Defaults option (except that the default item type is taken from
the ISSTOCK field in the product entity).
9.8. Billing Options
We support certain transactions specific to Sage 50 with our Billing module. This lets you push
journal transactions of various types into Sage. These are specialist requirements useful in
certain circumstances but should not be used unless you are sure about what you require here.
We support the following journal transactions:
• BP – for a Bank Payment against a specified bank account an nominal code.

© redware research limited 2018. 29
• BR – for a Bank Receipt against a specified bank account and a nominal code.
• SI – to create a “batch invoice” for a customer against a nominal code and a tax code.
• SC – to create a “batch credit note” for a customer against a nominal and a tax code.
• PI – to create a “batch purchase” for a supplier against a nominal code and a tax code.
• PC – to create a “batch purchase credit note” for a supplier against a nominal and a tax code.
You should know that the SI/SC transactions are created automatically when a standard product
invoice is “posted” in Sage so creating proper product invoices in Sage from the Invoice entity in
CRM is usually a better option than creating SC/SI transactions.
Bank Payment transactions are not allocated against the corresponding SI/PI transactions in
Sage so again you are better off creating these transaction using the Bank facility in Sage to get
the allocation as well as the bank transaction. But there are circumstances where this approach
is useful. Take care though that you do not leave unallocated transactions in Sage.
The following table details the attributes that are specified in the TRANSACTION entity for these
transactions.
Account
The Supplier or Customer account. Make sure the accountnumber and
relationship type is correct. Blank for BP/BR.
Ledger
SALES for SI/SC and PURCHASE for PI/PC. Blank for BP/BR.
Tax Point
The transaction Date
Quantity
Unit Price
Discount
Specify (QUANTITY * UNITPRICE) – DISCOUNT as the amount to
process (DISCOUNT is optional). Alternatively use the NET field.
Tax
Tax if required.
Gross
You can leave this blank as it is calculated from the NET and the TAX.
Tax Code
The Sage Tax code usually T9 for no tax or T1 for standard VAT.
Currency
Currency must match the Account Currency
Description
The long description usually going into the DETAILS column of the
Sage Transaction. If this is blank the NAME field is used instead.
Reference
The REF field in the Sage Transaction.
Nominal
The Nominal Code required in numeric format – 4202.
Payment Type
Used for BP/BR only to determine the bank account if required.
Status Reason
Set to CREATE to push into Sage. PROCESSING means a failure and
UPLOADED has been pushed into Sage with the ACCOUNTS
REFERENCE containing the corresponding Sage reference number.
Department
Project
Other Reference
The EX REF field in the Sage transaction.

© redware research limited 2018. 30
This is how the posted transactions look in Sage.
© redware research limited 2018. 31

© redware research limited 2018. 32
10. QuickBooks Online
QuickBooks Online requires an authorisation process the first time the application is used. Press
the LOG ON button to bring up your web browser to let you log in to QBO.
Once you have successfully connected to QBO you can use the Power BI Connector immediately.
If you want to use the Dynamics 365 Connector which sends invoices into QBO then you need to
CONNECT and then EDIT and set values for the default Sales and Purchase Nominal and Tax
Codes and then press SAVE before using the Connector.
The access token will expire after a few months and you will need to LOG ON again to QBO to
refresh the tokens. Otherwise you can just CONNECT if you wan to change any of the settings.

© redware research limited 2018. 33
11. Batch Mode
Once you have successfully configured and operated the software you can implement batch
mode simply by supplying batch as an argument to the software.
There are several ways to run the program automatically:
• Create a Shortcut
• Run a BAT file
• Create a scheduled task
11.1. Create a Shortcut
Create a shortcut by right clicking on the program icon and then edit the shortcut properties and
add a space and batch after the executable as shown below.
11.2. Run a BAT File
Use notepad to create a bat file to run the program as in the example below. Double click on the
BAT file to run the Connector in batch mode.
11.3. Create a Scheduled Task
Specify a scheduled task to run the program regularly. You can specify the program executable
directly as shown below or run the BAT file if you have set one up.

© redware research limited 2018. 34
© redware research limited 2018. 35
12. Configuration
There are many additional settings that we or your reseller can advise on which can be set into
your configuration file.
