
ICONICS 10.96
Six-time Partner of the Year Winner
What’s New
|
March 2020
Contents
2
Contents
Introduction to Condensed What's New .............................................................................................. 5
Structure of the Document.................................................................................................................... 5
"First Available In" Column .................................................................................................................... 5
General .............................................................................................................................................................. 6
Online Help ................................................................................................................................................. 6
Compatibility .............................................................................................................................................. 6
AnalytiX ............................................................................................................................................................. 7
New: CFSWorX ........................................................................................................................................... 7
AnalytiX-BI ................................................................................................................................................. 10
BridgeWorX64 & Workflows ............................................................................................................... 20
Energy AnalytiX ........................................................................................................................................ 30
Facility AnalytiX & FDDWorX .............................................................................................................. 30
ReportWorX64 & ReportWorX Express .......................................................................................... 32
Data Connectivity ........................................................................................................................................ 43
BACnet ........................................................................................................................................................ 43
GridWorX ................................................................................................................................................... 44
Modbus Point Manager ........................................................................................................................ 51
Web Services ............................................................................................................................................ 51
GENESIS64 ..................................................................................................................................................... 54
New: Voice Machine Interface and Text Machine Interface .................................................... 54
AlarmWorX64 ........................................................................................................................................... 55
AlarmWorX64 MMX ............................................................................................................................... 59
AlertWorX .................................................................................................................................................. 59
AssetWorX ................................................................................................................................................. 60
Controls ...................................................................................................................................................... 65
Data Explorer ............................................................................................................................................ 84
EarthWorX .................................................................................................................................................. 84
FDDWorX ................................................................................................................................................... 85
GraphWorX64 ........................................................................................................................................... 85
Contents
3
Internet of Things Provider .................................................................................................................. 96
RecipeWorX ............................................................................................................................................... 97
ReportWorX Express .............................................................................................................................. 99
Workflows .................................................................................................................................................. 99
Hyper Historian ..........................................................................................................................................100
New: Data Exporter ..............................................................................................................................100
Logger .......................................................................................................................................................100
Data Replay .............................................................................................................................................102
Performance Calculations ..................................................................................................................102
Installation ...................................................................................................................................................104
IoTWorX & Internet of Things ..............................................................................................................105
New: Information Broker ....................................................................................................................105
Edge Installation & Provisioning .....................................................................................................106
Device Management & Configuration ..........................................................................................107
Platform Services ...................................................................................................................................111
Communicator Modules .....................................................................................................................112
New: IoT Hyper Collector ...................................................................................................................113
IoT Visualizer ...........................................................................................................................................113
Internet of Things Workbench Provider .......................................................................................114
IoT General ..............................................................................................................................................118
KPIWorX ........................................................................................................................................................119
MobileHMI & HTML5 WebHMI ...........................................................................................................128
Common...................................................................................................................................................128
HTML5, iOS, Android ...........................................................................................................................129
Windows 10/Universal Windows Platform (UWP) App ...........................................................134
Workbench ..................................................................................................................................................139
New: Project Files ..................................................................................................................................139
PowerShell Support ..............................................................................................................................141
Workbench General .............................................................................................................................142
Audit Log..................................................................................................................................................143
Project Reporting ..................................................................................................................................143
Contents
4
Platform Services .......................................................................................................................................144
New: Web API .........................................................................................................................................144
Commanding ..........................................................................................................................................144
Data Browser ..........................................................................................................................................148
Expressions ..............................................................................................................................................148
FrameWorX .............................................................................................................................................149
Language Aliasing ................................................................................................................................149
Licensing ..................................................................................................................................................150
OData Connector ..................................................................................................................................150
OPC UA .....................................................................................................................................................151
Security .....................................................................................................................................................151
Triggers .....................................................................................................................................................153
Unified Data Manager .........................................................................................................................154
Tools...............................................................................................................................................................155
Bulk Asset Configurator ......................................................................................................................155
ConverterWorX ......................................................................................................................................155

Introduction to Condensed What's New
5
Introduction to Condensed What's New
This edition of the "What's New" describes many new features and enhancements in version
10.96.
This is not intended to be an exhaustive list of all new features in 10.96. When available, a
complete list of all features and enhancements can be found on our website.
For information on fixes made in version 10.96, see the appropriate "Resolved Issues"
document.
The most up to date "What's New" and "Resolved Issues" documents can be found in our
online documentation here:
Release Notes for 10.96
Structure of the Document
This document is split into chapters for the different areas of the ICONICS Suite, then
further into sections for major updates, representing significant enhancements or new
functionality, followed by tables of additional enhancements and fixes.
Where appropriate, references to additional information, such as instructional
application notes or help files, will be indicated.
"First Available In" Column
Some of the features in this document were first added in an update pack for version
10.95. When this is the case, the 10.95 update pack version is listed in the "First Available
In" column. Items listed as "New for 10.96" indicate features that were first added in
10.96 and are not currently available in a 10.95 update pack.
Users of any 10.95 update pack version can consult this column to tell which features
are new for their version and which they already have.

GENESIS64
6
General
Online Help
(Reference ID: 71988, 72009)
ICONICS' help files for version 10.96 are now available online at
https://docs.iconics.com.
The software itself can optionally be configured to direct users this new online help
repository. When installing, users now have the choice between locally installed help
and online help.
Online help will benefit from continual updates and improvements, whereas locally
installed help will always be available to the user, even on machines with limited or no
internet access.
Note that when choosing online help, the local help files will not be installed. When
local help files are present, they will be used instead of the online help.
Local help can be installed at a later time by browsing your installation media, going to
ICONICS Suite > Help, and running setup.exe from that location. Also, users can opt to
use online help after the installation by uninstalling the ICONICS Help from Windows
Settings.
Compatibility
Added Support for Microsoft SQL Server 2017
(Reference ID: 61341)
As of 10.95.4, Project Reporting (and all of the ICONICS Suite) is now compatible with
Microsoft SQL Server 2017.
Added Support for Microsoft SQL Server Contained Databases
(Reference ID: 62188)
Workbench and all providers now support Microsoft SQL Server "contained databases"
as configuration and logging databases.

GENESIS64
7
AnalytiX
New: CFSWorX
A brand-new offering in 10.96 is CFSWorX. "CFS" stands for "Connected Field Services".
CFSWorX is a notification system designed to streamline the efficiency of field service
organizations and reduce downtime through intelligent scheduling and reliable
notifications.
Real-Time Monitoring
CFSWorX provides real-time monitoring of connected equipment, whether that be on-
premises or via the Internet of Things. Any point coming through FrameWorX can be
used for equipment monitoring, including OPC UA, Modbus, SNMP, and more. Alarms
are handled by AlarmWorX64 Server.
Field Worker Data
A database of worker data is maintained, including their contact information and
schedule. This database can optionally be synchronized with third-party identity
databases such as Active Directory and Microsoft Dynamics 365. (Support for other
identity databases and CRM systems is planned for future updates.)
Information that can be used to judge a worker's availability or suitability to respond to
a particular alarm is collected by CFSWorX. This may include their schedule (which can
come from a third-party identity database or be configured with ScheduleWorX), which
specific alarms and assets they are responsible for, their groups (which can be used to
mark skills and proficiency levels), and data from their mobile device, such as location.
Workers can also be linked to ICONICS security users. This allows the MobileHMI app to
identify workers based on their ICONICS login.
Mobile Health Monitoring
Workers utilizing the MobileHMI app can send their mobile health data to the CFSWorX
server. This information includes their signal strength, battery life, presence (mobile
activity), and GPS location.
See Mobile Device Health for CFSWorX for more information.

GENESIS64
8
Workflow Engine
CFSWorX uses ICONICS' Workflows technology (the same technology used by
BridgeWorX64) to configure the appropriate responses for events. Users can configure a
graphical flow chart to determine what actions should occur upon an alarm, when a
worker responds, or other situations. This powerful tool can be used to configure simple
escalation lists, or an advanced series of actions based on complex decisions.
Actions that can be taken include writing to tags, sending SMS or email alerts, and
creating a GenEvent entry.
Example templates are included. Some users may be able to leverage the examples for
their final projects with very little customization.
Worker Lookup and Fixed Contact List Activities
Two new activities for CFSWorX workflows are the worker lookup and the fixed contact
list. Both activities provide a list of workers – one dynamic, the other fixed – to use as
targets for the notification activities. The blocks can be configured to send to all list
members at once, or one at a time.
When messaging workers one at a time, these activities work best in loops. The first time
the block is processed in the workflow it will return the contact information for the first
worker in the list. The next time the block is processed it will return the second contact,
etc. A simple workflow example will get a worker from the list, email the worker, delay to
give the worker time to respond, check to see if the alarm has been acknowledged or
accepted, then if not, get the next worker and repeat.
The worker lookup activity can be configured to filter the list of workers based on a
variety of conditions, such as schedule, location, group (i.e. skill or area of expertise),
alarm source, and alarm area. The list may optionally be sorted by GPS location, with the
closest worker listed first.
GENESIS64
9
The worker lookup list is continually refreshed but keeps track of who has already been
notified to ensure that if a new worker appears on the list they will be included.
Device Notifications
There are several options for notifying workers. These include:
• Email (SMTP)
• SMS (via modem)
• SMS (AT&T)
• SMS (Twilio)
• WhatsApp (Twilio)
• Voice (Twilio)
Note that Twilio and AT&T alerts require a paid account with those respective services.
Direct SMS requires the use of a modem.
Other notification options are planned for the future. Please contact your sales
representative if there is a specific notification channel you would like to request.
Audit Log
CFSWorX maintains a detailed audit log of when alarms occur and when workers
responded to them.
Mobile App
Workers who receive an alert can launch the MobileHMI app and visit the CFSWorX
dashboard page. This page displays the available alarms and their details. The worker
can respond with "accept", "busy", or "reject" options. These different responses can
affect the CFSWorX workflow.
The CFSWorX dashboard page works out of the box and is completely customizable.
Operator Dashboard
CFSWorX also comes with a premade and customizable operator dashboard. This
dashboard is designed to be viewed by an in-office operator to view the current state of
alarms, the audit log, and optionally to assign alarms to specific field workers.

GENESIS64
10
Create Work Orders
An optional feature is the creation of work orders. CFSWorX can create work orders in
external systems such as Microsoft Dynamics 365. This can be done from the MobileHMI
app using the "Create Work Order" button.
Support for other work order systems is planned for future updates.
For Further Reference
• Application Notes:
o CFSWorX – Getting Started
o CFSWorX – Configuring Dynamics 365
o CFSWorX – Setting up Mobile Device Health
o CFSWorX – SMS Configuration
• Help: About CFSWorX
AnalytiX-BI
Major Enhancements
Data Flows
Data Flow Usability and Performance Enhancements
There were numerous "quality of life" enhancements to the data flows, including:

GENESIS64
11
• On demand preview – The Data Flow Preview panel now runs on demand, via
the new Apply Changes button at the bottom of the Data Flow configuration
panel. Previously, the Data Flow Preview panel for a data flow would populate
whenever any changes were made. This was not always optimal, as data flows
could attempt to run with incomplete parameters, possibly creating a preview
that was nonsensical or had known errors. Also, constantly refreshing very
extensive or slow data flows could slow down the development process, as the
user had to wait for the data flow to finish. Now, the user can configure at their
leisure and use Apply Changes when they feel they need to see the preview. [64681]
• Preview caching – Data Flow Preview content is now cached. After the preview is
loaded the first time the data is stored to disk for quick retrieval when the user
comes back to this data flow dialog. The cache is cleared when parameters are
changed or on demand using the Refresh Cache hyperlink next to the Data Flow
Preview section header. Caching allows for faster configuration and can avoid
unnecessary queries to expensive data sources. (Note, this caching is for
configuration only. Executing the data flow in runtime will always query the data
source for data.) [62367]
• Cancel preview – Data flows that run for a long time or have gotten stuck can
now be canceled. A Cancel button now appears when a data flow preview is
being loaded. [61503]
• Visible data types – Data Flow Data types for data flow columns are now shown
in the Data Flow Preview headers. This makes it easier to see if type conversions
are needed. Previously, the only way to confirm a data flow column data type was
to ingest it into a data table. [67999]
• Remove multiple columns in one step – The Remove Column step now allows
you to remove multiple columns at the same time. Previously columns had to be
removed in separate steps, which could become cumbersome if there were many
columns to remove. [61534]
• More descriptive error messages – Error messages in steps have been
enhanced to be more descriptive and give users a better understanding of what
went wrong. [60417]
For Further Reference
• Help: About AnalytiX-BI Server

GENESIS64
12
New Data Flow Step: Split Column
(Reference ID: 68020)
Data flows can now use the new Split Column step to convert a single column into two
or more columns based on a number of criteria like delimiter, number of characters, or
when a string changes from characters to digits and vice versa.
For Further Reference
• Help: AnalytiX-BI Server Dataflows
Data Flow Parameters Can Reference Other Parameters
(Reference ID: 61286)
Data flow parameters can now reference other parameters. Data flows using this feature
can be easier to use by simplifying the parameters that the user needs to enter when
invoking the data flow.
For example, a data flow can be configured with two parameters, @CustomerID and
@PointName. The @PointName parameter can be configured as an expression that uses
@CustomerID, such as "db:Northwind.OrdersByCustomerID<@CustomerID=" +
{{@CustomerID}} + ">". The @PointName parameter can then be used as the
parameter for a dataset step.
Now, when a user needs to use this data flow, all they need to specify is the customer
ID. Previously, the user would have needed to pass the entire point name as the
@PointName parameter, because there was no way to build the point name from just
the customer ID.

GENESIS64
13
For Further Reference
• Help: AnalytiX-BI Server Dataflows
Data Flow Parameters with Multiple Values
(Reference ID: 64769)
Data flow parameters can now have multiple values. In the data flow point name, the
user can specify multiple values for a parameter by repeating that parameter. In the
resulting dataset, the queries will be run individually for each parameter value and the
results will be appended.
Multi-value parameters can also be built from other parameters using the array
functions.

GENESIS64
14
For Further Reference
• Help: AnalytiX-BI Server Dataflows
More Hyper Historian Aggregates
(Reference ID: 64902)
The Hyper Historian Aggregated Data step now provides more aggregate names in the
dropdown and allows the use of a parameter. Via the parameter, the user can specify
aggregates that do not appear on the list.
Previously, the list of aggregates was much more limited and there was no way to use
an aggregate that was not on that list.
For Further Reference
• Help: Data Sources – Historical Data – Hyper Historian Aggregated Data
Data Models
Data Models Can Relate Tables and Views
(Reference ID: 58587)
In data models, it is now possible to create relationships with views. Relationships can be
created between a table and a view, or between two views.

GENESIS64
15
This can be especially useful for KPIWorX users, because now views can take full
advantage of KPIWorX features such as runtime filtering and joining. This opens a lot of
extra functionality for users of AnalytiX-BI and KPIWorX, as they can now use views to
add custom columns to their KPIWorX data without losing the powerful filtering and
joining functionality.
Note, for technical reasons, only views created or edited in the 10.96 Workbench (or
later) can be related to tables. To add this functionality to a preexisting view, simply
open your view in a version 10.96 Workbench and hit Apply. (You may need to make a
small change to get the apply button to enable. This can be adding and then removing
a space from the view's name.)
For Further Reference
• Help: AnalytiX-BI Server Data Models
Data Table Usability and Performance Enhancements
(Reference ID: 68395)
There were numerous "quality of life" enhancements to data tables in a data model,
including:
• When the source of a table is a data flow, refreshing the schema only pulls the
headers. The data flow does not run. This is useful for situations where the data
flow is querying an expensive or slow data source.
• The data preview seen in Workbench now comes directly from the BI Server
runtime table. Previously, the Workbench ran the data flow, itself. By having the
preview come from the BI Server, we ensure that the preview is exactly what the
user will see in runtime, and we also prevent unnecessary querying of possibly
expensive data sources. Note, new data tables will no longer have a preview until
they have been saved at least once, at which point the BI Server runtime table will
be populated.
• Workbench forms for data tables now display some runtime data about the table,
such as its status, when it was last updated, and its row count.
• The user can now trigger the table data to be dropped and reloaded on demand.
This is done using the Drop and Reload Table Data hyperlink in the Runtime
Status section header.
• The "Nullable" column has been removed from the schema configuration. It was
not actually used. All columns in the schema always allowed nulls regardless of
the value of this column.

GENESIS64
16
• The "Numeric Scale" column has been removed from the schema configuration. It
was removed for several reasons. Users found this column confusing. It was easy
for users to accidentally truncate their data (such as removing the minutes and
seconds from a datetime column). Any changes in this column required the
expensive operation of dropping and reloading the table. If users wish to adjust
rounding (which is mostly what the "Numeric Scale" column was used for), they
still can do so using a data flow.
For Further Reference
• Help: AnalytiX-BI Server Data Tables
New Data Table Refresh Type: "Delete and Insert"
(Reference ID: 63631)
In addition to the previous refresh types of "Merge new data" and "Overwrite with new
data", the data tables can now be configured to "Delete and insert". "Delete and insert"
works similar to "Overwrite with new data", except with "Overwrite…", if the data source
fails the table will retain the old data. With "Delete…" the BI runtime data table will first
be emptied, then the new data will be inserted, guaranteeing old data will be removed
even if the data source fails.
For Further Reference
• Help: AnalytiX-BI Server Data Tables
Row Count Tag
(Reference ID: 61147)
Data models tables, views, or ad-hoc query points now provide an @@Count tag that
returns the number of rows. This @@Count tag makes it easy to use AnalytiX-BI tags
with the GraphWorX64 clone dynamic.
Here are some examples of @@Count tags:
• bi:Models:Northwind.Categories.@@Count
• bi:Models:Northwind(SELECT Categories.CategoryID).@@Count
Note that the @@Count tag may return a different value from a SELECT COUNT(…)
aggregate query. The @@Count tag returns the full number of rows, whereas the
COUNT aggregate only counts non-null rows.
For Further Reference
• Help: AnalytiX-BI Server SQL Queries

GENESIS64
17
Subscribe to Columns as Arrays
(Reference ID: 66033)
Users can now subscribe to a single column of a data table, view, or ad-hoc query and
get the entire column as an array.
Here are some examples of column tags that should now return arrays:
• bi:Models:Northwind.Categories.CategoryID
• bi:Models:Northwind(SELECT Categories.CategoryID)
• bi:Models:Northwind(SELECT Categories.CategoryID,
Categories.CategoryName)[1]
• bi:Models:Northwind(SELECT Categories.CategoryID,
Categories.CategoryName)[CategoryName]
For backwards compatibility reasons, this feature is disabled by default. To manually
enable it, open Platform Services Configuration, go to the Point Managers tab, select
the BI Server Point Manager, and set the value for EnableArraySubscription to true
to enable this feature or false to disable it.
This feature is also available for the GridWorX and Web Services point managers.
For Further Reference
• Help: Subscribe to Columns as Arrays
AnalytiX-BI General
New Function: ISNULL
(Reference ID: 66091)
A new ISNULL function has been added. It works similarly to the T-SQL ISNULL function,
and is defined as follows:
ISNULL(column name, default value) [AS alias]
The function evaluates for all the rows in the column and the result is the column value,
if the value is not NULL, otherwise the specified default value. The default value cannot
be an expression and must be either a Boolean literal, a string literal, or a number.
The ISNULL function has the following limitations:
1. Can only be used in the SELECT clause.

GENESIS64
18
2. Cannot be used inside an aggregate function (so, "SUM(ISNULL(col, default))" is
not supported).
To work around the aggregate limitation, a view can be created to apply the ISNULL
function and then a query or other view can apply the aggregate. For example, create
this view:
SELECT ISNULL(col, 0) AS mycol
And then use this query:
SELECT SUM(view.mycol) AS sum
For Further Reference
• Help: AnalytiX-BI Server SQL Queries
Diagnostic Counters
(Reference ID: 68072)
New in 10.96, the AnalytiX-BI point manager now includes diagnostic information
exposed as tags similar to those originally implemented in the FrameWorX Server.
Tables now expose an extra folder called "@@Diagnostics". This new folder contains a
few diagnostic points:
• @@LastUpdated – The date and time when the table was last updated, in local
time. A table is updated when it is first loaded when the service starts, or when a
trigger causes a refresh.
• @@LastUpdatedUTC – Same as @@LastUpdated, but in UTC time.
• @@TableStatus – The current the status of table. Possible values are:
o Offline – The table belongs to a model that is currently offline.
o Initialized – The table belongs to a model that is currently online, but no
data has been loaded in the table yet.
o Loading – The BI Server is currently loading data in the table.
o Online – The BI Server completed loading data in the table with no errors,
and the table is ready to be queried.
o Error – The BI Server completed loading data in the table and the table is
ready to be queried, but an error occurred during the load process.
• @@TableStatusCode – Same as @@TableStatus, but as a numeric code instead
of a string. Values are: 0 (Offline), 1 (Initialized), 2 (Loading), 3 (Online), 4 (Error).

GENESIS64
19
• @@LastError – The last error that occurred while loading data in the table or null
if there was no error. (Note, this point is not exposed by default. To enable it, go
to Platform Services Configuration > Point Managers tab, select the BI Server
Point Manager, and set EnableErrorDetailsDiagnosticPoints to true.) If the
data source accepts parameters, parameters do have to be included
For Further Reference
• Help: AnalytiX-BI Server – New Diagnostic Counters
Additional Enhancements
AnalytiX-BI General
Ref ID
Description
First Available In
63691
Aggregate functions (like COUNT) now support adding the DISTINCT keyword in order to
operate only on distinct values from the underlying column.
New for 10.96
66023
In addition to the previous refresh types of "Merge new data" and "Overwrite with new data",
the data tables can now be configured to "Delete and insert". The difference between "Delete
and insert" and "Overwrite with new data" is that with "Overwrite..." it will delete the table's
contents and insert new data only if there is new data to insert, whereas with "Delete..." it will
delete the data regardless of what the data source returns.
If it is important to ensure that old data gets removed from the runtime data table, even when
there are no records or the data source has failed, use the new "Delete and insert" refresh type.
New for 10.96
68157
Tags consumed in AnalytiX-BI no longer count against the GENESIS64 tag count for licensing.
New for 10.96
61519
CustomIdentifier and Description fields are now exposed for Assets Dimension filtering.
10.95.4
57568
63095
BI Server points can now be subscribed as individual elements in addition to datasets. Not that
only "query" points can be accessed in this fashion. So bi:Models:Northwind.Products[0][0] is
not supported because it is not a query point, however bi:Models:Northwind(SELECT
Products.*)[0][0] would be supported.
10.95.2
62848
BI Server can now query both dynamic and static asset properties with the "Asset Property
Values" step. This includes the value of cached properties. Previously, it could only query static
properties.
10.95.2
62865
62884
The BI Server now includes a JSON block. This allows users to take an input string containing
JSON and parse the contents into a dataset. JSON arrays are parsed into multiple rows, with
each row containing an array element. JSON objects are parsed into one row with multiple
columns, each column named after the name of the property and containing the property
value. If a property is itself a JSON object, its value will be outputted as a string containing the
JSON and an additional step can be applied to further parse and expand that column. Use the
"Prefix" checkbox to set whether to use the original property name as a prefix for the parsed
properties or not.
10.95.2
62872
In the BI Server, the "Assets" step under "Dimensions" now returns a new column ("Enabled")
which reports whether the asset is enabled or not. This column can then be used to filter out
non-enabled assets.
10.95.2
AnalytiX-BI Workbench Provider
Ref ID
Description
First Available In
66888
The data view data source field has been enhanced for better usability. The font and default
height have been adjusted for better readability. The field now accepts tabs and multi-line text,
allowing the user to create more readable queries. Descriptive errors are displayed when a
query fails. The height of the query field can also be changed.
New for 10.96

GENESIS64
20
Ref ID
Description
First Available In
69141
69142
69143
In a data flow, the real-time and historical (both raw and aggregated) steps now have a
dropdown to allow the user to pick a data type for the Value column. It will default to "Native"
(which results in the same behavior as previous versions, for backwards compatibility). The user
can choose a specific type, and the dataflow will attempt to cast all values to the target type. If
the value cannot be cast (for example, attempting to cast a string to a Boolean), the value will
have bad quality in the output dataset.
New for 10.96
67988
Dataflow parameters can now be used in Add Column and Transform Column steps.
10.95.5
62294
62292
67933
For data flows, the Asset Property Values and Real-Time data source steps have been
enhanced to query in batches instead of all at once. This will improve performance for very
large sets of properties or tags by not overloading the data source with many concurrent
requests. Users can configure the size of the batches, as well as the length of time the read
will wait before timing out.
In addition to the batch size and read timeout, the Real-Time step also provides a configurable
wait period after receiving a bad quality update. This allows the server to provide a good
quality update, as some servers will provide an initial bad quality update (usually indicating
"waiting for initial data"), followed by good quality.
10.95.4
62621
When defining parameters for data flows, users can now launch the expression editor for
parameters of type expression and can get an appropriate picker for parameters of type
datetime or timestamp.
10.95.3
BridgeWorX64 & Workflows
Major Enhancements
BridgeWorX64 & Workflows Engine
Load Balancing and Redundancy
(Reference ID: 68600)
In version 10.96, BridgeWorX64 introduces load balancing. Multiple BridgeWorX64
servers can work together to execute transactions, sharing the load between servers and
providing a measure of redundancy if a server goes offline.
Each BridgeWorX64 machine may run a scheduler and an engine. The schedulers will
keep track of the queue of transactions that need to be executed and dispatch them
among the running engines. The schedulers keep track of which engines are online and
running. If one engine fails, the scheduler will dispatch transactions to the remaining
engines.

GENESIS64
21
Systems that should run as a scheduler should run the ICONICS BridgeWorX64
Scheduling Service. Systems that should run as an engine should run the ICONICS
BridgeWorX64 Point Manager. Note that the stoplight in Workbench controls both
services, but they can be separately controlled through the Windows Services control
panel. If you would like to prevent a service from accidentally being started with the
stoplight, set its startup type to Disabled in Windows Services or right-click on your
project in Workbench, select Configure Services, and set the Start Mode from there.
For redundancy purposes, multiple schedulers can be configured, though only one
scheduler will be active at a time. The standby schedulers are prepared to become active
if the active scheduler goes offline.
BridgeWorX64 servers running redundantly should share the same configuration
database. In Workbench, expand Bridging > Transactions and edit your configuration.
In the Scheduling section, set the Scheduling Mode to Distributed Load-Balancing
Schedulers Network. For Scheduling Nodes, enter one or more machines (IP address
or name) to use as scheduling nodes.
If a BridgeWorX64 system fails while the engine is executing a transaction the scheduler
can re-submit the transaction to another running engine (distributed recovery) or let the
local BridgeWorX64 engine attempt recovery by itself (local recovery). The recovery
options are set on a per-transaction basis. In Workbench, expand Bridging >
Transactions > your configuration, and edit your transaction. In the Advanced Settings
section, choose either Local Recovery or Distributed Recovery.
Note that interrupted transactions can either be restarted from the beginning or not
recovered at all. BridgeWorX64 is not able to resume the transaction where it left off.
For Further Reference
• Help: Load Balancing and Redundancy
Directly Subscribe to Alarms and Events
(Reference ID: 67740)
Previously, if a BridgeWorX64 transaction needed to execute based on an alarm or an
event, the user needed to configure a separate alarm trigger and link the trigger to the
transaction. That is still an option, but now users can configure their desired alarm or
event subscription directly on the transaction itself.
The alarm subscriptions can be configured on the Alarm Subscriptions tab of a
BridgeWorX64 transaction. If a transaction has both triggers and alarm subscriptions,
the transaction will run when any trigger or matching alarm occurs.

GENESIS64
22
Being able to subscribe directly to events is particularly useful when working with MQTT
brokers using our new Information Broker functionality. See the section on New:
Information Broker.
This feature is also used with our new CFSWorX product. See the section on New:
CFSWorX.
For Further Reference
• Application Notes:
o BridgeWorX64 - New Features in 10.96
o ICONICS - Information Broker MQTT Quick Start
• Help: Directly Subscribe to Alarms and Events
New Activities: JSON Content Reader and Generic JSON Writer
(Reference ID: 57728, 57729, 67769)
BridgeWorX64 now includes activities to help you work with JSON content: the JSON
Content Reader activity and Generic JSON Writer activity.
The JSON Content Reader activity can take a JSON string and convert it into a standard
BridgeWorX64 output dataset to be used in further activities. This can be useful when
reading JSONs from external files, web services, databases, or third-party applications.
JSONs can either be parsed as name-value pairs, always returning columns named
PropertyName and PropertyValue, or as columns.
When parsing as name-value pairs, you have the option to include array indices, which
can be useful if your JSON contains array content.
When parsing as columns, you can choose to match a list of predefined columns by
position, or by name. Matching by position is useful if you cannot always guarantee that
your JSON items will contain the correct property names.
The JSON Content Reader activity can also output XML, which can be outputted to a file
or used in further activities.
The Generic JSON Writer activity can build a JSON string and write it to a document.
Using a simple content designer, the activity can write simple scalar nodes, complex
object nodes, and array nodes. The values for these nodes can come from previous
activities, tags, or expressions.
The Generic JSON Writer activity even includes a preview of your JSON.

GENESIS64
23
These activities are particularly useful when working with MQTT brokers using our new
Information Broker functionality. See the section on New: Information Broker.
For Further Reference
• Application Notes:
o BridgeWorX64 - New Features in 10.96
o ICONICS - Information Broker MQTT Quick Start
• Help:
o JSON Content Reader Activity
o Generic JSON Writer
New Activity: Information Broker Publisher
(Reference ID: 67769)
The new Information Broker Publisher activity makes it easy to publish JSON payloads to
a third party MQTT broker. It leverages the new "publish" method in FrameWorX and
provides an easy way to design a JSON payload, similar to the Generic JSON Writer
activity, mentioned above.
This activity is part of our new Information Broker. See the sections on New: Information
Broker.
For Further Reference
• Application Notes:
o ICONICS - Information Broker MQTT Quick Start
o BridgeWorX64 - New Features in 10.96
• Help: Information Broker Publisher Activity
New Expression Functions for Datasets
(Reference ID: 65846)
Version 10.95 of BridgeWorX64 made working with datasets easier by adding the
getoutputcell custom expression function, which allowed the user to get a scalar value
from a particular cell of a dataset.
In 10.96, there are a few more expressions in this vein to make working with datasets
easier:
(Note: These functions first appeared in 10.95 Update 5 except for findoutputcell, which
is new for 10.96.)
• getoutputrow – Return an array containing scalar values from all columns of
specified row.

GENESIS64
24
• findoutputrow – Return an array containing scalar values from all columns of the
first row that matches a filtering condition (the syntax of rowFilter should be the
same as that of ADO.NET DataTable view rows filtering).
• findoutputcell – Same as findoutputrow, except returns one particular cell in the
row based on an index or column name.
• findoutputrowindex – Return an integer index of the first row that matches a
filtering condition or (-1) if no matching rows found.
For Further Reference
• Application Note: BridgeWorX64 - New Features in 10.96
• Help: Expression Functions for Datasets
Transaction Hibernation
(Reference ID: 69063)
The BridgeWorX64 engine has a certain number of threads for executing transactions.
This essentially represents the number of transactions that BridgeWorX64 can have
executing at one time. BridgeWorX64 also has a queue of transactions waiting to be
executed.
In previous versions, transactions that included long wait times could clog up this
queue, using up valuable threads for doing nothing but waiting.
New in version 10.96, transactions can be configured to hibernate. By hibernating a
transaction, it is temporarily taken out of the running thread until its wait period is
expired, allowing the thread to be used for other transactions. This can greatly increase
the efficiency of BridgeWorX64, especially when executing many transactions with waits.
Hibernation occurs when a transaction enters a delay activity which is configured as an
unconditional delay (not using a delay expression), and the configured delay period
exceeds a certain threshold. This threshold is configured in Workbench on the
transaction object (under the Bridging > Transactions > your configuration). It is in the
Advanced Settings section and named Hibernation Threshold. This is the only setting
that must be configured to take advantage of hibernation.
For Further Reference
• Application Note: BridgeWorX64 – Transaction Hibernation
• Help: BridgeWorX64 Transaction Hibernation

GENESIS64
25
Get Transaction Information in a Dataset Point
(Reference ID: 70464)
There is a new point available under the Bridging node in the data browser,
called .Query. This point is a dataset that allows the user to access information about a
transaction, such as the transaction log and log details.
The point was designed to work with the new BridgeWorX64 Navigator, BridgeWorX64
Viewer, and Table controls to provide runtime information to the user about
transactions. See New: BridgeWorX64 Navigator and Viewer for more details, including
how to find an example of using the .Query tag with these controls.
For Further Reference
• Help: Get Transaction Information in a Dataset Point
New Activity: Web Service Manipulator
(Reference ID: 63724)
As of version 10.95.4, there is now a Web Service
Manipulator activity for BridgeWorX64. The activity can
execute web manipulators for REST web services. (See
"Web Manipulator for REST Web Services" under "Data
Connectivity" > "Web Services".)
Edit your BridgeWorX64 template and add a Web Service
Manipulator activity. Usage is very similar to the pre-
existing Data Manipulator activity.
When executed successfully, this activity exposes an
output dataset containing one row and three columns:
OutputParameterName, Data, and StatusCode. The value
in the OutputParameterName column is a constant string,
"ReturnValue", and is provided to be consistent with the schema of the Data
Manipulator activity.
Web Service Manipulators can be configured in Workbench under Data Connectivity ->
Web Services.
For Further Reference
• Help: Web Service Manipulator Activity

GENESIS64
26
New: BridgeWorX64 Navigator and Viewer
New BridgeWorX64 Controls and Dashboard
(Reference ID: 67783)
A new Navigator and Viewer have been added for BridgeWorX64. These controls act like
the ReportWorX64 Navigator and Viewer controls.
The BridgeWorX64 Navigator provides a folder tree of the available transactions, and
the BridgeWorX64 Viewer provides a list of filtered transactions, including who executed
them, the time they were executed, and their current status. It also allows the user to
manually execute transactions and download an XML log.
Both controls have support for the new customized context menu and commands on
events.
There is also a premade BridgeWorX64 dashboard that utilizes these controls, plus the
new table control, to give you an overview of your running BridgeWorX64 instance. To
launch the dashboard, put GraphWorX64 into runtime, go to the Runtime menu, then
select BridgeWorX64 in the Tools section. To see how this display is configured, edit
the GwxBridging.gdfx file in the Components directory. (It is highly recommended to
make a backup of this display before making any changes.)
For Further Reference
• Help:
o BridgeWorX64 Navigator Control
o BridgeWorX64 Viewer Control
Additional Enhancements
BridgeWorX64 & Workflows General
Ref ID
Description
First Available In
59505
Tags consumed in BridgeWorX64 no longer count against the GENESIS64 tag count for
licensing.
New for 10.96
59688
BridgeWorX64 now supports caching the configuration database. This is configured in
Workbench. Bring up the context menu of your project, choose Configure Application(s)
Settings, go to the Applications tab, and enable the "Local Cache" setting for the Bridging
module.
New for 10.96
67936
67481
There were several optimizations of the BridgeWorX64 and Workflow engine which should
result in better performance.
New for 10.96
69624
Changed the TraceWorX trace level on some messages logged by BridgeWorX64.
New for 10.96
65487
65491
The Historical Input and Historical Alarms Input blocks now allow dynamic start and end times.
10.95.5
62211
It is now possible to create an execution log only when a transaction has failed. To configure
this, edit the transaction, go to the Transaction Settings tab > Advanced Settings section and
enable "Log Only Failed Transactions".
10.95.4

GENESIS64
27
Ref ID
Description
First Available In
62213
When archiving is enabled, users now have the option of only archiving succeeded
transactions. This helps ensure that failed transactions will remain in the log long enough to be
examined. To set this, edit the configuration object, go to the Archiving section, and enable
"Archive only succeeded transactions".
10.95.4
62556
62557
62558
62559
62560
62561
62562
62563
62564
Added a timeout setting to these blocks: CSV file reader, XML file reader, data set reader,
historical input, CSV file output, condition, send email, file transfer, and generate report.
10.95.4
62572
Added a "Log Only Failed Transactions" option to configured transactions.
10.95.4
62573
Added an "Archive only succeeded transactions" option to the Archiving section of a
BridgeWorX64 configuration.
10.95.4
62923
The Data Set Reader block now recognizes BI Data Flow input parameters.
10.95.4
60247
Parameters in bulk data manipulator blocks now use the output fields from the specific data
input as their default mapping. Previously, they used constants like an empty string or now().
10.95.3
60248
Added a “Refresh” button to the Dataset Transformer block. This works like the Reset button,
except it does not remove existing definitions. “Refresh” only adds new columns without
deleting the expressions for existing columns.
10.95.3
61039
Attachments can now be added to email activities.
10.95.3
62640
The Dynamic Tag Writer now supports an array of tags of indeterminate size.
10.95.3
62642
CSV and XML writers now support expressions for the File Name. Previously expressions were
only supported in the Directory Name.
10.95.3
62644
All tag writer blocks now provide an output dataset. The columns are, PointName, WriteValue,
WriteStatus, WriteTimestamp, HasReadValue, ReadValue, ReadStatus, ReadTimestamp.
Optionally, a Filtering expression could be applied, as in other blocks with output.
All writer blocks now support an additional configuration parameter, "Wait after Write",
indicating if the block should wait after a write and grab the very next data update from OPC
Server as the "ReadValue". This wait is configured in the number of scan periods, from zero up
to three. Blocks will wait for the next data update only if the write was successful with a status
of “Good” and the wait period is not zero. For any other write results (i.e. "Good - write
skipped"), the writer activity would not wait for next data update and therefore corresponding
output row would have False in HasReadValue and null in ReadValue columns.
10.95.3
62672
Two checkboxes were added to the Bulk Data Manipulator:
• "Succeed only if All source rows are processed successfully" – This option determines the
“Success” or “Fail” result of the block. If checked, “Success” will only be set if all rows succeed.
A single failure will result in “Fail”. If not checked, “Success” will always be returned unless
“Enable Database Transaction scope” is checked, at which point it will return the success or
failure of the single database transaction.
• "Enable Database Transaction scope" – This refers to database transactions, not
BridgeWorX64 transactions. It is applied only if the data manipulator is local. In this case, the
Data Manipulator is executed in-process and BridgeWorX64 wraps all data manipulator
command executions in a single database transaction. This means if one or more commands
fail then the entire batch is rolled back.
10.95.3
62729
The Data Reader block now allows for data sources that need parameters. If a user browses to
a dataset point that has a parameters fragment (such as <@param1=value1,
@param2=value2>), the "Input Parameters" grid should now populate with the parameters
(@param1 and @param2). This may need to hit the "Refresh" link on the input parameters
section.
10.95.3
58366
BridgeWorX64 can now read the newly added previous value, previous quality, and previous
timestamp values of data triggers (see 62853).
10.95.2
62814
Added a new setting called “Split Array Values into multiple Data Rows” in the BridgeWorX64
DA Reader Activity and Bulk DA Reader Activity which splits array values into their own data
rows in the activity’s output recordset. This setting will show a new ArrayIndex column in the
generated recordset displaying the values index position.
10.95.2
GENESIS64
28
Ref ID
Description
First Available In
Note, ArrayIndex is a zero-based index list.
62863
Added a new XML Writer block to BridgeWorX64.
10.95.2
62864
Added a new "DataSet Transform" BridgeWorX64 activity, which is used to manipulate data
streams. This provides similar transform functionality to the BI Server that can be used on the
datasets within a BridgeWorX64 transaction.
10.95.2
62868
BridgeWorX64 now includes a new block type called "Bulk Real Time Input" for supporting a
dynamic array of input tags.
10.95.2
62891
Real Time Input blocks now supports the ability to build an expression which resolves to the
name of the tag to be read.
10.95.2
57771
Deleting a block in BridgeWorX64 now removes the associated arrows as well.
10.95.1
BridgeWorX64 & Workflows Workbench Providers
Ref ID
Description
First Available In
56714
57563
BridgeWorX64 archiving can now be configured in Workbench. The archiving settings are
configured on each configuration object under the Transactions folder. Previously, archiving
was only configurable by editing the IcoBwxService.exe.config file.
New for 10.96
60077
59481
59483
59484
59485
59486
59487
59488
59489
59490
59521
66014
70651
Multiple small changes have been made to the Workbench dialogs for BridgeWorX64 and
Workflow to enhance usability and provide better feedback.
New for 10.96
61461
The user is no longer allowed to delete the active configuration object.
New for 10.96
63266
The "Archive only succeeded transactions" option is now available only when "Archive older
files" is enabled.
New for 10.96
66554
It is now possible to configure the temporary directory for a BridgeWorX64 configuration. This
is configured on a configuration object in the Generic Properties section.
The temporary directory is used to store a transaction when it is being hibernated.
New for 10.96
65919
Transaction blocks can now accept timeouts of up to 864000000 milliseconds (10 days). The
previous limit was 100 seconds.
10.95.5
61233
Added two new context menu items on a transaction folder for "Enable all transactions" and
"Disable all transactions". These items will enable or disable all transactions in the folder.
10.95.4
62058
62056
62057
62059
The Workflow configurator now has a description field for Transactions, Templates, and their
folders.
10.95.4
63674
The Data Manipulator and Bulk Data Manipulator activities now show an error when they are
configured with a non-GridWorX tag as a data source.
10.95.4
60212
When a template is created from a report or transaction, the template is created in the same
subtree as the report or transaction.
10.95.3
60237
Added an "Edit in full screen" option to the context menu of transaction templates. This option
opens the template for editing and automatically maximizes the tab.
10.95.3
60597
Deleting an activity that is linked to the "stop" block no longer deletes the "stop" block as well.
10.95.3
57898
The user can now determine how the vertices in a link are drawn. In a template diagram, select
a link (line/arrow between two blocks) and choose a Line type. The choices are Polyline, Spline,
and Bezier.
10.95.2
57924
62840
Parameters are now supported in Workflows.
10.95.2

GENESIS64
29
Ref ID
Description
First Available In
57973
57974
The default colors of template diagram activities have been updated and are now
customizable.
10.95.2
57992
57993
57994
57995
57996
57997
58030
58362
58902
58927
58929
Multiple small changes have been made to the Workbench dialogs for BridgeWorX64 and
Workflow to enhance usability and provide better feedback.
10.95.2
58166
Trigger name and other base trigger attributes are now available in the template diagram's
expression editor.
10.95.2
58186
It is now possible to disable triggers on a transaction without deleting the trigger.
10.95.2
58187
Added a "Click to refresh variables" link to the header of the template diagram editor. This link
will refresh the list of global and local variables in the expression editor and data browser. Prior
to this button, the diagram had to be closed and reopened to detect any changes made to the
variables while the dialog was open.
10.95.2
58227
Added more feedback to global or local variables to show they are in use in an active
transaction. The icon of a variable in the tree indicates if it is in use, there is a new column in
the Project Details grid for "Used by transaction", and a warning dialog appears if a user tries
to edit a variable that is in use.
10.95.2
58334
Activities can now consume the output of any other activity, and choose which fields are
consumed. (Previous to this enhancement, only the output of a previous activity could be
consumed.) The output of a specific activity can be accessed in the expression editor using the
Activity Output item in the Internal section.
10.95.2
58885
58997
There are now two buttons for data sources in the template designer, one to open the tag
browser and the other to open the expression editor.
10.95.2
58900
Columns in the data schema of activities like Data Set Transformer and CSV File Output can
now be rearranged. Select "Configure", then use the up and down buttons or enter a new
value in the number (#) column.
10.95.2
62866
62867
A new syntax for BridgeWorX64 global and local variables has been added. The new syntax is
more consistent with other GENESIS64 products, such as GridWorX and web services. The new
syntax is:
bwx:global@VariablePathName.Row[0].Col[0] or
bwx:global@VariablePathName.Row[0].Col["MyColumnName"]
The original syntax style is still supported.
10.95.2
55962
The arrows that connect actions in a template diagram can now have one or more vertices,
allowing the creation of "elbow" lines and other shapes. This will aid in creating more easily
understood diagrams. Hold down CTRL and select a line to add a vertex.
10.95.1
56666
Workbench now checks to see if each point name is unique in a Real Time Output activity.
10.95.1
56752
It is now possible to immediately trigger a transaction in Workbench for testing purposes.
Bring up the context menu for a transaction and select "Test Transaction". Note, this option is
only available for enabled transactions in active configurations.
10.95.1
57714
Added a Label field to activities. When it has a value, the label for an activity is shown in the
diagram editor, otherwise the name is shown. The name of an activity must be unique, whereas
the label is designed to be a short human-readable description of the activity.
10.95.1
57716
Individual activities can be disabled. This is consistent with the functionality of 32-bit
BridgeWorX.
10.95.1
57745
57746
57769
57772
57866
57868
Multiple small changes have been made to the Workbench dialogs for BridgeWorX64 and
Workflow to enhance usability and provide better feedback.
10.95.1

GENESIS64
30
Ref ID
Description
First Available In
57904
58065
Template diagrams can now access trigger attributes. Trigger attributes can be accessed in the
expression editor of activities.
10.95.1
58066
The variables and attributes available in the template diagram's expression editor are now
separated into different sections by type, such as global variables, local variables, and trigger
attributes.
10.95.1
58067
The template diagram's expression editor now shows the hierarchy of local and global
variables. Previously it was difficult to distinguish between two variables of the same name in
different folders.
10.95.1
58088
Local and global variables are now only available in the tag browser and expression editor
where DA tags are accepted. They are no longer available for historical or alarm input fields.
10.95.1
Energy AnalytiX
Under Construction
Energy AnalytiX has been temporarily held out of the initial release of version 10.96
while we make some significant updates. Look for the new and improved Energy
AnalytiX to be re-introduced in a future update. Please contact your local sales
representative or email [email protected] with questions or feedback.
Facility AnalytiX & FDDWorX
Major Enhancements
New Fault Viewer Control
Version 10.96 introduces an entirely new Fault Viewer control.
This control replaces the preexisting fault control (FDD Viewer) and offers many benefits,
including:
• Configuration is now stored entirely in the GraphWorX64 file, rather than partially
on the server
• More customizability with styling, colors, and available columns
• Support for global colors and global aliasing
• Linked navigation variables
• Saved views

GENESIS64
31
• Embedded microcharts and timelines
• Ability to query faults from a distributed AssetWorX architecture
• Better parity between desktop (WPF) and HTML5 platforms
• Support for commanding, including the new commands on events
• Virtual columns
• Export Data command support, allowing very large exports
• Enhanced performance
The fault viewer comes with two predefined views, one that can provide a statistical
rollup view of your faults and another that shows the individual incidents. Linked
navigation variables allow the user to connect two fault viewers so that a selection in the
statistical fault viewer will display the individual incidents that made up the statistic.
Linked navigation variables can also allow the fault viewers to be linked to an Asset
Navigator for easy filtering on areas and assets, and to a TrendWorX64 Viewer or time
duration buttons for easy time navigation. Commanding support can add further
connectivity between the fault viewers and the rest of your display or project.
You can easily create a set of fault viewers connected to an Asset Navigator with these
steps:
1. Add an Asset Navigator.
2. In the Asset Navigator menu, select Write in the Selected Asset section.
3. Add a Fault Viewer.
4. In the Fault Viewer menu, select Views > Fault Statistics.
5. Add a second Fault Viewer.
6. In the Fault Viewer menu, select Views > Fault Incidents.
7. Go into runtime. The viewers and asset tree will be automatically linked. Selecting
an asset will filter the statistics viewers and selecting an item from the statistics
viewer will filter the incidents viewer.
The fault viewer can also be linked to the new table control to show even more detailed
information about selected fault incidents, such as comments, activation variables, latest
causes, etc.
Microcharts and timelines embedded in the fault viewer allow users to visually see and
correlate when their faults were occurring.

GENESIS64
32
To customize a fault viewer, you must first choose the fields you want to query from
your database or fault server. This is done on the Fields page. Once those fields are
chosen, they will be used in other areas of the viewer, such as Columns, Filters, and
Style. Any attribute that you wish to display as a column, use in a filter, or use in a style
must first be selected on the Fields page.
Displays that use the preexisting fault control will continue to function as normal, but
users will not be able to add new copies of the preexisting control into their displays.
Users are encouraged to upgrade to the new control when possible but there is not a
direct upgrade path, so we made sure existing displays could continue to function with
the old control.
This control is available in desktop (WPF) and HTML5, but not Universal Windows
Platform (UWP). We plan to add UWP support in a future version.
For Further Reference
• Application Note: FDDWorX Viewer - New Features in 10.96
• Help: Fault Viewer Control
Additional Enhancements
Ref ID
Description
First Available In
62256
Improved the performance of loading fault incidents for distributed architecture.
10.95.4
62611
Enhanced the TraceWorX messages for Faults. Notably, the Fault and AssetID(s) that cause null
data values are now logged to TraceWorX.
10.95.3
62612
Expressions made for a diagnostic matrix no longer disappear if the diagnostic matrix has
changed.
10.95.3
62894
Facility AnalytiX now supports TrueForDuration and TimeSinceLastChange functions for
historical fault backfill.
10.95.2
ReportWorX64 & ReportWorX Express
Major Enhancements
ReportWorX Express & Excel Add-In
Edit Layout Directly in Excel
(Reference ID: 67818)
The Excel Add-In for ReportWorX64 and ReportWorX Express has been redesigned in
version 10.96.
The biggest change is that the Layout and Parameter Configurator has been removed.
Mapping and editing data sources can now be done directly in Excel, giving users a
much better idea of how their data mapping will look with the rest of their sheet.

GENESIS64
33
To map data sources, select the cell or cell range you'd like to map, then go to the
ReportWorX64 menu and choose Add > Data Source from the Edit Data Source
section. A Data Browser will open. Choose the data source tag to map, then select OK.
The cells in your sheet will now appear as mapped. The Edit and Remove options in the
ReportWorX64 menu can edit or remove data sources.
Data sources can also be
added via the context
menu. Bring up the
context menu of a cell to
see the ReportWorX64
options available. These
options include the same
Add, Edit, and Remove
menus found in the
ReportWorX64 ribbon,
along with the ability to work with parameters and open the data browser.
Users can add brand new data sources or make edits to existing data sources using the
Configure Data Sources button in the ReportWorX64 menu. This button will open a
slimmed-down version of Workbench.
The Open Lateral Data Browser button or context menu item can be used to open a
data browser alongside the Excel sheet. Similar to how the Layout and Parameter
Configurator used to work, data sources can be dragged from this data browser directly
into the worksheet. (Note, an "invalid target" crossed circle icon may be shown when
dragging data sources. The drag and drop should work, regardless.)
For Further Reference
• Help: Excel Add-In
Improvements to Parameters
(Reference ID: 39667, 69180)
Parameters can now be displayed in the sheet. Mapping parameters is similar to the way
data sources are mapped. Select the cell or cell range you'd like to map, then go to the
ReportWorX64 menu and choose Add > Parameter Source from the Edit Data
Source section.

GENESIS64
34
An existing populated cell can be turned into a parameter. For example, if cell A1
contains an asset name and you would like to make that name into a parameter, select
cell A1, go to the ReportWorX64 menu, and choose Turn Cell Into Parameter in the
Edit Parameters section. The cell will appear as a mapped cell, mapped to a new
parameter. Select ReportWorX64 > Parameters to edit properties of this new
parameter, such as its data type and display name.
Parameters can be added or edited using the Parameters button in the ReportWorX64
menu.
When using the Download Data button to populate the report, if there are any
parameters that require user input, a dialog will appear to let the user choose those
values. This allows ReportWorX64 Express customers to take advantage of parameters,
and full ReportWorX64 customers to test parameter values before uploading their
workbook as a template.
For Further Reference
• Help: Displaying/Mapping Parameters in Excel Sheet
Quickly Edit Data Sources, Edit Multiple Data Sources
(Reference ID: 68682)
A new section has been added to the ReportWorX64 menu called, Quick Edit Data
Source. This section allows the user to make many common configuration changes
without having to access the data source configuration dialog. These options apply to
the data source under the current selection in Excel.
The settings that can be edited in this section include:
• Show headers
• Fill Method
• Number of Rows (for the Use Threshold fill method)
• Date Time Format
• Double Format
The Quick Edit Data Source section also allows the user to edit more than one data
source at a time. If more than one data source is selected in the sheet, the Quick Edit
Data Source section will display Multiple data source mode in place of Single data
source mode. Updates made in multiple data source mode will be applied to all
selected data sources.
For Further Reference
• Help: Quick Edit Data Source

GENESIS64
35
New General Configuration Menu
(Reference ID: 68683)
At the very end of the ReportWorX64 ribbon is a new button that looks like a pair of
gears. This opens the ReportWorX64 General Configuration dialog.
The main purpose of this dialog is to allow the user to configure the default settings of
data sources. Select the Data Source item in the tree to set a number of common
configuration settings, such as the presence of headers and the fill method.
Under Data Sources > Columns, you will find a list of different data source types. Use
these to configure the default columns to be created when adding data sources of these
types.
The Message page of the general configuration dialog provides a way to restore
warning messages that have been suppressed.
For Further Reference
• Help:
o General Configuration Menu
o Configurations
ReportWorX64 Navigator
Enhanced Configuration
(Reference ID: 64032, 64039)
The configuration for the ReportWorX64 Navigator has been enhanced. The navigator
now has its own ribbon that offers many common configuration options, such as
enabling or disabling tooltips and alternate row colors.
The control also has a new configuration dialog. Users no longer need to use the
properties panel to configure their ReportWorX64 Navigator (though they are still free
to do so).
For Further Reference
• Help: ReportWorX Navigator

GENESIS64
36
Execute Commands on Events
The ReportWorX64 Navigator is one of many controls that now supports executing
commands on events. These events vary per control, but for the ReportWorX64
Navigator they include:
• Ready
• Report Selected
• Started
To configure the command to be executed when this event occurs, go to Runtime tab.
Find the Commands on Events section, check Enable Commands on Events, then
configure the form below.
See Execute Commands on Events for more details.
For Further Reference
• Application Note: Commanding - Commands on Events and Context Menus
• Help: Executing Commands on Events
Customizable Context Menu
(Reference ID: 57682)
The context menu for the ReportWorX64 Navigator can now be customized in version
10.96. Various parts of the ReportWorX64 Navigator can have different context menus –
for instance, a different set of options can be presented for a report node and a report
folder.
To configure the context menu:
1. Configure your ReportWorX64 Navigator.
2. Go to the Runtime page.
3. Go to the Context Menu section.
4. Check Enable.
5. Choose the Group for the context menu you'd like to edit.
6. Add, remove, or edit items in the Items table.
Many other controls also support the customizable context menu. See Customizable
Context Menu.
For Further Reference
• Application Note: Commanding - Commands on Events and Context Menus
• Help:

GENESIS64
37
o ReportWorX64 Navigator Control
o Customizable Context Menu
ReportWorX64 Viewer
Execute Commands on Events
The ReportWorX64 Viewer is one of many controls that now supports executing
commands on events. These events vary per control, but for the ReportWorX64 Viewer
they include:
• Ready
• Started
To configure the command to be executed when this event occurs, go to Runtime tab.
Find the Commands on Events section, check Enable Commands on Events, then
configure the form below.
See Execute Commands on Events for more details.
For Further Reference
• Application Note: Commanding - Commands on Events and Context Menus
• Help: Executing Commands on Events
Customizable Context Menu
(Reference ID: 57682)
The context menu for the ReportWorX64 Viewer can now be customized in version
10.96.
To configure the context menu:
1. Configure your ReportWorX64 Viewer.
2. Go to the Runtime page.
3. Go to the Context Menu section.
4. Check Enable.
5. Add, remove, or edit items in the Items table.
Many other controls also support the customizable context menu. See Customizable
Context Menu.
For Further Reference
• Application Note: Commanding - Commands on Events and Context Menus
• Help:

GENESIS64
38
o ReportWorX64 Viewer Control
o Customizable Context Menu
Additional Enhancements
ReportWorX64 General
Ref ID
Description
First Available In
54029
Added a "Reporting" start menu shortcut to the GWXReporting.gdfx display, which is a
preconfigured display to allow users to execute and manage their executed reports.
New for 10.96
54240
Reports can now be canceled. This can be done via the ReportWorX64 Viewer or by writing to
the @@Cancel tag for a report.
New for 10.96
57091
File copy and web publish redirectors now allow browsing for parameters in the Publish Folder
and Publish URL fields. (Previously, parameters were usable in these areas, but they had to be
typed in manually.)
New for 10.96
62914
63067
ReportWorX64 can now generate CSV reports. To configure this, open a report object and for
"Generate reports as", check CSV.
Note that due to the nature of CSV files, many Excel features such as formatting, charts, etc.
will be removed from the generated report.
New for 10.96
68045
Tags consumed in ReportWorX64 no longer count against the GENESIS64 tag count for
licensing.
New for 10.96
70437
Reports can now be configured with a timeout. This timeout is configured on a report object
on the Report Settings tab. If the report takes longer than the specified time, it will be
canceled.
New for 10.96
68027
ReportWorX now allows a wider variety of aggregates, such as EndBound.
10.95.5
61800
The formatting of a cell now defaults to using Excel's settings if the Formatting field in the
Layout Editor is left blank.
10.95.4
62527
The "Protect Workbook" functionality has been enhanced. In addition to preventing the user
from adding, removing, or renaming sheets in Excel reports, you are now prevented from
modifying sheets in Excel reports, and PDF reports are now protected (uneditable).
10.95.4
61308
61416
Added an optional anchor row. This allows for expressions to be added under the anchor row
whose range could grow as the data source expanded. The anchor row can be added by right-
clicking on the mapping. This feature was available in ReportWorX (32-bit).
10.95.3
62812
ReportWorX64 can now include parameter values in reports. To use the feature, open Layout
Manager, create parameters and right-click on any empty cell and select "Add Parameter
Mapping". Use the property grid for further edits.
10.95.2
57268
Added the LastExecutionInterval (total execution time of a report) and LastExecutedError (the
last error message encountered, if any) tags for reports.
10.95.1
ReportWorX64 Navigator
Ref ID
Description
First Available In
62677
Added the "FrameWorX Node" field to the Report Navigator that sets the target server for
report data.
10.95.3
ReportWorX64 Express & Excel Add-In
Ref ID
Description
First Available In
35530
When the user selects the "Update" button, a dialog now appears with the progress of the
update.
New for 10.96
47897
Added a "Hide comments" option to the Miscellaneous section of the ReportWorX64 menu.
This option will hide the comments (red triangles) that note where cells have been mapped.
New for 10.96
54008
54377
68686
Incorrectly configured data sources or parameters are now identified in the worksheet with a
red border.
New for 10.96

GENESIS64
39
Ref ID
Description
First Available In
When the error is resolved, the original user-configured border of the cell is returned. The
user-configured border is also used if the cell is copied or cut and pasted, a column is removed
or added, etc.
57524
Added Display Names to parameters. Display Names allow users to give parameters
descriptive names.
New for 10.96
57526
Parameter description is no longer a required field.
New for 10.96
59725
Users can now select more than one data mapping at a time and bulk edit properties such as
the fill method and whether headers should be shown.
To select multiple data mappings, select a cell in one mapping, then hold down the Ctrl key
and select a cell in the second mapping. The selection method (single or multiple selection)
should be indicated in the ReportWorX64 ribbon above the Display Name. If only one data
source is selected, then "Single data source mode" will be displayed. If multiple data sources
are selected, "Multiple data source mode" will be displayed.
Note that due to limitations of Excel, if multiple data sources are selected and the data sources
have different values for a property then the value of the first data source will be shown. If you
wish to apply that value to all selected data sources, you must select it twice.
For example, assume two data sources are selected. The first data source has "Show Headers"
enabled and the second has it disabled. The user wants both data sources to show headers.
The ribbon will show "Show Headers" enabled, because that is the value of the first data
source. In order to apply that to both data sources, the user must first uncheck "Show
Headers" then check it again.
New for 10.96
60991
When an anchor row is added (put the cursor in a mapped data source cell, ReportWorX64
Ribbon > Edit Data Source section > Add > Anchor Row), the fill type is now automatically
changed to "Auto with expand". It is not possible to change the fill type until the anchor row is
removed.
New for 10.96
61007
The anchor row is now displayed as part of the mapped area, including its own comments to
help the user use the row properly.
New for 10.96
61235
Formulas in custom columns and anchor rows are now saved and should persist after
downloading data and then clearing data.
New for 10.96
61442
Added more options for adding a new column to a data source. Go to the ReportWorX64
ribbon and select Add, or right-click on a mapped cell and select Add. Choose from one of
these options:
* Column on the left bound - Adds a column to the beginning of the mapping. All other
columns move right.
* Column here - Adds a column in the current location. The current column and all other
columns move right.
* Column on the right bound - Adds a column to the end of the mapping.
When the data source is transposed, these options change to "Row on the upper bound",
"Row here", and "Row on the lower bound".
New for 10.96
61896
The "AutoWithExpandAll" fill method has been removed. With the updates to the
ReportWorX64 plug-in, this method has been obsoleted.
Any existing data sources that were configured with "AutoWithExpandAll" will now use the
"Auto with expand" fill method.
New for 10.96
68680
Multiple tags can now be selected in the data browser when adding a data source.
New for 10.96
68681
64603
It is now possible to change the tags for a mapped data source.
* Select a cell mapped to a data source.
* In the ReportWorX64 ribbon, select Edit > Data Source.
* Go to the Tags tab.
* Select a row in the table.
* Select the "x=" button for that row.
This will open the data browser. The browser includes data points, along with global aliases,
languages aliases, language conversions, and parameters.
New for 10.96

GENESIS64
40
Ref ID
Description
First Available In
If the new data source has a different schema, the worksheet will update with the new columns
and headers.
68828
A "Stop Download" button has been added, which can be used to cancel an in-progress data
update.
New for 10.96
68972
Users can now name their data sources. To rename a data source, use one of these methods:
* Select a data source cell, go to the ReportWorX64 ribbon, and update the Display Name field.
* Select a data source cell, go to the ReportWorX64 ribbon, and select Edit > Data Source. On
the Configuration tab, update the Display Name field.
* Right-click on a data source cell and select Edit > Data Source. On the Configuration tab,
update the Display Name field.
New for 10.96
69057
Data source columns can now auto-fit after the data has been downloaded. To enable this
behavior, go to the ReportWorX64 ribbon and check "Auto fit data sources on download".
New for 10.96
69075
Excel allows users to drag an Excel worksheet into a different workbook. ReportWorX64 data
sources will now follow the worksheet into the other workbook.
Note that only the data sources and parameters configured on that worksheet will be moved
to the new workbook. If the source workbook was configured with only one sheet, any
parameters configured but not used on that sheet will be lost when the sheet is dragged into
the target workbook.
New for 10.96
69337
The Escape key can now be used to close popup dialogs from the ReportWorX64 add-in.
New for 10.96
69506
Previously, the "Clear" button in the ReportWorX64 Excel add-in would only clear data if it had
been updated in this session. If the workbook was saved, closed, and reopened, the Clear
button would not clear the data.
This functionality has now been added. The plug-in now allows data to be cleared even after it
has been saved and reopened. Please note that this only works with reports created in version
10.96 or later. Reports created in 10.95 or earlier are still subject to the previous limitation.
New for 10.96
69586
Improved the consistency in reports generated using the "Download Data" button (from inside
the sheet) and via the ReportWorX64 execution engine (executed by the server).
New for 10.96
69631
The ReportWorX64 log now shows a progress bar if the data sources do not finish loading
within one second.
New for 10.96
70069
Added an "About Us" menu item.
New for 10.96
70071
Added a "Show Help" menu item.
New for 10.96
70089
If the user is trying to add a new data source where there is not enough room to fit it normally,
but there is enough room to fit it while transposed, a dialog box will appear asking if the user
would like to cancel the action or transpose the data source.
New for 10.96
70221
71556
71851
The ReportWorX64 Excel add-in now supports wrapping a data source with an Excel table. The
table must match the dimensions of the data source exactly for this feature to function
properly.
Note that to add a table, the user must either use the Ctrl-T shortcut or the Insert > Table
button. The "Format as Table" button on the Home menu is not supported.
New for 10.96
70355
The login button now reflects the login state. If no user is logged in it reads, "Not logged in". If
a user is logged in, it shows the username.
New for 10.96
71408
Added a "Wrap long text on download" option in the ReportWorX64 menu. When enabled,
after ReportWorX64 downloads data to the sheet it will enable text wrapping on all cells that
are part of a data source.
Note that if both "Wrap long text on download" and "Auto fit data sources on download" are
enabled, the auto-fit is applied first.
New for 10.96
71429
ReportWorX64 can optionally warn the user when they are about to overwrite cells with
content by mapping a data source or parameter. These warnings are disabled by default. To
enable them, go to General Configuration (gear icon), select Data Source, then enable "Show
warning if the data source is going to overwrite content".
New for 10.96
71839
Merging cells mapped to data sources or parameters is not supported in ReportWorX64. While
a mapped cell is selected all merge options of Excel are disabled.
New for 10.96

GENESIS64
41
Ref ID
Description
First Available In
71885
The report execution log is now stored on a per-workbook basis. This prevents the actions of
one workbook from clearing the log of another workbook.
New for 10.96
71913
The "Format as Table" button on the Home menu of Excel is disabled when a data source is
added to a worksheet. This is necessary, as creating tables using this button can break
ReportWorX64 functionality. The "Format as Table" button becomes re-enabled when there
are no more data sources on the worksheet.
Note that tables can still be added using the Ctrl-T shortcut or the Insert > Table button.
New for 10.96
72090
When mapping a data source or parameter, if the area to be mapped contains any merged
cells, these cells will be unmerged.
The user will be warned of this behavior whenever they map a data source or parameter. This
warning can be disabled. To re-enable a disabled warning, go to ReportWorX64 > General
Configuration (gear button) > Message.
New for 10.96
72096
The "Clear Contents" feature of Excel, located in the context menu and under Home > Clear, is
disabled when a cell mapped to a data source or parameter is selected. This is necessary, as
clearing cell content using this button can break ReportWorX64 functionality.
New for 10.96
72210
The "Quick Analysis" context menu item is disabled when a data source is added to a
worksheet. This is necessary, as using this menu item can break ReportWorX64 functionality.
New for 10.96
61582
Excel formatting options now persist after data is updated. This is more consistent with our
32-bit ReportWorX product.
10.95.4
60702
Added a Transpose option to the Data Mapping in the Layout Manager. This feature was
available in ReportWorX (32-bit).
10.95.3
61307
ReportWorX64 now allows additional custom columns to be mapped. For these custom
columns, users can type an expression in the body row of the custom column, and it will be
auto filled with the rest of the rows. This feature was available in ReportWorX (32-bit).
10.95.3
62637
Previously, errors when hitting the Update button in the ReportWorX Excel add-in would only
appear in TraceWorX. Now, errors can be viewed directly in Excel after doing an update by
enabling "Show Execution Log". This makes it easier to troubleshoot issues when developing a
report.
10.95.3
62639
For data sources that take a start and an end date, if the dates are accidentally swapped (the
start date comes after the end date), ReportWorX64 will reverse them to make sure the earlier
date is always the start date and the later date is the end date.
10.95.3
62827
The event filter for historical alarm connections now supports parameters as part of an
expression filter. Use the "Variables" button in the expression editor to choose from configured
parameters.
10.95.2
62843
62844
The Double Format and Date Time Format properties of data sources now provide a dropdown
with some common formats. These are not the only formats allowed, but they should serve as
examples for those wanting to have a custom format.
10.95.2
62846
In previous versions of the ReportWorX Excel add-in, checkboxes for options such as “Show
Headers” and “Show Timestamps in UTC” would appear as a filled box when selected. This was
confusing for some users, as a filled box usually indicated a partial selection. These checkboxes
now show with an unambiguous checkmark.
10.95.2
ReportWorX64 Viewer
Ref ID
Description
First Available In
42581
The ReportWorX64 Viewer can be configured to show only reports executed by the logged-in
user. To configure this, select the ReportWorX64 Viewer in configure mode, go to the
Properties panel, then change the "Visualise reports" property.
New for 10.96
53474
The ReportWorX64 Viewer now supports sorting. Select a header to sort ascending. Select the
same header again to sort descending, and a third time to remove sorting.
New for 10.96
53475
The ReportWorX64 Viewer now supports paging. For large enough results, users can use the
back, forward, first, and last buttons to navigate pages, along with entering in a specific page
number.
New for 10.96
53476
The ReportWorX64 Viewer now supports filtering by columns. Select the filter icon on a header
to configure the filter. (This is in addition to the preexisting "Advanced filter" functionality, that
still exists.)
New for 10.96
53727
By default, the viewer now sorts by execution time, most recent reports first.
New for 10.96

GENESIS64
42
Ref ID
Description
First Available In
66831
The ReportWorX64 Viewer control can now be a target of the Refresh command.
10.95.5
62279
The grid object used in the Asset Navigator, ReportWorX64 Viewer, and AlarmWorX64 Viewer's
list view has been enhanced to allow auto-sized columns to shrink as well as expand.
10.95.4
ReportWorX64 Workbench Provider
Ref ID
Description
First Available In
54402
54401
61830
Added a new property to reports called "Multi Parameters". This property is intended to be
used in future releases. It will determine the behavior of the report if users select multiple
values for a parameter. Users can choose between combining the values into a single dataset
or generating multiple sheets in a report, one for each combination of parameters.
New for 10.96
61229
Users can now disable or enable all reports in a folder. Select a folder and bring up the context
menu, then choose either "Enable all reports" or "Disable all reports".
New for 10.96
61461
The user is no longer allowed to delete the active configuration object.
New for 10.96
63996
Multiple inactive template versions can now be selected and deleted at once.
New for 10.96
58798
Users can now choose specific sheets to include in a PDF report. To choose this, open a report
object, go to the Report Settings tab, go to the Advanced Properties section, check "Specify
which sheets should be included in the PDF report", then fill in the Include Sheets field.
10.95.3
60212
When a template is created from a report or transaction, the template is created in the same
subtree as the report or transaction.
10.95.3
60360
ReportWorX64 imports no longer allow creating reports with identical GUIDs. If a report with a
duplicate GUID exists in the import file, that report will be ignored.
10.95.3
56495
Users can now trigger a test report from within Workbench. Only enabled reports in active
configurations can be tested.
10.95.1
56772
Users can now edit comments associated with report template versions. Right-click on a
template version to edit it.
10.95.1

GENESIS64
43
Data Connectivity
BACnet
BACnet General
Ref ID
Description
First Available In
69130
When working with objects on a device, BACnet Runtime now checks two properties, whether
the device supports RPM/WPM services and whether it also supports segmentation. If both
features are supported, then it uses ReadPropertyMultiple/WritePropertyMultiple services for
the operations. If one of the features is not supported, then it uses
ReadProperty/WriteProperty services. Previously, BACnet Runtime would try
ReadPropertyMultiple/WritePropertyMultiple first, and if the device didn't support
segmentation it would fail and then BACnet Runtime would try ReadProperty/WriteProperty.
This caused unnecessary load and errors.
New for 10.96
65710
BACnet devices with a system status of "Operational_Read_Only" are now displayed as online
in Workbench. Previously, only "Operational" devices showed as online, and
"Operational_Read_Only" devices showed as offline. These "Operational_Read_Only" devices
could always be successfully discovered, even before this update.
10.95.5
62143
The BACnet Point Manager no longer resends updates to the client if the status code hasn't
changed. Previously, the same status code could be sent repeatedly. For example, if the point
manager tried to subscribe to failed points every 15 seconds; previously, it would send an
update to the client with the failed status code every 15 seconds.
10.95.4
62525
BACnet alarms now support acknowledgement comments.
10.95.4
62526
Added a new Boolean alarm attribute called "BACnetEvent", which is true when a BACnet Event
Notification is "NotifyTypeEvent". Otherwise, it is false.
10.95.4
62553
Added a number of enhancements to the BACnet EDE Generator utility:
• Support for adding BACnet Device information to an existing EDE file.
• Support for overwriting preexisting devices with updated information.
• A new dialog with the list of all devices available in BACnet Runtime.
• Support for more BACnet properties (checkboxes) to be stored in the EDE file.
10.95.4
62554
Added a new alarm attribute called "BACnetRuntimeID". It contains the BACnet Device ID of
the specific BACnet Runtime that forwarded the alarm.
10.95.4
62580
Enhanced tracing of the EDE Generator. Traces can now contain details such as the full device,
object, and property information.
10.95.4
63197
The processing of DA data updates has been enhanced so that requesting large amounts of
data updates (such as when running a report with Project Reporting) has minimal effect on
existing clients waiting to get their responses.
10.95.4
62675
62728
Previously, if the BACnet service was restarted the description (message) of active alarms
would be lost. This occurred because BACnet would only send the description with the initial
notification, but not the response when you read the current state of alarms after the BACnet
service is restarted.
Now, the BACnet service can cache alarm descriptions, allowing them to persist after a restart
of the BACnet service. This feature is disabled by default. It can be enabled on a global level by
going to Workbench > Data Connectivity > BACnet > Devices, then to the Communication tab
> Alarm Cache section. Check the box for "Store Alarm Descriptions".
You can override this global setting on a per-device level. On the settings for the device, check
"Override Store Alarm Descriptions" and then check or uncheck "Store Alarm Descriptions".
10.95.3

GENESIS64
44
BACnet Workbench Provider
Ref ID
Description
First Available In
68620
When browsing a very large device in Workbench, keys could appear, and the browsing could
fail. This XML exception would be logged: "Maximum quota exceeded for array length
(<length>) when reading XML data. This quota can be increased by modifying the
MaxArrayLength property on the XmlDictionaryReaderQuotas object used when creating the
XML reader. Line 1, position <position>."
A new property has been added to set the maximum package size. This can be found in
Workbench under Data Connectivity > BACnet > Devices, called "Maximum Entities Number".
Reducing this value can avoid the XML exception.
New for 10.96
69212
When Workbench subscribes to property values, it first checks with the BACnet point manager
to see what property values exist. Previously, it would always subscribe to a hard-coded list of
properties. This could cause errors on devices where these properties did not all exist.
Workbench may still subscribe to the full list of properties in cases where the list of existing
properties cannot be obtained for some reason.
New for 10.96
60752
The BACnet provider in Workbench no longer attempts to subscribe to all child descriptions by
default. To re-enable this feature, edit IcoSetup64.ini and add or edit this entry:
[BACNET\Configuration]
ReadDescriptions=1
If this feature is enabled, when you browse to a node that has children with descriptions, the
BACnet Workbench provider will subscribe to BACnet Runtime to get the description.
10.95.4
63953
Updated the offline BACnet devices icon to be more distinguishable, especially for colorblind
users. The icons of offline devices now have a red circle in the corner.
10.95.4
GridWorX
Major Enhancements
GridWorX Server
Subscribe to Columns as Arrays
(Reference ID: 66031)
Users can now subscribe to a single column of a dataset and get the entire column as an
array. For example, this tag should now return an array:
db:Northwind.Categories[CategoryID]
For backwards compatibility reasons, this feature is disabled by default. To manually
enable it, open Platform Services Configuration, go to the Point Managers tab, select
the GridWorX Point Manager, and set the value for EnableArraySubscription to true
to enable this feature or false to disable it.
This feature is also available for the AnalytiX-BI Server and Web Services point
managers.

GENESIS64
45
For Further Reference
• Help: Subscribe to Columns as Arrays
Diagnostic Counters
(Reference ID: 62614)
Starting in 10.95.3, the GridWorX point manager now includes diagnostic information
exposed as tags similar to those originally implemented in the FrameWorX Server. At the
root level, the GridWorX point manager now exposes two diagnostic points:
• @@TotalCacheSize - The current total size of items in the cache.*
• @@TotalCachedItemsCount - The total number of items in the cache.
Data sources now expose an extra folder along with "Columns" and "Data Items" called
"@@Diagnostics". This new folder contains a few diagnostic points:
• @@CachedItemsCount - The number of cached items for the data source. If the
data source accepts parameters, parameters do not have to be included.
o Example: db:connection.source.@@CachedItemsCount
• @@CacheSize - The size of all the items stored in the cache for the data source.*
If the data source accepts parameters, parameters do not have to be included
o Example: db:connection.source.@@CacheSize
• @@LastCallStatus - The status of the last (or current, if executing) call. Possible
values are: Succeeded, Running, Failed, Timed Out. Please note that "Timed Out"
is only returned when connecting to SQL Server; a timeout with other connection
types will be reported as "Failed". If the web service accepts parameters,
parameters do have to be included.
o Example: db:connection.source<@p1=1, @p2=2>.@@LastCallStatus
• @@LastCallStatusCode - Same as @@LastCallStatus but represented as an
integer code. Values are 0 (Succeed), 1 (Running), 2 (Failed), 3 (TimedOut). If the
data source accepts parameters, parameters do have to be included.
o Example: db:connection.source<@p1=1, @p2=2>.@@LastCallStatusCode
• @@LastError - The last error that occurred during the method execution or null
if there was no error. (Note, this point is not exposed by default. To enable it, go
to Platform Services Configuration > Point Managers tab, select the
GridWorX Point Manager, and set EnableErrorDetailsDiagnosticPoints to
true.) If the data source accepts parameters, parameters do have to be included
o Example: db:connection.source<@p1=1, @p2=2>.@@LastError
* Cache size points are returned in bytes; however, they are only an approximation of
the actual memory consumed by the cached items.
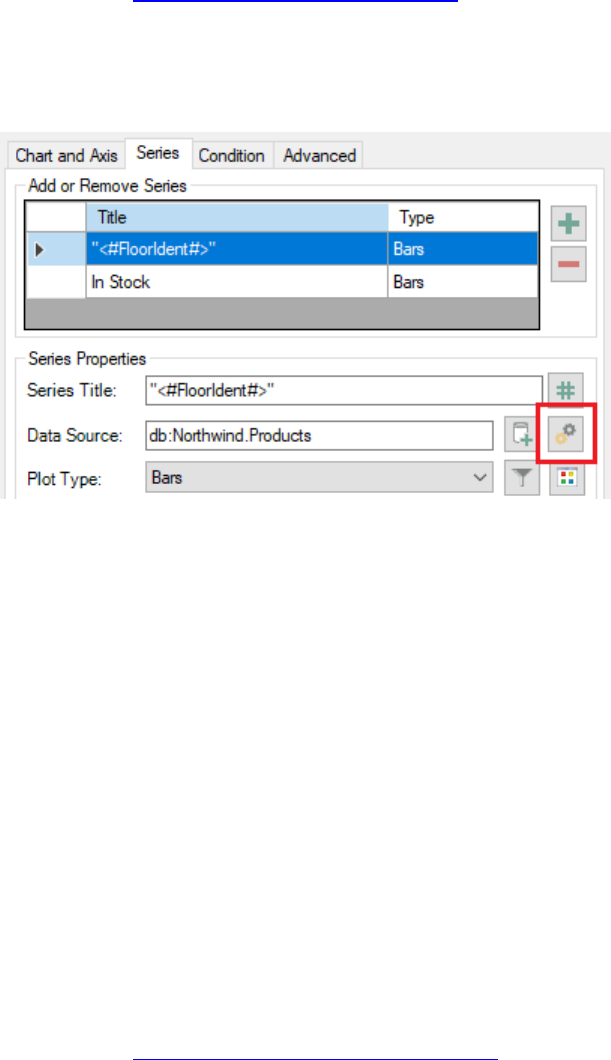
GENESIS64
46
For Further Reference
• Help: GridWorX Diagnostic Counters
GridWorX Viewer
Redesigned Series User Interface and New Series Properties
In 10.96, the GridWorX
Viewer's user interface for
configuring a grid series has
been redesigned to be able
to fit more series properties.
Many new properties, and
some preexisting ones, can
now be found by clicking on
the Advanced Properties
button, which is on the same
row as the Data Source
field.
The new properties include:
• Data Source – The Data Source field is not new, of course, but in the Advanced
Properties dialog there is a larger version of the Data Source field, which can be
more easily used to see and fill in parameter values within the tag name. [69188]
• Line Dashes – Enter a number, which is the length of dashes (in pixels) for line
charts. Leave blank for solid lines. If you'd like the dashes and blank spaces to be
different lengths, enter two numbers (such as "5,10" for a line 5 pixels long,
followed by a blank space 10 pixels long). [60553]
• Show Cursor – Disabling this checkbox for a series will prevent that series from
appearing in the cursor information. (This feature is currently available in desktop
(WPF) only.) [58715]
• Show Legend – Disabling this checkbox for a series will prevent that series from
appearing in the legend. [63539]
For Further Reference
• Help: GridWorX Viewer Chart, Series Tab
New Chart Type: Donut
(Reference ID: 60860, 70565)
Donut charts are new in version 10.96. To create a donut chart, select your chart, go to
the Chart and Axis tab, and set the Chart Type to Donut.

GENESIS64
47
To change the radius of the center, go to the Advanced tab and set DonutRadius.
For Further Reference
• Help: GridWorX Viewer Chart, Chart and Axis Tab
Execute Commands on Events
(Reference ID: 69779)
The GridWorX Viewer is one of many controls that now supports executing commands
on events. These events vary per control, but for the GridWorX Viewer they include:
• Data Downloaded (data has finished downloading)
• Data Downloading (data has started downloading)
• Double Click (chart only)
• Middle Click
• Right Click
• Row Click (chart only)
• Row Selected (chart only)
• Sample Click (grid only)
• Sample Double Click (grid only)
To configure the command to be executed when this event occurs, select your grid and
go to the Behavior tab, or select your chart and go to the Chart and Axis tab. Find the
Commands on Events section, check Enable Commands on Events, then select the
Configure button.
Commands can be configured to use values from the row selected or clicked. When
configuring the command, select the browse icon, go to the Expressions tab, select
Variables, then go to the Context Variables tab.
Note that the Row Selected event will still be triggered even if a single cell is selected
(the default behavior of the viewer). It is not necessary to select an entire row.
This support for commands on events replaces the support added in version 10.95.4 to
execute commands when selecting a row using the SelectionCommandColumnKey
advanced property.
See Execute Commands on Events for more details.
For Further Reference
• Application Note: Commanding - Commands on Events and Context Menus
• Help: Executing Commands on Events

GENESIS64
48
Execute Command on Chart Series Click
(Reference ID: 61362)
In addition to executing
commands on events, users
can configure a specific
command to execute when
clicking or tapping on a
chart series. (This
functionality was available
starting in version 10.95.4.)
Users who want to execute
different commands for
different series may want to
take advantage of this
feature, rather than the
"execute commands on
events" feature, which
requires the same command
to be executed for every
series.
The command to be
executed is defined on the Series tab of a Chart. Select the series, select the
Advanced Settings button on the same row as the data source, then configure the
command.
For Further Reference
• Help: GridWorX Viewer – Execute Commands on Events
Enhanced Cursor Format
(Reference ID: 61384)
The Cursor Format property has been enhanced to allow expressions in order to provide
more options on what can be shown in the cursor. The Cursor Format property can be
found in the advanced settings for a series.
The new cursor format expressions could be used starting in version 10.95.4, but in
10.96 there is now an expression editor available to help users build proper expressions.

GENESIS64
49
Note, the old syntax will still be accepted for backwards compatibility. No changes
should be required to existing displays.
Also note, this functionality is currently only supported in desktop (WPF) displays and
Universal Windows Platform (UWP) apps. Support for HTML5 apps is planned for future
versions.
For Further Reference
• Help: GridWorX Viewer – Series advanced settings Window
Additional Enhancements
GridWorX Server
Ref ID
Description
First Available In
66392
Users can now alter the scheduler granularity of the GridWorX point manager. Speeding up
this value can result in faster responses from GridWorX at the cost of higher CPU usage. To
change this value, modifying the SchedulerGranularityMsec parameter under Platform Services
Configuration > Point Managers tab > GridWorX Point Manager. The default is 1000 ms. Note
that setting this parameter to very small values (100 ms or less) might cause high CPU and
performance issues in GridWorX.
10.95.5
67662
Added the ability to disable the auto-refresh of GridWorX Viewers after writing to the
@@Refresh tag for a data source. Disabling this functionality returns the @@Refresh tag to
the way it behaved prior to version 10.95, where users will have to manually refresh the viewer
to see updates after writing to the @@Refresh tag. To disable the viewer's auto-refresh, go to
Platform Services Configuration > Point Managers tab > GridWorX Point Manager and set the
DisableGridClientRefreshSignaling parameter to True.
10.95.5
58881
Added support to export data from a GridWorX chart to CSV, HTML, TXT, and ExcelML. This is
available in the context menu, toolbar, and ribbon.
10.95.3
57461
Changed the handling of default values for parameters. Parameters now follow these rules:
* If a parameter is not specified at all, it will not be passed to the query or stored procedure.
This means that if the stored procedure has a default value, that default value will be used.
* If a parameter is specified without a value (for example: @paramName=) then NULL will be
used as a value.
* If a parameter is specified without a value but enclosed in quotes (either single or double, for
example: @paramName='') then an empty string will be used as a value.
10.95.1
GridWorX Viewer
Ref ID
Description
First Available In
11649
Added a "Sorting" tab on the grid configuration. This tab allows the user to configure the sort
order for the grid columns. This is an alternative to activating the control and clicking on the
column headers to sort them.
New for 10.96
50720
70231
70232
Filters configured in the column header dropdowns can now be saved with the display. There
are two ways to save them:
1) In configuration mode, right-click on the viewer and activate the control, then set the filters
are you would in runtime mode and save the display.
2) In configuration mode, go to the Advanced tab of the grid configuration and set
ShouldResetSettings to false. Enter runtime, set the filters as desired, then go back into
configuration mode and save the display.
New for 10.96
61355
70850
Pie and donut charts can now have a legend. This is enabled on the Advanced tab of the chart
with the ShowLegend property.
New for 10.96

GENESIS64
50
Ref ID
Description
First Available In
71031
61914
70371
Added a new option to client-side filters called "Show the filter in runtime". This option can be
found on a grid under the Behavior tab > Configure default client-side filter(s) > add or edit a
filter. When disabled, this option will hide a filter in runtime. It can be used to create
preconfigured filters usable in status indicators, conditions, and elsewhere that you do not
want the user to be able to choose from in runtime.
Note, this feature is available in desktop (WPF) and Universal Windows Platform (UWP), but
not HTML5. We plan to add this to HTML5 in a future version.
New for 10.96
62917
Added a new property, ForceReportDialog, on the Advanced tab of a grid. Setting this
property to true will force the the export dialog to show when performing a CSV export,
regardless of the value of DefaultReportPath. When ForceReportDialog is false, the dialog will
only appear if DefaultReportPath has no value.
This property is currently only supported in the desktop (WPF) platform. We plan to add
support for HTML5 in later versions. (Unfortunately, this cannot be supported in Universal
Windows Platform (UWP) due to sandbox restrictions on UWP apps.)
New for 10.96
63389
70580
The GridWorX Viewer now supports the Export Data command.
New for 10.96
69185
The Resolve Global Alias dialog that appears when refreshing a data source that includes a
global alias will no longer list the same alias more than once. Previously, the dialog would list
the alias multiple times if it occurred more than once in the tag name.
New for 10.96
69311
Added a new property, ClickCommandColumnKey, that works the same as
SelectionCommandColumnKey, except it triggers the command when the row is clicked, rather
than selected. Users may want to use ClickCommandColumnKey instead of
SelectionCommandColumnKey if they want to be able to trigger the command multiple times
without deselecting the row.
New for 10.96
63530
Dynamic values (such as tags and aliases) can now be used in the max and min values of a
GridWorX Viewer's chart's "Use specific X-Range" and "Use specific Y-Range" settings.
10.95.4
63733
Added a SelectEntireRow property to the Advanced tab of a grid. The default is false. When set
to true, selecting a cell will instead select the entire row.
Note that in version 10.96, this property is largely cosmetic. Commands and functionality that
look for a selected row will also react to a selected cell, considering the whole row selected. (In
version 10.95.4 and 10.95.5 users needed to set this property and
SelectionCommandColumnKey to be able to execute a command when clicking any cell on a
row. SelectionCommandColumnKey support has been replaced by support for executing
commands on events.)
10.95.4
60588
Clickable links in GridWorX Viewer grids are no longer underlined.
10.95.3
60772
Choosing "Print" from the desktop (WPF) context menu of a grid now brings up a print dialog.
Previously, it would automatically print to the default printer on the machine. This is now
consistent with the "Print" option in the context menu of a chart.
10.95.3
GridWorX Workbench Provider
Ref ID
Description
First Available In
68819
The GridWorX Workbench provider no longer removes manually entered parameters when
editing the query of a data source.
New for 10.96
70516
Previously, custom SELECT queries could not have UPDATE commands automatically
generated. Now, custom queries can automatically generate UPDATE commands, but only if
the schema has a primary key.
This change should address a behavior where updating a SELECT command could blank out
the existing UPDATE command. The UPDATE command was blanked out because editing the
existing SELECT command changed from a table query to a custom query when it was edited,
and the UPDATE command could not be regenerated. Now it can be regenerated, as long as
there is a primary key.
New for 10.96

GENESIS64
51
Modbus Point Manager
Modbus Workbench Provider
Ref ID
Description
First Available In
65712
Modbus Unit IDs can now be specified with any number from 0-255.
10.95.5
Web Services
Major Enhancements
Subscribe to Columns as Arrays
(Reference ID: 66032)
Users can now subscribe to a single column of a dataset and get the entire column as an
array. For example, this tag should now return an array:
ws:Sample Web Services.National Weather Service.Current
Conditions<@stationid=KBOS>.cloudLayers
For backwards compatibility reasons, this feature is disabled by default. To manually
enable it, open Platform Services Configuration, go to the Point Managers tab, select
the Web Services Point Manager, and set the value for EnableArraySubscription to
true to enable this feature or false to disable it.
This feature is also available for the AnalytiX-BI Server and GridWorX point managers.
For Further Reference
• Help: Subscribe to Columns as Arrays
Diagnostic Counters
(Reference ID: 62615)
Starting in 10.95.3, the web services point manager now includes diagnostic information
exposed as tags similar to those originally implemented in the FrameWorX Server. At the
root level, the web services point manager now exposes one diagnostic point:
• @@TotalCachedItemsCount - The total number of items in the cache.
Web methods now expose a folder called "@@Diagnostics". This new folder contains a
few diagnostic points:

GENESIS64
52
• @@CachedItemsCount - The number of cached items for the web method. If
the web method accepts parameters, parameters do not have to be included.
o Example: ws:folder.service.method.@@CachedItemsCount
• @@LastCallStatus - The status of the last (or current, if executing) call. Possible
values are: Succeeded, Running, Failed, Timed Out. If the web service accepts
parameters, parameters do have to be included.
o Example: ws:folder.service.method<@p1=1, @p2=2>.@@LastCallStatus
• @@LastCallStatusCode - Same as @@LastCallStatus but represented as an
integer code. Values are 0 (Succeed), 1 (Running), 2 (Failed), 3 (TimedOut). If the
data source accepts parameters, parameters do have to be included.
o Example: ws:folder.service.method<@p1=1,
@p2=2>.@@LastCallStatusCode
• @@LastError - The last error that occurred during the method execution or null
if there was no error. (Note, this point is not exposed by default. To enable it, go
to Platform Services Configuration > Point Managers tab, select the Web
Services Point Manager, and set EnableErrorDetailsDiagnosticPoints to true.)
If the data source accepts parameters, parameters do have to be included
o Example: ws:folder.service.method<@p1=1, @p2=2>.@@LastError
For Further Reference
• Help: Web Services Diagnostics Counters
Support for JSON Web Tokens
(Reference ID: 62716)
Starting in 10.95.3, REST web services can now be created to use JSON Web Tokens.
For Further Reference
• Help: JSON Web Token Authentication
Web Manipulator for REST Web Services
(Reference ID: 62590)
First introduced in 10.95.3, REST services can now have web manipulators. Similar to
data manipulators in GridWorX, web manipulators are designed to execute a REST
method on demand to perform some action in a "fire and forget" way, rather than
querying and displaying data on a regular basis.
Web manipulators are best to use instead of web methods when you need to perform
some action, such as writing a value, or get some limited data on a one-time or sporadic
basis. Web methods continue to be the best choice when your goal is to display a set of
data for a user.

GENESIS64
53
Unlike web methods, web manipulators do not have configurations for refresh, schema,
or return value. They allow the user to choose another REST method to refresh when the
manipulator is executed, similar to GridWorX data manipulators.
Like GridWorX data manipulators, web manipulators are run when writing to the
@@Execute tag. Parameter values for the web manipulator can either be included in the
point name or written to specific parameter tags that are browsable under the web
manipulator.
A web manipulator has two tags to get returned values. @@StatusCode contains the
HTTP status code of the manipulator call. @@Data will contain the result of the REST
method call. If the method returns an object it is possible to get the value of individual
properties by adding the property name to the @@Data point. For example, if the call
returns this JSON object: { "Name": "Pressure", "Value": 12.8 }, the "Value" portion can be
obtained with this tag: ws:folder.service.manipulator<>.@@Data.Value.
For Further Reference
• Help: Creating a Web Manipulator
Additional Enhancements
Web Services General
Ref ID
Description
First Available In
67257
When translating XML to JSON, Web Services will now interpret elements having the nil
attribute set to true as NULL values. Previously the xsi:nil element was simply added as a
column with a value of true.
10.95.5
67899
On SOAP web methods, for xs:choice parameters that are represented as type "object" it is
now possible to pass the desired data type in the JSON representing the object. The data type
is specified via the special property __type (note, there are two underscores), for example:
{ "__type": "TypeOne", "ItemOne": "X", "DateTwo": "2019-03-18" }
10.95.5
Web Services Workbench Provider
Ref ID
Description
First Available In
50938
Web Services can now parse XML responses. Supported content types are application/xml,
application/rss+xml, application/atom+xml, application/soap+xml, text/xml.
10.95.5
62139
Introduced the ability to override the default accept-encoding header. This can be done on
the service or method level by adding a parameter of type “HTTP Header”.
10.95.4

GENESIS64
54
GENESIS64
New: Voice Machine Interface and Text Machine Interface
(Reference ID: 67798)
Brand new for version 10.96, users can now use digital assistant services, such as
Amazon's Alexa, Microsoft's Cortana, and Google Home, to control their ICONICS
systems.
Users configure "skills" in the cloud of their choice. These skills are invoked by speaking
to a smart device such as Alexa. The user's speech is sent to the cloud, converted into
text, matched to the configured skill, then sent to the ICONICS server for it to take
action. For example, a user could say to an Alexa device, "Turn off pump two," and a
zero would be written to the enabled bit for pump two. A user could also ask for the
status of pump two, and Alexa would reply, "Pump two is enabled."
Smart home properties (such as power and brightness) can be associated with assets in
AssetWorX. "Scenes" can be created in RecipeWorX, allowing the user to control
multiple attributes or points with a single voice command, such as saying, "Alexa, turn
on day mode," to set all lights in a particular building to their preset daytime values.
Voice Machine Interface and Text Machine Interface takes advantage of our new
support for Open ID Connect security. (See Web Login with External Identity Providers.)
Users can authenticate their voice device against ICONICS security, controlling which
points the device and read or write to.
This capability is similar to the speech recognition capability of GraphWorX64 and
MobileHMI, except in those cases the speech is processed locally by the operating
system. Voice Machine Interface support is handled by a third-party cloud service.
Voice Machine Interface and Text Machine Interface can leverage these digital assistants:
• Amazon Alexa (Smart home and custom skills)
• Microsoft Bot (Cortana, Skype, Teams)
• Google Home
For Further Reference
• Application Note: (available upon request)
• Help: About ICONICS Voice Machine Interface

GENESIS64
55
AlarmWorX64
Major Enhancements
AlarmWorX64 Viewer
Flip View Can Automatically Cycle Alarms
(Reference ID: 64561)
The AlarmWorX64 Viewer's flip view can now be configured to automatically cycle
through the available alarms. To configure this, select the flip view then go to the
Advanced tab. Set the AutoFlipInterval to the number of milliseconds you would like
each alarm to be displayed. A value of zero disables the feature (no cycling).
This feature is currently available for desktop (WPF) and Universal Windows Platform
(UWP), but not HTML5.
For Further Reference
• Help:
o Using Flip View to Automatically Cycle Alarms
o Advanced Display Options (AlarmWorX64)
o Flip Options in AlarmWorX64 Viewer
New Chart Type: Donut
(Reference ID: 60865)
Donut charts are new in version 10.96. To create a donut chart, select your chart, go to
the Axis tab, and set the Plot Type to Donut.
To change the radius of the center, go to the Advanced tab and set DonutRadius.
For Further Reference
• Help:
o Donut Plot Type
o Axes Tab Properties in Charts in AlarmWorX64
o Advanced Display Options (AlarmWorX64)
o Chart Options in an AlarmWorX64 Viewer

GENESIS64
56
Execute Commands on Events
(Reference ID: 69620)
The AlarmWorX64 Viewer is one of many controls that now supports executing
commands on events. These events vary per control, but for the AlarmWorX64 Viewer
they include:
• Double Click
• Middle Click
• Right Click
• Row Click (grid, list, or flip)
• Row Selected (grid, list, or flip)
• Sample Click (chart only)
• Sample Double Click (chart only)
To configure the command to be executed when this event occurs, select your grid, list,
or flip and go to the Behavior tab, or select your chart and go to the Axis tab. Find the
Commands on Events section, check Enable Commands on Events, then select the
Configure button.
This support for commands on events replaces the support added in version 10.95.4 to
execute commands when selecting a row using the SelectionCommandColumnKey
advanced property.
See Execute Commands on Events for more details.
For Further Reference
• Application Note: Commanding - Commands on Events and Context Menus
• Help: Executing Commands on Events
Enhanced Alarm Beep, Different Sounds for Different Conditions
(Reference ID: 9801)
Users can now configure the AlarmWorX64 Viewer to make different sounds based on
different conditions. Previously, all alarms had to use the same sound.
To configure custom sounds, configure your alarm viewer, select your grid, go to the
Condition tab, edit the Visual Style for your condition, fill in the new Custom Beep File
field, and specify a Beep Speed. The custom beep file can be a relative path (relative to
the display file location) or a web URI.
GENESIS64
57
Note that only one sound will play at a time. If more than one alarm with a configured
sound is present the alarm viewer will determine which sound plays by the order of
conditions in the list. The topmost matching condition with a sound will be the one that
plays.
Also note that alarms that do not match the current filter will not trigger sounds.
Users still have the option of overriding the default beep sound using the
BeepFileLocation property of the alarm viewer. Conditions that have a beep speed, but
no custom beep file will still play the custom BeepFileLocation sound.
The custom beep file field is not currently supported for the HTML5 alarm viewer. It is
supported in desktop (WPF) and Universal Windows Platform (UWP).
For Further Reference
• Application Note: AlarmWorX64 Viewer - Configuring Sounds for Alarms
• Help: Setting the Alarm Beep Function
Additional Enhancements
AlarmWorX64 Logger
Ref ID
Description
First Available In
69393
Enhanced performance of new configurations by optimizing table creation.
New for 10.96
64778
Improved the speed of retrieving historical alarm data when requested by a client.
10.95.5
62976
Users can now override the SQL Server timeout. To do so, add or modify the entry below
(which is the number of seconds) in the IcoSetup64.ini file. Reducing this value can speed up
the historical alarm data replay on a redundant system when the primary SQL Server is offline
but note that setting it too fast can cause unintended failover to the secondary SQL Server
database. The default value is 20 seconds.
[AWX\AWXLog]
HistoricalConnectTimeout=20
10.95.1
AlarmWorX64 Server Workbench Provider
Ref ID
Description
First Available In
61461
The user is no longer allowed to delete the active configuration object.
New for 10.96
AlarmWorX64 Viewer
Ref ID
Description
First Available In
11649
Added a "Sorting" tab on the grid configuration. This tab allows the user to configure the sort
order for the grid columns. This is an alternative to activating the control and clicking on the
column headers to sort them.
New for 10.96
31353
Added an X icon to the list and flip view search bars. This icon can be used to quickly remove
the search and return to an unfiltered view. This X icon is currently not available in HTML5.
New for 10.96
33322
In list view, selecting an alarm will now toggle the details pane open and closed. Previously,
selecting the alarm would open the details pane but not close it.
New for 10.96

GENESIS64
58
Ref ID
Description
First Available In
Note that HTML5 does not currently support this functionality. Selecting an alarm in HTML5
will open the details pane, but not close it.
47200
70586
The AlarmWorX64 Viewer's list view now supports the Sort command.
New for 10.96
57343
The performance of the desktop (WPF) AlarmWorX64 Viewer has been optimized for large
bursts of data (such as viewing over 15,000 alarms at once).
New for 10.96
61852
The desktop (WPF) and alarm viewer now allows filtering by time along with date in datetime
columns. This feature is currently not available on HTML5 or Universal Windows Platform
(UWP).
New for 10.96
62214
The AlarmWorX64 Viewer no longer requires a subscription to the active time field. That field
can be unsubscribed.
New for 10.96
63166
63278
The Edit Time Range dialog no longer shows configuration elements for the Shift Schedule
Configuration while in runtime mode, only in configure mode. Previously, the dialog allowed
the user to edit the shifts in runtime, but the changes would not be saved. This was misleading,
so the configuration elements were removed.
This affects desktop (WPF) and Universal Windows Platform (UWP), but not HTML5. The
HTML5 dialog still shows the configuration elements for shifts in runtime.
New for 10.96
64945
When a virtual column's expression contains an error, a simple exception message is displayed
instead of a stack trace. The stack trace that was displayed previously was confusing to end
users and usually not necessary to troubleshoot the issue.
New for 10.96
68770
The count of alarms in an alarm viewer is now available as a localsim property. This property is
available for both real-time and historical alarms, and all views (grid, chart, list, and flip).
For example, to get the alarm count of the first viewer on the first tab of an alarm viewer
named "MyAwx" you could use this tag: localsim:property:myAwx.Items[0].Items[0].AlarmCount
Note, localsim property tags for the AlarmWorX64 Viewer are not currently available in HTML5.
New for 10.96
69311
Added a new property, ClickCommandColumnKey, that works the same as
SelectionCommandColumnKey, except it triggers the command when the row is clicked, rather
than selected. Users may want to use ClickCommandColumnKey instead of
SelectionCommandColumnKey if they want to be able to trigger the command multiple times
without deselecting the row.
New for 10.96
69729
The default AlarmWorX64 Viewer beep sound will now work in desktop (WPF) WebHMI
displays running in Internet Explorer without requiring any extra steps. Previously, the
AwxBeep.wav file needed to be manually copied into the PubDisplay folder, and the
BeepFileLocation advanced setting needed to be set.
New for 10.96
70329
70330
71484
The AlarmWorX64 Viewer's Acknowledge & Operation dialog now has a "Beep Off" option that
will turn off the beep sound for the given alarm. "Beep Off" is also now available as an
Operation in the Acknowledge command.
New for 10.96
71079
71080
The desktop (WPF) and Universal Windows Platform (UWP) AlarmWorX64 Viewer pie and
donut charts now show values when the ShowFieldName advanced property is enabled.
Previously they only showed the name and not the value. This makes the behavior consistent
with the HTML5 AlarmWorX64 Viewer.
New for 10.96
71212
71204
Added a new property to AlarmWorX64 Viewer pie and donut charts called "ShowFieldValue".
When set to true the value is shown in the data labels, when set to false a percentage is shown.
This property can be configured on the Advanced tab of a chart. (Note, this feature is currently
only available for desktop (WPF) and Universal Windows Platform (UWP) platforms. We plan to
add support for HTML5 in a later version.
New for 10.96
62279
The grid object used in the Asset Navigator, ReportWorX64 Viewer, and AlarmWorX64 Viewer's
list view has been enhanced to allow auto-sized columns to shrink as well as expand.
10.95.4
63390
Added support for the Export Data command to the AlarmWorX64 Viewer.
10.95.4
60590
60600
Clickable links in the AlarmWorX64 Viewer are no longer underlined.
10.95.3
60773
Choosing "Print" from the desktop (WPF) context menu now brings up a print dialog.
Previously, it would automatically print to the default printer on the machine.
10.95.3
56527
56529
The AlarmWorX64 Viewer's Acknowledge & Operation dialog now has a "Latch Reset" option
that will reset whatever latch has been applied.
10.95.1

GENESIS64
59
Ref ID
Description
First Available In
56984
In a redundant scenario, the AlarmWorX64 Viewer should now read historical data from the
secondary logging database when the primary logging database cannot be reached. The
timeout for contacting the primary database is configured by this IcoSetup.ini entry:
[AWX\AWXLog]
HistoricalConnectTimeout=20
The default value is 20 seconds. Very small timeout values (5 seconds or less) may produce
unpredictable results and are not recommended. Note that when the SQL Server is remote
from the alarm logger the network timeout detection length may be added to the overall
timeout length. (The default Windows network timeout is 72 seconds.)
The logger must be restarted after changing this INI entry.
10.95.1
AlarmWorX64 MMX
AlarmWorX64 MMX General
Ref ID
Description
First Available In
63211
Added support for changing the pager agent from PDU-mode to text-mode. For information
on how to make this change, contact your regional Technical Support office or open a case at
https://partners.iconics.com.
10.95.4
62710
Added an AlarmWorX64 Multimedia mail agent that supports SSL/TLS security.
Note: For security reasons, it is critical that the emailcfg.exe be run under the same user
account as the mmxmailnt.exe. Failure to do so will result in a failure to properly read the
registry and access the stored password. If a user wishes to disable SSL support, the
Icosetup64.ini file can be modified as follows:
[AWXMMX32\MMXMail]
EnableTLS=0
10.95.3
62758
AlarmWorX64 Multimedia no longer posts connection string information to GenEvent.
Previously, the connection string could be posted, which might have included sensitive
password information.
10.95.3
AlarmWorX64 MMX Workbench Provider
Ref ID
Description
First Available In
65670
Changes to an AlarmWorX64 MMX configuration are now recorded in the audit log and
GenEvent.
10.95.5
AlertWorX
Ref ID
Description
First Available In
62430
The Send Email command now supports setting the "from" email address. Note that the "from"
email address configured in the AlertWorX email node must have the proper permissions in
the email server to "Send As" the email address specified as the "from" address in the
command.
New for 10.96
62784
The "from" email address for AlertWorX emails can now be configured on a per-configuration
basis. Previously it was a per-port basis, and the "from" email from the first configuration
would be used for all emails.
10.95.3
62971
An AlertWorX SMS/Text node can now send message to more than one recipient. Use the
semicolon (;) as the separator.
10.95.1

GENESIS64
60
AssetWorX
Major Enhancements
Asset Navigator
Microcharts
(Reference ID: 67777)
It is now possible to include
microcharts inside the Asset
Navigator control. Microcharts
connect to equipment properties
to display a minimalist trend of
the equipment property over time,
allowing operators to quickly spot
notable trends or spikes.
Microcharts work best with
historical data, through real-time
data can be plotted as well.
Microcharts are special columns in the Asset Navigator. Each microchart is associated
with a particular equipment property. Assets that have that equipment property will
show a trend in the configured microchart column.
To add microcharts to your Asset Navigator:
1. Configure the control
2. Go to the Columns tab.
3. Go to the Columns section.
4. Add a column.
5. Select the column you added.
6. Set the Content type to Microchart.
7. For the Property Name field, fill in the name of the property you would like to
trend with this microchart (such as CurrentTemperature). You can browse for a
specific asset property to use that property's name.
8. Select the More Options button next to the Content field to configure more
details about the microchart, such as whether it should use historical or real-time
data and the type of chart to display.
There are additional settings for the behavior of microcharts on the Columns page in
the Microcharts section, which may be collapsed by default.

GENESIS64
61
You can quickly add some microcharts to display alarm data by selecting the Asset
Navigator in configuration mode, then selecting Columns > Alarm Microcharts.
For Further Reference
• Help: About Microcharts
Execute Commands on Events
(Reference ID: 65398)
The Asset Navigator is one of many controls that now supports executing commands on
events. These events vary per control, but for the Asset Navigator they include:
• Asset Clicked
• Asset Selected
• Ready
• Started
To configure the command to be executed when this event occurs, go to Runtime tab.
Find the Commands on Events section, check Enable Commands on Events, then
configure the form below.
See Execute Commands on Events for more details.
Commands on events are only supported for the desktop (WPF) and HTML5 Asset
Navigators. We plan to add support for Universal Windows Platform (UWP) in a future
version.
For Further Reference
• Application Note: Commanding - Commands on Events and Context Menus
• Help: Executing Commands on Events
Customizable Context Menu
(Reference ID: 57682)
The context menu for the Asset Navigator can now be customized in version 10.96.
Various parts of the Asset Navigator can have different context menus – for instance, a
different set of options can be presented for the context menu of a standard asset node
and an asset node in the search results.
To configure the context menu:
1. Configure your Asset Navigator.
2. Go to the Runtime page.

GENESIS64
62
3. Go to the Context Menu section.
4. Check Enable.
5. Choose the Group for the context menu you'd like to edit.
6. Add, remove, or edit items in the Items table.
Many other controls also support the customizable context menu. See Customizable
Context Menu.
For Further Reference
• Application Note: Commanding - Commands on Events and Context Menus
• Help:
o Asset Navigator Control
o Customizable Context Menu
Favorite Assets
(Reference ID: 57331, 62831, 62983)
Starting in version 10.95.1 and 10.95.2, favorites assets be designated in the Asset
Navigator.
Favorites can be added from an Asset Navigator using the customizable context menu.
Follow these steps to configure a navigator to allow favorites and then add a favorite:
1) Edit the navigator in configure mode.
2) Go to the General page.
3) For Display Mode, choose a mode that includes favorites (for example: Favorites
then Assets).
4) If desired, select the down arrow at the bottom of the Navigator section to
expand more options, the enable Browsable Favorites. (This will allow the user
to expand items in the favorites section to see their children.)
5) Go to the Runtime page.
6) In the Context Menu section, for Group, choose Asset Node or Search Results
Node.
7) Select the add button and choose Add to Favorites.
8) Go into runtime.
9) Bring up the context menu for an asset node or search results node and choose
Add to Favorites.
10) Change the Name of the favorite if desired, then choose its location (public or
private).
a. Note, private favorites will only be visible if you are logged in.

GENESIS64
63
Favorites can also be added using the Add Favorite command. This command can add
a specific asset or the selected asset in a navigator.
Favorites can be removed using the context menu, or the Remove Favorite command.
They can also be copied and pasted between the public and private favorite groups and
folders.
There are both public and private favorites. Private favorites are only available to users
who are logged into security.
Public favorites can be secured on a user or group in ICONICS security, using the
Favorites tab.
For Further Reference
• Help: Favorite Assets
AssetWorX Server
Configure and Browse Hyper Historian Tags from AssetWorX
(Reference ID: 67824)
Version 10.96 moves the ICONICS Suite towards a more unified configuration
environment by allowing you to configure Hyper Historian tags directly from within
AssetWorX. AssetWorX is taking steps to become your central configuration
environment for ICONICS Suite products. Hyper Historian tags may be configured
directly on an asset, or in an equipment class.
These new integrated tags can be browsed from either AssetWorX or Hyper Historian,
based on the user’s preference.
Users can still create tags in Hyper Historian independently from AssetWorX, if they
have tags they want to log that do not relate to the asset structure.
Users of the Bulk Asset Configurator may find that they no longer need to use the
ClassHistoryDefinitions sheet of the input Excel workbook. The Hyper Historian dialogs
in an equipment class can be fully parameterized. If the equipment class has configured
Hyper Historian tags, then the Bulk Asset Configurator will create those tags when
instantiating the class. (The ClassHistoryDefinitions sheet is still supported who prefer
that method.)
For Further Reference
• Application Note: AssetWorX – Configure Hyper Historian Tags from AssetWorX
• Help: Hyper Historian – AssetWorX Integration

GENESIS64
64
All Equipment Class Fields Support Parameters
(Reference ID: 52435, 66792, 69802)
Previously, only text fields
supported parameters, but now
in version 10.96 any equipment
class field may be
parameterized. Simply select the
/? button next to a field to
assign it a parameter.
In the parameter dialog for a
field, you can see the allowed
values for that field. Use these
values when instantiating the
equipment class. You can use
the convenient copy buttons
next to the values to copy them
to the clipboard.
This support even extends to the new Hyper Historian tags configurable from
AssetWorX, meaning equipment classes can be used to easily create Hyper Historian
tags for your assets.
For Further Reference
• Help: Equipment Class Fields Parameter Support
Additional Enhancements
AssetWorX General
Ref ID
Description
First Available In
63378
The ASC_DataCache table now contains additional columns: StatusCode, Timestamp,
ValueType, and TextValue. These columns are populated from the AssetWorX cache and can
be used to retrieve AssetWorX cache values in SQL clients. They are never read back by
AssetWorX. TextValue is only populated if the value can be converted to text.
10.95.4
62636
AssetWorX assets can now be linked to a BI model via the external link field.
10.95.3
62705
The 1,024-character limit on “Real Time”, “History”, and “Dataset” point names has been
removed.
10.95.3
Asset Navigator
Ref ID
Description
First Available In
60082
59212
Implemented better data validation for controls such as heatmap, data diagram, and asset
navigator. Users are no longer allowed to enter invalid data. (In some cases in the past, invalid
data could cause the controls to crash.)
New for 10.96

GENESIS64
65
Ref ID
Description
First Available In
71166
Added a Read Default Commands property to the Asset Navigator. This is configured on the
Controls tab in the Selected Asset section.
When this property is disabled it prevents assets selected using the "Read Data Source" data
source from triggering the default command. Selecting assets by other means (such as clicking
or tapping on them in the Asset Navigator) will still trigger the default command.
This property is enabled by default, which is consistent with the behavior in previous versions.
New for 10.96
68271
Added a new "Read Default Command" property in the Controls > Selected Asset section of
the AssetWorX Navigator configuration. Setting this property to false will prevent default
commands from being executed when the selected asset changes due to the tag specified in
Selected Asset > Data Source.
10.95.5
61951
Added an option to the Asset Navigator to revert to the old search behavior where the display
names were returned instead of the full asset path. To revert to the old behavior, open the
Asset Navigator configuration popup, go to the Controls tab, Search section, and hit the
expand arrow. Check the box for "Hide Asset Path". You may also want to change the "Results
Names" option to "Show Display Names".
10.95.4
62279
The grid object used in the Asset Navigator, ReportWorX64 Viewer, and AlarmWorX64 Viewer's
list view has been enhanced to allow auto-sized columns to shrink as well as expand.
10.95.4
62599
Added a new "Command Order" property to the AssetWorX Navigator. Double-click on the
AssetWorX Navigator to open the pop-up configurator, then look on the General tab under
the Navigator section. By default, it is set to Alphabetical, but it can be switched to Server
Defined to sort commands as defined on server. This sorting applies both to commands in
context menu and to direct commands.
10.95.3
62984
Search results now have a context menu, similar to the context menu for regular assets. This
context menu can be customized - see enhancement 57682.
10.95.1
AssetWorX Workbench Provider
Ref ID
Description
First Available In
70016
In Workbench, under Assets > Product Configuration > Other Settings the Connection String
field in the Cache Data Store section now masks passwords.
New for 10.96
Controls
Major Enhancements
New: Security Indicator
New Security Indicator Control
(Reference ID: 67817)
The new Security Indicator control provides a way to display security information, such
as the logged-in user or the user's group and provides a way to execute commands
based on security events, such as when a user logs in or out.
The text displayed in the security indicator is fully customizable via expressions. These
expressions can contain context variables such as @@user, which allows the text to
update based on the current security context.

GENESIS64
66
The Security Indicator control supports the new commands on events and customizable
context menu features.
The preexisting Security Login control still exists, though users may find that the Security
Indicator control can provide all of the same functionality, and more.
For Further Reference
• Application Note: GraphWorX64 - Security Indicator Control
• Help: Security Indicator Control
New: Table
New Table Control
A brand-new control in version 10.96 is the table control. This control is very similar to
the new fault viewer control, and designed to be used in concert with the fault viewer,
allowing the user to see even more detailed information about selected fault incidents,
such as comments, activation variables, latest causes, etc.
The table control can display any dataset or query data. The table control does not
replace the preexisting GridWorX Viewer control, but it has a lot of overlapping features.
The benefits of the table control over the GridWorX Viewer include:
• Linked navigation variables
• Premade styles
• Embedded microcharts
• Enhanced performance

GENESIS64
67
The GridWorX Viewer still has some advantages, such as charting support. While we
expect that users will choose between the GridWorX Viewer and the new table control
depending on their exact needs, we would encourage users to use the table control
when possible. In the future, ICONICS plans to replace the GridWorX Viewer with newer
compatible controls, such as the table control. Upgrading projects will be easier if they
already use the table control.
To configure a table control, you must first choose the fields you want to query from
your database. This is done on the Fields page. Once those fields are chosen, they will
be used in other areas of the viewer, such as Columns, Filters, and Style. Any attribute
that you wish to display as a column, use in a filter, or use in a style must first be
selected on the Fields page.
This control is available in desktop (WPF) and HTML5, but not Universal Windows
Platform (UWP). We plan to add UWP support in a future version.
For Further Reference
• Help: Table Control
Controls General
Customizable Context Menu
(Reference ID: 57682)
Many controls now include a customizable context menu.
The context menu configuration varies per control, but it is usually configured on the
Runtime page in the Context Menu section.
Controls that include this context menu support include:
• Asset Navigator
• BridgeWorX64 Navigator (new control)
• BridgeWorX64 Viewer (new control)
• Camera Control
• Data Diagram
• Fault Viewer (new control)
• Heatmap
• Recipe Navigator
• ReportWorX64 Navigator
• ReportWorX64 Viewer
• Security Indicator (new control)
• Table (new control)

GENESIS64
68
• TrendWorX64 Viewer
For Further Reference
• Application Note: Commanding - Commands on Events and Context Menus
• Help: Customizable Context Menu
Camera Control
Enhanced Configuration
(Reference ID: 65769)
The configuration for the camera control has been enhanced. The camera control now
has its own ribbon that offers many common configuration options, such as enabling or
disabling controls and flipping the video.
The control also has a new configuration dialog. Users no longer need to use the
properties panel to configure their camera controls (though they are still free to do so).
For Further Reference
• Help: Camera Control
Support for HVEC (H.265/MPEG-H Part 2)
(Reference ID: 59366)
Version 10.96 adds support for High Efficiency Video Coding (HVEC), also known as
H.265 or MPEG-H Part 2. This codec allows for greater video resolution and a wider
variety of camera devices.
Note that HVEC video streams require higher system requirements than lower resolution
streams. To have a good stream experience ICONICS strongly recommends an i7
equivalent or better processor, and a GTX10 series equivalent or better GPU.
HVEC is only supported for desktop (WPF) only. We plan to support HTML5 and
Universal Windows Platform (UWP) in future versions.
For Further Reference
• Help: Camera Control

GENESIS64
69
HTML5 Support
(Reference ID: 67811)
The camera control can now be used in HTML5 displays and apps.
Currently the HTML5 camera control only supports MJPEG and JPG. We plan to add
RTSP (H.264 and H.265) support in future versions.
See Feature Parity Improvements for other HTML5 parity improvements.
For Further Reference
• Help: Camera Control
Improved Support for ONVIF Cameras with Relative Positioning
(Reference ID: 54252)
The camera control can now support a wider variety of ONVIF cameras, including those
that do not use port 80 for their camera service, and those that use relative positioning
instead of absolute.
Support for relative positioning required the addition of new buttons into the camera
control along with the movement sliders. These buttons, when pressed, will initiate the
movement and stop it when the button is released. The slider is only supported for
cameras that support absolute positioning, and the buttons for relative positioning.
For Further Reference
• Help: Using Camera Control with ONVIF Cameras

GENESIS64
70
Browse for ONVIF Cameras
(Reference ID: 64766)
ONVIF cameras are now browsable in the
ICONICS Data Browser.
When configuring a camera control, users
can now go to the Data Points tab of the
browser, then browse under My
Computer > Platform Services >
Cameras. Browsing this folder will send a
broadcast to enumerate all ONVIF capable
cameras on the network.
Expanding a camera will display supported
properties of that camera, such as
OnvifUrl, VideoUrl, and MotionDetection.
The exact properties depend on the
capabilities of the camera. The server must
be able to connect to the camera to
enumerate these properties, which means a password must be correctly configured in
the Platform Services Configuration dialog on the Passwords tab.
For Further Reference
• Help: Using Camera Control with ONVIF Cameras
Play or Pause Video Feedback with Commanding
(Reference ID: 65780)
Previously, users who wanted a way to play or pause the camera control's playback
would need to use global aliases for the video URL and set the alias to null to "pause" it.
This had a side effect of causing errors in the camera control.
Now, the SetFreezeMode command has been enhanced to play or pause the camera
control's video. See Set Freeze Mode Command Can Now Play/Pause Camera Control
for more details.
For Further Reference
• Help:
o Camera Control
o SetFreezeMode Command

GENESIS64
71
Execute Commands on Events
The camera control is one of many controls that now supports executing commands on
events. These events vary per control, but for the camera control they include:
• Ready
• Started
To configure the command to be executed when this event occurs, go to Runtime tab.
Find the Commands on Events section, check Enable Commands on Events, then
configure the form below.
See Execute Commands on Events for more details.
For Further Reference
• Application Note: Commanding - Commands on Events and Context Menus
• Help: Executing Commands on Events
Customizable Context Menu
(Reference ID: 57682)
The context menu for the Camera Control can now be customized in version 10.96.
Various parts of the Camera Control can have different context menus – for instance, a
different set of options can be presented for the video itself and the rest of the control.
To configure the context menu:
1. Configure your Camera Control.
2. Go to the Runtime page.
3. Go to the Context Menu section.
4. Check Enable.
5. Choose the Group for the context menu you'd like to edit.
6. Add, remove, or edit items in the Items table.
Many other controls also support the customizable context menu. See Customizable
Context Menu.
For Further Reference
• Application Note: Commanding - Commands on Events and Context Menus
• Help: Customizable Context Menu

GENESIS64
72
Data Diagram
Execute Commands on Events
(Reference ID: 64978)
The data diagram is one of many controls that now supports executing commands on
events. These events vary per control, but for the data diagram they include:
• Data Source Changed
• Ready
• Right Click
• Sample Click
• Sample Double Click
• Started
To configure the command to be executed when this event occurs, go to Runtime tab.
Find the Commands on Events section, check Enable Commands on Events, then
configure the form below.
See Execute Commands on Events for more details.
For Further Reference
• Application Note: Commanding - Commands on Events and Context Menus
• Help: Executing Commands on Events
Customizable Context Menu
(Reference ID: 60279)
The context menu for the Data Diagram can now be customized in version 10.96.
To configure the context menu:
1. Configure your Data Diagram.
2. Go to the Runtime page.
3. Go to the Context Menu section.
4. Check Enable.
5. Add, remove, or edit items in the Items table.
Many other controls also support the customizable context menu. See Customizable
Context Menu.
Currently, the Data Diagram custom context menu is not supported in HTML5. We plan
to add support for that platform in a future version.

GENESIS64
73
For Further Reference
• Application Note: Commanding - Commands on Events and Context Menus
• Help: Customizable Context Menu
Heatmap
Smooth Transitions
(Reference ID: 63819)
Updating the data source of a heatmap control now optionally creates a smooth
animation when transitioning from one dataset to another. This provides a more
pleasant transition than the previous sudden change to the new dataset.
To see these smooth transitions, configure your heatmap, go to the Color Axis page,
and enable Smooth Transitions.
For Further Reference
• Help: Heatmap – Smooth Transitions
Execute Commands on Events
The heatmap is one of many controls that now supports executing commands on
events. These events vary per control, but for the data diagram they include:
• Ready
• Started
To configure the command to be executed when this event occurs, go to Runtime tab.
Find the Commands on Events section, check Enable Commands on Events, then
configure the form below.
See Execute Commands on Events for more details.
For Further Reference
• Application Note: Commanding - Commands on Events and Context Menus
• Help: Executing Commands on Events
Customizable Context Menu
(Reference ID: 60276)
The context menu for the Heatmap can now be customized in version 10.96.
To configure the context menu:
GENESIS64
74
1. Configure your Heatmap.
2. Go to the Runtime page.
3. Go to the Context Menu section.
4. Check Enable.
5. Add, remove, or edit items in the Items table.
Many other controls also support the customizable context menu. See Customizable
Context Menu.
Currently, the Heatmap custom context menu is not supported in HTML5. We plan to
add support for that platform in a future version.
For Further Reference
• Application Note: Commanding - Commands on Events and Context Menus
• Help: Customizable Context Menu
Weighted Average
(Reference ID: 64544)
Originally added in 10.95 Update 3, the
weighted average function (WAvg) of
the heatmap gives the heatmap a
more natural-looking and smooth
transition between data points. This
works particularly well for a
temperature heatmap. See the
Heatmap - Weighted Average
application note for information on
how to configure the weighted
average.
For Further Reference
• Application Note: Heatmap - Weighted Average
• Help: Heatmap Control

GENESIS64
75
TrendWorX64 Viewer
Stacked Plots
(Reference ID: 34192, 39268, 61723)
Version 10.96 introduces a number of
stacked plot types within the
TrendWorX64 Viewer. Simply choose
the new plot types on the plot object
in the TrendWorX64 Viewer
configuration tree.
The Create Pen and Edit Pen commands have been enhanced to support these new plot
types.
For Further Reference
• Application Note: TrendWorX64 Viewer - New Features in 10.96
• Help:
o Stacked Plots
o Plot Properties
Combined Plot Types
(Reference ID: 34774)
Users can now combine multiple plot
types in a single TrendWorX64 Viewer
chart.
To configure multiple plot types, add
more than one plot to your chart
object in the tree. Set each plot with
the plot type you would like to use
and add pens to those plots.
For Further Reference
• Application Note: TrendWorX64 Viewer - New Features in 10.96
• Help:
o Combined Plot Types
o Plot Properties

GENESIS64
76
Alternate Background Colors
(Reference ID: 35668)
You can now have alternating background color stripes in your TrendWorX64 Viewer.
Select your chart in the tree and go to
the Chart tab. Set the Alternate Plot
Area color with the color of your
stripes. This color and the standard
Plot Area color will be alternated
between major X grid lines. Both
colors will also be used in the
summary view.
If you do not wish to use the background striping, set the Alternate Plot Area to no
color (the X next to the eyedropper in the color picker).
This feature is currently supported in desktop (WPF) and HTML5, but not Universal
Windows Platform (UWP).
For Further Reference
• Application Note: TrendWorX64 Viewer - New Features in 10.96
• Help: Alternate Background Colors
Shared Axes and Individual Axis Styling
(Reference ID: 44846, 48034, 67881)
Users now can share an axis with multiple pens without using a global axis. Previously,
the user had to choose between each pen having their own independent axis or sharing
all pens on one axis. Now you can have any number of axes for any number of pens. For
instance, three pens can share an axis and a fourth can be on its own axis.
To enable the shared value axis, configure the TrendWorX64 Viewer, select your chart
in the tree, then go to the Y Axis tab. Check the Shared Value Axis box, then select
Configure. In this dialog, you can create your axes and configure them with their own
styles and settings.
Once you have your axes created, select your pen in the tree and go to the Ranges tab.
In the Shared Axis section, select the name of the axis you would like to use for this pen.
Users can also use the shared axes feature to individually style axes for different pens,
using one axis per pen.

GENESIS64
77
This feature replaces the "Shared Axis" feature (also known as "Global Ranges" in some
earlier versions).
For Further Reference
• Application Note: TrendWorX64 Viewer - New Features in 10.96
• Help:
o Multiple Shared Axes
o Shared Axes Configuration Window
Display Axes on Both Sides
(Reference ID: 35027, 67885)
Axes can now appear on both sides of a TrendWorX64 Viewer. When configuring a
shared axis (see Shared Axes and Individual Axis Styling), check the Alternative
Placement box to have the axis configured on the non-default side (right) of the viewer.
For Further Reference
• Application Note: TrendWorX64 Viewer - New Features in 10.96
• Help:
o Multiple Shared Axes
o Shared Axes Configuration Window
Execute Commands on Events
(Reference ID: 47260)
The TrendWorX64 Viewer is one of many controls that now supports executing
commands on events. These events vary per control, but for the TrendWorX64 Viewer
they include:
• Double Click
• Pen Added
• Pen New Data
• Right Click
• Sample Click
• Started
• Time Range Changed
To configure the command to be executed when this event occurs, select your chart and
go to the Chart tab. Find the Commands on Events section, check Enable Commands
on Events, then select the Configure button.
See Execute Commands on Events for more details.

GENESIS64
78
Commands on events are only supported for the desktop (WPF) and HTML5 trend
viewers. We plan to add support for Universal Windows Platform (UWP) in a future
version.
For Further Reference
• Application Note: Commanding - Commands on Events and Context Menus
• Help: Executing Commands on Events
Customizable Context Menu
(Reference ID: 54537)
The context menu for the TrendWorX64 Viewer can now be customized in version 10.96.
The chart and legend have separately configurable context menus. To set up these
context menus, configure your trend viewer, select the chart object in the tree, go to
either the Chart tab or the Legend tab, make sure Context Menu is enabled and click
the associated Configure button.
Note that in HTML5 your custom menu items will appear above the default menu items,
whereas in desktop (WPF) the entire context menu is replaced by the custom settings.
Currently, the TrendWorX64 Viewer custom context menu is not supported in Universal
Windows Platform (UWP). We plan to add support for that platform in a future version.
Many other controls also support the customizable context menu. See Customizable
Context Menu.
For Further Reference
• Application Note: Commanding - Commands on Events and Context Menus
• Help: Customizable Context Menu
"Refresh" Context Menu Item
(Reference ID: 37510)
A "Refresh" option is available in the new customizable context menu. Choosing this
option in runtime will have the viewer re-query its historical data.
Previously, such a runtime refresh was only possible by toggling certain pen settings,
like disabling and re-enabling a pen, or changing its aggregate.
For Further Reference
• Application Note: Commanding - Commands on Events and Context Menus
• Help: New Refresh Context Menu Item

GENESIS64
79
"Delete Pen" Context Menu Item
(Reference ID: 65900)
A "Delete" option is available in the new customizable context menu. Choosing this
option from the pen menu in runtime will remove the selected pen.
Previously users could use the context menu to delete pens, but only from the legend's
context menu.
For Further Reference
• Help: New Delete Pen Context Menu Item
Show Custom Data in Legend
(Reference ID: 10184)
Users can now add custom data to a pen and show it in the legend.
Configure the trend viewer, select your pen, and fill in the Custom Data field. This field
can be static text, a global or language alias, a tag, or an expression.
Once your pens are configured with their custom data, select your chart in the tree, go
to the Legend tab, enable the legend, and move Custom Data from Available
Columns to Selected Columns.
For Further Reference
• Application Note: TrendWorX64 Viewer - New Features in 10.96
• Help: Show Custom Data in Legend
Tooltips on Sample Hover
(Reference ID: 31025)
In desktop (WPF), hovering over a sample, bar, or pie slice now gives a tooltip with the
pen name, value, and timestamp. Also, for bar and pie charts, the bar or slice being
hovered over will change color.

GENESIS64
80
We plan to implement these tooltips for other platforms in later releases.
For Further Reference
• Application Note: TrendWorX64 Viewer - New Features in 10.96
• Help: Tooltips on Sample Hover
Enhanced Time Shift Setting
(Reference ID: 17510)
Users can use the time shift setting on
the General tab of a pen to display the
pen at a different timestamp than its
original samples. The most common use
case for this is to compare the recent
history of a pen with a previous time
period. For example, the same pen could
be added twice, once with no time shift
and once with a time shift value of -1 Week". This would let the user compare today's
logged values to the same day last week.
Users can click the more ("…") button to choose from a list of common durations or
browse for tags or aliases.
The time shift property was available in previous versions, but it was only available on
the Advanced tab, could only take values in a format of hh:mm:ss, and could not use
dynamic values.
The Create Pen and Edit Pen commands can now set the time shift parameter.
For Further Reference
• Application Note: TrendWorX64 Viewer - New Features in 10.96
• Help: Enhanced Time Shift Setting
GENESIS64
81
Configuration User Interface Improvements
(Reference ID: 70716)
Various improvements were made to the configuration user interface of the
TrendWorX64 Viewer to help make the configuration experience better. These
enhancements include the following.
• Chart > Cursors tab
o The data source for the first and second cursors have new options on the
"more" ("...") button. Choosing "Current Position" will hard-code the
current cursor position into the field. This value becomes the starting
position for the cursor. Choosing "Default" will reset the cursor to its
default value ("{{localsim::_cursor1:String}}" or
"{{localsim::_cursor2:String}}").
o The data source for the cursor tooltips has new options on the "more"
("...") button. Choosing "First (1)" or "Second (2)" will hard-code a value of
1 or 2, respectively. Choosing "Default" will reset the visibility data source
to its default value ("{{localsim::_cursortooltips:Int32}}").
• Chart > Legend tab
o The "Available Columns" and "Selected Columns" fields are now labeled.
o In the default columns added to the legend in a new TrendWorX64 Viewer,
the width of the Description column has been increased from 100 to 200.
• Chart > Pens
o For new TrendWorX64 Viewers, the default for uncertain and bad plot
mode was changed to "Plot" instead of "Leave gap".
• Chart > Range
o The data source for the range has new options on the "more" ("...") button.
Choosing "Current Range" will hard-code the current range into the field.
This value becomes the starting range for the viewer. Choosing "Default"
will reset the range to its default value ("{{localsim::_timerange:String}}").
• Pen > General tab
o The parameters in the Connection field are now automatically set when
adding multiple pens at once or when changing the pen data source while
the connection parameters are undefined.
o The time zone and ideal pen settings have been moved into the "Time
Settings" section on the General tab, along with the new time shift setting.
• Pen > Style tab
o Items related to the pen style have been moved to a new Style tab.
o Maker size is now available on the Style tab. Previously it was only
available on the Advanced tab. A value of zero will make the marker size
automatically.

GENESIS64
82
• Pens > Values tab
o The Calculations tab has been renamed to "Values".
Users will also find new options in the configuration user interface to account for new
features. These user interface changes are detailed with their relevant enhancements.
For Further Reference
• Help: Configuring TrendWorX64 Viewer
Additional Enhancements
Controls General
Ref ID
Description
First Available In
60082
59212
Implemented better data validation for controls such as heatmap, data diagram, and asset
navigator. Users are no longer allowed to enter invalid data. (In some cases in the past, invalid
data could cause the controls to crash.)
New for 10.96
62279
The grid object used in the Asset Navigator, ReportWorX64 Viewer, and AlarmWorX64 Viewer's
list view has been enhanced to allow auto-sized columns to shrink as well as expand.
10.95.4
Camera Control
Ref ID
Description
First Available In
65133
The Camera Point Manager now runs out of process.
New for 10.96
Data Diagram
Ref ID
Description
First Available In
60082
59212
Implemented better data validation for controls such as heatmap, data diagram, and asset
navigator. Users are no longer allowed to enter invalid data. (In some cases in the past, invalid
data could cause the controls to crash.)
New for 10.96
Heatmap
Ref ID
Description
First Available In
60082
59212
Implemented better data validation for controls such as heatmap, data diagram, and asset
navigator. Users are no longer allowed to enter invalid data. (In some cases in the past, invalid
data could cause the controls to crash.)
New for 10.96
64742
Empty or null values in the input dataset are ignored. Previously, they would be filled in by a
zero value.
New for 10.96
64764
There were several improvements and fixes to the configuration preview:
* The sum aggregate was incorrectly set in preview when the avg aggregate was set, the
configuration dialog was open, then the OK button was clicked. This has been resolved.
* The red and orange discrete styles were swapped in ribbon.
* These settings have new defaults for newly created heatmaps:
a) Distance function: x={{@@value}}/pow({{@@distance}},2)
b) Minvalue: 0
c) Aggregate: WAvg
* When changing the control size in configuration mode the heatmap was not recalculated.
This has been resolved.
* Implemented a more accurate preview for the WAvg aggregate that better illustrates it.
New for 10.96
58522
The color axis scale can now accept dynamic data sources such as tags or expressions.
10.95.2

GENESIS64
83
TrendWorX64 Viewer
Ref ID
Description
First Available In
23736
60760
Enhanced the "Insert an operator comment" window with the following changes:
* Added data source description or tag name (if the description is not available). (10.96)
* Timestamp shown is where the comment will appear, rather than the timestamp of when the
comment was added. (10.95.3)
* Added a cancel button. (10.95.3)
* Dialog is now centered to the parent window. (10.95.3)
New for 10.96
24091
The "Is Enabled Tag" field on the General tab of a pen now contains a dropdown that allows
users to easily choose true or false when they want to hard-code the enabled state.
New for 10.96
25515
70676
The TrendWorX64 Viewer can be configured to suppress all error messages (for example, when
trying to load an invalid configuration file). This is done with the EnableSilentMode property
on the Advanced tab of the TrendWorX64 Viewer.
Note, the EnableSilentMode property does not apply to HTML5 because these sorts of
messages are not displayed in HTML5 viewers.
New for 10.96
31705
Pen descriptions and units can now be configured to use dynamic tags. Note that the
description field always interprets its content as a tag unless the content is surrounded by
double quotation marks.
New for 10.96
47493
Added a warning message that appears in TraceWorX when users call the
TwxChartPen.Samples object in scripts. This object may cause performance issues and is
obsolete. The warning message encourages users to call GetDataInWindow() instead of
TwxChartPen.Samples. Note that TwxChartPen.Samples is only included for backwards
compatibility and may be completely removed in later versions.
New for 10.96
57277
64569
Axis titles can now be configured to use dynamic tags. Note, this is currently only supported in
desktop (WPF) and HTML5, not Universal Windows Platform (UWP).
New for 10.96
58532
The TrendWorX64 Viewer can optionally be configured for symmetric auto-scale. On the
Ranges tab of a pen, if both the minimum and maximum are set to auto scale the "Symmetric
Auto Scale" option becomes available. When enabled, the range of the axis is scaled evenly
above and below zero.
This option was available in desktop (WPF) starting in 10.95.2, but only became available in
HTML5 starting in 10.96.
New for 10.96
60677
The aggregate in use is now available as a column for use in CSV exports. To add this column,
configure your TrendWorX64 Viewer, select the chart, go to the Data tab, click the Configure
button for Data Export, then add the "Filter" column.
New for 10.96
60717
60145
62588
Users can now specify the connection parameters for tags added in runtime (dragged and
dropped or added via Commanding without parameters specified in the command). This
addresses a need to specify whether AssetWorX tags dragged and dropped into a
TrendWorX64 Viewer should be treated as DA or HDA tags.
To configure these default connection parameters, select the chart, go to the Pens tab, check
the "Default Connection Parameters" button, then specify the parameters in the "Connection"
field.
This feature was available starting in 10.95.3 but was only available on the Advanced tab of the
chart as the UseDefaultConnectionParameters and DefaultConnectionParameters properties.
Version 10.96 added them to the Pens tab.
New for 10.96
60774
Added a new option on the Cursors tab of the chart object, "Move cursors by mouse hover."
When enabled, the cursor will follow the mouse without requiring a click.
This functionality was available starting in 10.95.3 with the Advanced setting
"CursorMoveWithMouse", but it is only available on the Cursors tab starting in 10.96.
New for 10.96
61561
The runtime ribbon can now be disabled. To disable it, configure your TrendWorX64 Viewer,
select the top-level item in the tree, and go to the Advanced tab. Set Show Runtime Ribbon (in
the Common section) to False. Note that if you have already been in runtime mode you will
need to restart GraphWorX64 to see this change.
New for 10.96

GENESIS64
84
Ref ID
Description
First Available In
63015
The user can now configure whether they want the TrendWorX64 Viewer to continuously write
to the cursor data source or only write after the cursor has finished moving. This can be
configured on the chart element's Cursors tab. When "Write cursor position" is enabled, the
"Continuous Write" option becomes available. When this option is selected the viewer will
continually write to the configured data source, and when the option is deselected it will only
write when the cursor movement has finished.
This option is also available on the Advanced tab of the chart element as
"ContinuousWriteCursorPosition".
New for 10.96
66722
Updated desktop (WPF) support for systems with the display scaling (DPI) set to something
other than 100%. There were no reported issues around this, but we suspect there could have
been font-rendering issues on these systems, especially on axes with automatic tick marks.
New for 10.96
68904
Users can now choose the format for exporting data from the TrendWorX64 Viewer. To set this
format, open the TrendWorX64 Viewer configuration, select the chart, go to the Data tab, and
click Configure in the Export section. Sort by Pens and Sort by Time both export with all pen
values in the same columns (sorted by pen name or time, respectively), whereas Table of
Values puts the value of each pen in its own column. For best results, only use Table of Values
with pens that are all using an aggregate. Exporting raw data with Table of Values will most
likely result in many empty/null cells, as the raw timestamps of samples are not likely to match
among different pens.
New for 10.96
69128
Added an option to hide the loading wheel, or "busy indicator". This option can be found on
the Advanced tab of the chart and is called EnableBusyIndicator. It defaults to true.
New for 10.96
70682
Multiple internal architectural changes to increase performance and stability.
New for 10.96
63604
Users can now configure the stroke for axes. The stroke for the X axis can be configured on the
chart's X Axis tab with the Style button. The stroke for the Y axis can be configured for shared
axes on the chart's Y Axis tab with the Configure button. When not using shared axes, the
stroke for a pen's Y axis can be configured on that pen's Ranges tab with the Style button.
10.95.4
60641
The ShowTimeNavigationDialog() method has been added to Ico.Twx.TwxViewControl. This
method shows the Trend Period dialog.
Example script (where the TrendWorX64 Viewer is named "twx"):
var control : Ico.Twx.TwxViewControl = ThisDocument.GetElementByName("twx");
control.ShowTimeNavigationDialog();
See the GENESIS64 API Reference Help for more details.
10.95.3
60676
Added a new feature to allow the writing of a pen's value under the cursor to predefined data
tags. In the TrendWorX64 Viewer configuration, select a pen, then go to the Values tab. There
is a new section for "Cursors", with checkboxes for "Write first cursor value" and "Write second
cursor value", and browsable fields to choose the data sources for each.
10.95.3
60689
The timestamp is now available in the tooltip cursor for desktop (WPF) XY Charts.
10.95.3
60695
The desktop (WPF) runtime "Print" option for the TrendWorX64 Viewer now has a new
"Landscape" option to print in landscape mode. The Print global command also supports the
new Landscape parameter.
10.95.3
60818
The arrow keys can now be used to step between samples in Freeze mode. The TrendWorX64
Viewer must have keyboard focus, which can be achieved by clicking in the viewer or using the
tab key. This works only when the first cursor is visible, and the second cursor is hidden.
10.95.3
Data Explorer
Ref ID
Description
First Available In
63770
Data Explorer now obeys custom configured column widths for Assets or OPC tags.
10.95.4
EarthWorX
Ref ID
Description
First Available In
62547
Reduced the CPU usage when opening custom Esri maps.
10.95.4

GENESIS64
85
FDDWorX
See Facility AnalytiX & FDDWorX.
GraphWorX64
Major Enhancements
Parallel Projection & Advanced Snapping
(Reference ID: 67770)
Version 10.96 makes it easy to create 3D-looking graphics in a 2D space using parallel
projection. This is accomplished using several new features, most notably a new parallel
projection grid layout, more snapping features, and the ability to define snap points for
symbols, allowing the user to create a library of parallel projection symbols and be able
to quickly put them together into a perfectly laid out graphic. Symbols properly set up
with custom snap points can even be perfectly aligned to each other with the grid
snapping turned off.
ICONICS has added several libraries of ductwork symbols created in parallel projection
style (specifically, oblique projection) using custom snap points. You do not need to put
your display into parallel projection mode to use these symbols! Just enable snapping to
custom snap points.
To use the new symbols:
1) Open GraphWorX64.
2) Go to the View tab.
3) Select the dropdown button next to the grid icon in the Grid/Ruler section.
4) Enable Snap Objects to Objects.
5) Enable Snap Custom Snap Points to Objects.
6) Go to the Symbols panel.

GENESIS64
86
7) Expand the second dropdown box.
8) In the list of libraries, go to Building Automation > Building Controls.
9) Select one of these libraries:
a. 2D_Oblique_AirDucts
b. 2D_Oblique_Components
c. 2D_Oblique_Misc
d. 2D_Oblique_Sensors
e. 2D_Oblique_Valves
10) When the library has loaded, drag at least two symbols from the library to the
canvas.
11) Note that when the symbols are dragged near each other they snap together at
the predefined custom snap points, making it easy to lay out ductwork maps.
For Further Reference
• Application Note: GraphWorX64 - Parallel Projection
• Help: Parallel Projection
Enhanced 3D Performance
(Reference ID: 67771)
In 10.96, we are using a new engine for our 3D objects in the desktop (WPF) version of
GraphWorX64 which allows us to have faster frames-per-second for displays with very
high vertex counts.
Some tested displays with large numbers of vertices provided as much as 12x speed
improvement. (Actual speed improvements will vary.)
You don’t need to do anything to take advantage of this performance boost. Just
upgrade to 10.96!
ICONICS does not expect any issues with this new rendering engine, but because this is
a large change, we are including the ability to change some or all 3D Viewers back to
the old engine. If you find that your 3D Viewers are rendering differently in 10.96 than
they were in 10.95, select your 3D Viewer and set the PreferredRendering property to
Compatible. (Note, this is an advanced property. If you do not see it, go to View >
Application Mode and select Advanced.)

GENESIS64
87
If you would like to change this for all or most viewers at once, edit Gwx.config.xml in
the Program Files\ICONICS\GENESIS64\Components directory. Search for
UseSystem3DRenderer and set the value to True. Now, all viewers with
PreferredRendering set to Default (the default value) will use the old rendering
engine. Then if you would like certain viewers to use the new engine, set
PreferredRendering to Fast for those viewers.
For Further Reference
• Application Note: GraphWorX64 - Improved 3D Performance and Editing
• Help: Enhanced 3D Performance
Improved 3D Editing
(Reference ID: 67822)
Editing objects in a 3D space has been made easier.
Selecting objects in a group now
provides a unified bounding box around
all objects. Previously, when using the
bounding box, the individual in a group
had their own individual boxes.
Moving objects has also become easier. The new enhanced gizmo allows you to move
objects along a given axis or plane instead of confusing free movement in a 3D space.
You can optionally also snap objects to other objects.
You can even change the functional "center" of an
object or group by dragging the enhanced gizmo.
The gizmo position determines the snap point and
rotation point of an object or selection. It can be
snapped to any of the bounding box corners or the
center of the bounding box faces. Double-click the
gizmo to reset it to the true center.
For Further Reference
• Application Note: GraphWorX64 - Improved 3D Performance and Editing
• Help: Adding a 3D Object
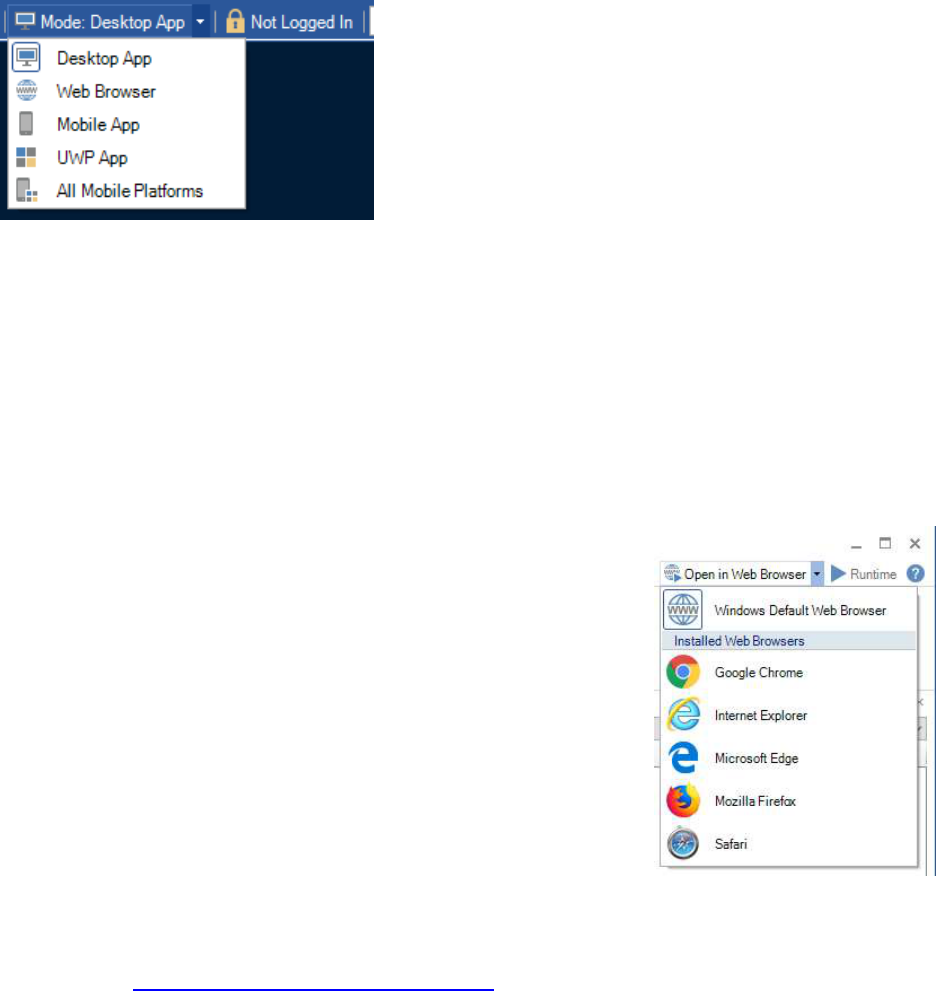
GENESIS64
88
Improved HTML5 Editing Features
(Reference ID: 67772)
Version 10.96 has made some improvements to GraphWorX64 to make it easier to edit
displays for HTML5 clients.
GDFX, the standard GraphWorX64 file format, is now also the default file format for web
or mobile displays. Users no longer need to separate files for desktop, browser, and
mobile experiences. (GDFXP files are still supported, but not required.)
Users can now choose their edit mode, which hides
features and components not compatible with
certain client types. The edit mode can also enable
helpful features for developing for that format. For
example, choosing "Mobile App" allows users to
enable a faceplate which can help them
understand what parts of their display will be
visible on clients of different sizes and aspect ratios. Users are free to change their edit
mode on the fly while configuring their displays.
If you get frustrated when your displays look slightly different on different clients
because the font looks slightly different, you can now embed custom fonts in your
GraphWorX64 files. By embedding custom fonts, you never have to worry about
whether your client has the font you want. (Please remember to obtain proper
permission to redistribute your fonts or use fonts that are freely available to
redistribute.)
Last but not least, we found that it was very common for
users creating displays for desktop browsers to open their
displays in a browser alongside their GraphWorX64 window.
So, we added a way to do this quicker! Now in
GraphWorX64, if you are editing a display in a web-
accessible folder (such as PubDisplay or AnyGlass) and you
are in the Web Brower, Mobile App, or All Mobile Platforms
edit mode you will see a new "Open in Web Browser"
button available near the runtime button. Use this button to
launch your display in your Windows default browser or
your favorite browser with a single click.
For Further Reference
• Application Note: GraphWorX64 - Improved HTML5 Configuration
• Help: Enhanced HTML5 Editing Features

GENESIS64
89
Password Protection for Saving
(Reference ID: 31515)
Display creators can now prevent their displays from being modified by adding a
password.
If a display file has a save password, the user will still be able to open the display in
configuration mode and make edits but will not be able to save the edits without the
password. A "warning banner" in the application (similar to Microsoft Office) will make
it obvious to the user that saving is currently locked (so the user will know in advance
that they would not be allowed to save their changes).
The save password feature is in addition to the preexisting load password feature and
does not replace it. Users who wish to protect their intellectual property should use the
preexisting load password, and the new save password is designed to protect the
display from unauthorized changes. (Note, however, that to fully protect the file from
modification, the Windows file system should be used to lock down access to the file.)
To configure a save password:
1) Make sure you are in Advanced mode (View menu > Application Mode >
Advanced).
2) Select the canvas (i.e. deselect all objects).
3) Go to the Property panel.
4) Enter a password into the SavePassword property.
5) When prompted, reenter the password.
6) Save the display.
For Further Reference
• Help: Password Protection for Saving

GENESIS64
90
Clone Dynamic
(Reference IDs: 62587, 62598, 62654, 62704, 62725)
First introduced in 10.95.3, the clone dynamic will make copies of an object or symbol in
runtime, allowing users to configure a single object or symbol, link it to some arrays or a
dataset, and have GraphWorX64 create as many copies needed to display your entire set
of data.
Previously, users with a dynamic number of objects to represent had to create the
maximum number of objects they expected to need, and use hide dynamics to remove
the ones that were not needed. This was annoying, created unnecessary overhead with
possibly many hidden and unused objects, and was not easily scalable. The clone
dynamic eliminates these problems, providing a simple scalable system to dynamically
create as many objects as needed.
The clone dynamic can even react to data changes in runtime, creating or removing
cloned objects as the data sources update.
The clone dynamic works best when combined with panels that automatically lay out
their contents, such as the stack or wrap panels. These panels will automatically position
all of the clones.
In addition to cloning symbols, the clone dynamic can also be used to clone states in a
process point's statefield or menu items in a popup menu. By using a GridWorX data
source, you can now create dynamic database-driven dropdowns or popup menus.
For Further Reference
• Application Note: GraphWorX64 - Clone Dynamic
• Help: Clone Dynamic

GENESIS64
91
Date Time Picker
(Reference IDs: 62785)
First introduced for desktop GraphWorX64
(WPF) and the Universal Windows Platform
(UWP) MobileHMI app in 10.95.2, and in
HTML5 in 10.95.3, GraphWorX64 now has a
built-in date time picker.
When a Time Date dynamic is added to a
display and its DataEntry field is set to true
there is now a new option called Picker.
When Picker is set to true, the user can
select the Time Date object in runtime and
be provided with a calendar and time picker.
The picker can be configured to show just
the date or just the time, based on the dynamic's TimeDateMode property. If the
dynamic's CustomTimeFormat includes milliseconds, the picker will have an option to
enter milliseconds.
Even when the picker is activated, users can still hold down Shift when selecting the date
time object to type directly into the field.
For Further Reference
• Help: Date Time Picker
Easier Data Entry
(Reference ID: 39190, 69146)
GraphWorX64 can now be more easily used to make screens designed for data entry.
Historically, users had to press a key such as Enter to submit a value to a data entry field.
This was designed so that users could not accidentally write an incomplete value to a
PLC, but it could make entering a lot of data painful. The intuitive behavior to simply
click into the next field would cause the loss of data.
Now in 10.96, process points can be configured to submit their value when the focus
changes, eliminating the need for the Enter key, and removing the possibility that typed
data could be accidentally lost.
These are advanced properties, so make sure you are in Advanced Mode (View menu >
Application Mode > Advanced) before attempting to make changes.

GENESIS64
92
To set the default behavior for every process point on your display, select the
document/canvas (i.e. deselect all objects), go to the Properties panel, and set
DataEntryLostFocusWritesValue in the Runtime section. True means that when the
process point loses focus it'll submit the current value to the data source, and false
means that the Enter or Tab key must be used to submit the value - losing focus will
erase any value entered.
The default value for new displays is false (consistent with the behavior prior to this
feature's addition), but this can be changed on the Preferences panel under New This
Display Default Settings.
Individual process points can use their own value for DataEntryLostFocusWritesValue.
This property can be found on the Dynamics panel and is only visible when DataEntry
is set to true. The default value is Default, which means this process point will follow
the configured behavior on the document.
ICONICS highly recommends not using this feature for process points connected to
live equipment. It can lead to accidental submission before a value is completely typed,
which can damage equipment.
For Further Reference
• Help: Easy Data Entry
Updated Client-Side Speech Recognition
(Reference ID: 65759, 65760)
Windows 10 clients can now benefit from client-side speech recognition. Users can
speak to GraphWorX64 to trigger handsfree pick actions. This can allow users to interact
with their displays without needing to touch a screen or a mouse. It can be essential in
clean environments such as a hospital, in places where operators are required to wear
bulky gloves, or when operators must use both hands for some operation while
interacting with a display.
On your desired pick action, set the VoiceCommand field to the text of the voice
command you'd like to trigger the action. Optionally, you can also set the
VoiceFeedback to hear an audible confirmation that the action has triggered. For the
MobileHMI Universal Windows Platform (UWP) app no additional steps are needed, but
for GraphWorX64 clients, go to Preferences > Runtime Options and set
EnableSpeechRecognition to True. Now, whenever a display with at least one
configured VoiceCommand field is running, GraphWorX64 or the MobileHMI app will
listen for the command.

GENESIS64
93
Client-side speech recognition requires a Windows 10 device. Speech and gesture
commands via a Kinect device are no longer supported in favor of this new Windows 10
speech recognition. The new Windows 10 code is cleaner, faster, and doesn't require
extra drivers.
For more information on cloud speech recognition, using services like Alexa, Cortana,
and Google Home, see New: Voice Machine Interface and Text Machine Interface.
For Further Reference
• Application Note: GraphWorX64 - Client-Side Speech Recognition
• Help: Client-Side Speech Recognition
Additional Enhancements
GraphWorX64 General
Ref ID
Description
First Available In
21735
The "Update Shared" feature now optionally preserves the size, orientation, and smart property
values of objects inside of a symbol. Previously "Update Shared" could only update preserve
these values for the symbol itself, and any objects inside the symbol would be changed to
match the selected symbol.
To preserve these values, check one or both "Recursive" boxes under "Size and Orientation"
and "Smart Property Values" on the Update Shared Objects dialog.
New for 10.96
24596
The Smart Property Editor's property grid now provides a context menu that includes options
such as cut, copy, paste, and undo.
New for 10.96
25492
The tab order for the onscreen keyboard has been changed. The tab key now moves the
selection to these controls in this order: text field > Enter > Cancel > Back > Clear > New Line
(for alpha keyboard) > other number or letter buttons > text field.
New for 10.96
25942
Added a new option under View > Grid called "Align Grid to Current Parent". This option will
automatically offset the current grid to match its parent. It affects panels (such as grid panels)
and the pivot control.
New for 10.96
26697
There are new non-scripting ways to get the context of an embedded GraphWorX64 Viewer.
Users can access "localsim" variables to get the source display name and current global aliases.
For example, if we assume the GraphWorX64 Viewer is named "gwx1", these variables can be
accessed to get the source and global aliases, respectively:
localsim:property:gwx1.Source
localsim:property:gwx1.CurrentGlobalAliases
New for 10.96
34986
In the past, choosing "Hide Faceplate" would simply hide the faceplate image, but features
related to the faceplate (such as zooming and scaling to fit the faceplate) would still function.
Now, choosing "Hide Faceplate" truly removes the faceplate and related functionality entirely
until it is re-enabled.
New for 10.96
39070
Added touch events to the scripting, such as TouchDown, TouchUp, TouchMove, etc. (See the
GENESIS64 API Reference Help for more details on these events.)
New for 10.96
39434
The "Combine Objects" functionality, which can combine multiple shapes into a single path
element, can now be more effectively used in grid displays or grid panels.
Previously, objects could only be combined if they were in position (0,0) of a grid. Now, they
can be combined from any cell. (The final object will use the grid properties of the original
head object.)
New for 10.96
41554
The "Styles and Colors" section on the "Home" menu now includes a "transparent" color.
New for 10.96
43812
Added a new option for the StartLocation window property: "Center Embedded Viewer". This
can be used to launch popup windows relative to the launching embedded viewer.
New for 10.96

GENESIS64
94
Ref ID
Description
First Available In
46675
69619
Added two new display-level properties:
* UsePointFailColorsForUncertainQuality
* UsePointFailTextForUncertainQuality
These properties default to false for compatibility with previous versions. When true, uncertain
quality values use the point fail colors or text, respectively. When false, only bad quality values
use the point fail colors or text.
These properties are supported in both desktop (WPF) and HTML5 platforms.
New for 10.96
48044
Commanding-related runtime window properties, such as CommandingName,
CommandingDisplayName, and MaxCommandsScope are now available on GDFXP displays.
New for 10.96
49354
The username dropdown in the login dialog of the desktop version of GraphWorX64 has been
resized on systems with touchscreen devices to make touch interactions easier.
New for 10.96
50021
The tab order for the security login control has been changed. The tab key now moves the
selection to these fields and buttons in this order: username > password > Login button >
Logout button.
New for 10.96
56173
When importing BIM files (IFC or XBIM) into a 3D viewport, the user now has the option to
import the BIM properties directly into AssetWorX. Previously, the user was only able to
generate a CSV file from the BIM properties, which then had to be manually imported into
AssetWorX. (Generating a CVS file is still an option.)
New for 10.96
56668
The Print() scripting method has been enhanced to include more parameters including
showDialog, printerName, printArea, and printWithWhiteBackground. (Please refer to the
GENESIS64 API Reference Help for full documentation on this method.)
New for 10.96
60180
Empty strings in desktop (WPF) and Universal Windows Platform (UWP) no longer cause
numeric-formatted process points to display using point fail color and text. They will simply
display as empty, with no error.
Note that the HTML5 behavior has not changed as of 10.96, but we plan to make HTML5
consistent with this in a later version.
New for 10.96
61600
The date picker is now available for process points that have a null value.
New for 10.96
61767
72187
Previously, the line width of shapes would zoom with the shape. A line that appeared to be
one pixel wide at 100% zoom would appear 2 pixels wide at 200% zoom.
Added a new property for shape objects named LineNoZoom. The default value is false, which
results in the same line width behavior as described above. When set to true, the line width no
longer scales with the zoom. Line width will remain fixed regardless of the GraphWorX64 zoom
level.
The LineNoZoom property currently only applies to the desktop (WPF) and Universal Windows
Platform (UWP) platforms. We plan to add support for HTML5 in later versions.
New for 10.96
61798
70201
Updated various icons and nomenclature for a more consistent look-and-feel.
New for 10.96
62025
On the Challenge Password dialog, the cursor used to be placed wherever the user clicked or
tapped in the Challenge Answer field. Users not paying attention could start to type the
answer in the middle of the field and not have enough room to type or paste the entire
answer. The cursor is now automatically placed at the front of the field.
New for 10.96
62115
When entering a challenge password, the enter key can now be used to submit the form.
New for 10.96
62121
The clone dynamic has been added to the quick access toolbar of the Dynamics panel.
New for 10.96
65102
65086
65103
65104
65105
65106
Because the technology has been obsoleted by Microsoft, Silverlight support has been
removed from GraphWorX64. Users are encouraged to use HTML5 displays for cross-browser
support.
Users can no longer create or update Silverlight displays (GDFXS file types) or publish displays
to Silverlight format. These files can still be opened using the "All Files" file type, but users will
not be able to save changes without choosing "Save as" and choosing a new file type such as
GDFX.
New for 10.96

GENESIS64
95
Ref ID
Description
First Available In
Users who have many GDFXS displays to convert may want to use the Web Publisher to bulk
convert them to GDFX. The Web Publisher can still take GDFXS files as inputs and will
automatically convert them to GDFX format when publishing.
66024
In configure mode, the F2 key will now execute the default "edit" action for the selected object
(similar to double-clicking).
New for 10.96
68980
68981
Scroll panels embedded in GraphWorX64 displays can now be scrolled horizontally by holding
down Shift and scrolling the mouse wheel. If vertical scrolling is disabled, then the Shift key is
not necessary - simply scrolling the mouse wheel will scroll horizontally.
New for 10.96
70183
The GraphWorX64 and Workbench desktop (WPF) apps that run in Internet Explorer are now
compatible with TLS 1.1 and 1.2.
New for 10.96
70238
The border of process points now obey the DisabledLineFillColor and PointFailLineFillColor.
New for 10.96
70704
The Select View global command can now be used with a GraphWorX64 display or 3D
viewport to select a predefined custom view.
New for 10.96
62552
Added four new GenEvent messages relating to saving or publishing displays:
* Display File Save Success (Severity=600 (OperatorChange))
* Display File Save Failure (Severity=750 (Error))
* File Web Publish Success (Severity=600 (OperatorChange))
* File Web Publish Failure (Severity=750 (Error))
10.95.4
63971
When importing AutoCAD files, imported labels' name are now equal to the original attribute
names.
10.95.4
64010
When importing from AutoCAD DWG files, polygons, polylines, and paths will no longer be
exploded. They will remain as those shapes instead of being broken into individual lines or
arcs.
10.95.4
62589
The "Find what" dropdown in the "Find" or "Replace” dialog will now only show data from the
selected objects. If no object is selected, it will show all data sources from the whole display.
(This is consistent with how GraphWorX32 functions.)
10.95.3
62617
Added a ReleaseDataWhenHidden property for all of the primary panel types, such as grid,
stack panel, and wrap panel. This property behaves the same as the ReleaseDataWhenHidden
property on layers, except ReleaseDataWhenHidden defaults to true for layers and false for
panels (to ensure compatibility with previous versions).
10.95.3
62659
When adding one single object to a viewbox, a group is no longer created. The viewbox now
only creates groups if more than one object is selected.
10.95.3
62669
The Ctrl-C, Ctrl-X, and Ctrl-V keyboard shortcuts for copy, cut, and paste now work for
dynamics on the dynamics tab. Previously it was possible to copy, cut, and paste dynamics, but
only through the right-click context menu.
10.95.3
62740
A display's custom scrollbar colors will now automatically propagate to its scroll viewers.
10.95.3
67755
72188
Added a new display-level property called ToolTipDuration that controls how long tooltips are
displayed in milliseconds.
Note that this property currently only affects the desktop (WPF) and Universal Windows
Platform (UWP) platforms. We plan to add support for HTML5 in later versions.
10.95.3
58809
When running desktop GraphWorX64 (WPF) in Internet Explorer, the Internet Explorer tab
name now gets its name from the Text property under of the window properties.
10.95.2
62835
"Edit View" and "Add Current View" have been moved to the top of the Custom Views menu
so users with many views do not have to scroll all the way to the bottom to manage them.
10.95.2
62922
In order to prevent situations where unauthorized users (usually web users) access a
GraphWorX64 page and use up license seats, GraphWorX64 no longer consumes a license
when launched in runtime mode, when no user is logged in, and when no display is loaded
(other than the "File Access Denied" display). As soon as a user logs in, GraphWorX64 enters
configure mode, or a FrameWorX data point is requested a license will be consumed.
10.95.1
62956
Previously, if a file became denied while a user was editing it (such as if they were logged out,
or FrameWorX Server went offline), the display would be unloaded and any unsaved changed
would be lost.
10.95.1

GENESIS64
96
Ref ID
Description
First Available In
To prevent the loss of work, GraphWorX64 now obscures the display instead of unloading it.
This gives the user an opportunity to resolve the permissions issue (by logging back in or
getting FrameWorX back online) and then save their work. Note that if GraphWorX64 is closed
before the permissions issue is resolved then the work will still be lost - this is necessary to
ensure that users who have had their save permission legitimately revoked cannot bypass
security and save.
62962
When a single object is selected, users can now right-click on most properties in the Properties
panel and see a "Copy Property Reference" option. This will copy the localsim:property tag for
that property to the Windows clipboard.
This tag can be pasted into another bind-enabled property (with a "tag" icon next to it. i.e., the
DataSource property of a process point) to reference it. Right-clicking to paste the
localsim:property tag will give you the option to paste an absolute path or a relative path.
Relative paths can be encapsulated in a symbol so that the symbol can be reused without
having to change the object names in the localsim:property tags.
The tag can also be pasted directly onto the GraphWorX64 main view area, which will result in
a process point with the DataSource set to the localsim:property tag.
10.95.1
63045
Added a new "Auto-Start Runtime" option when publishing displays for Internet Explorer
(WPF) with a Control Type of Configuration. This option will start the display in runtime mode
when it is loaded but allow the user to exit runtime and go into configure mode. (Choosing
"Runtime Only" as the Control Type will also start the display in runtime mode but will not
allow the user to exit runtime.)
10.95.1
63083
The object explorer now remembers the object that was selected when entering runtime and
returning to configuration mode.
10.95.1
GraphWorX64 3D Viewport
Ref ID
Description
First Available In
69568
On the Materials menu, the X, Y, and Z buttons will now take effect as soon as they are
pressed. Previously, if you wanted to change the material mapping direction you had to pick
one of the X, Y, or Z buttons, then press one of the mapping methods (Planar, Cylindrical, etc.).
New for 10.96
70049
The export feature of the 3D Viewport now has a progress bar.
New for 10.96
58233
Added two new options to the context menu of an object in the 3D Viewer: "Duplicate
Selected Faces" and "Split from Parent Geometry". To use either option, set the Selection
Mode to "Only faces can be selected", select one or more faces, then right-click on the faces
and select the appropriate option. The faces with either be duplicated into a new object or
split into a new object.
10.95.3
63056
When multiple items are selected, the head object is highlighted in a different color. This color
can be configured in the options (activate the 3D viewport, go to File > Options). The head
object is usually the last one selected and is used for aligning and similar options.
10.95.1
Internet of Things Provider
See the Internet of Things Workbench Provider section under

GENESIS64
97
IoTWorX & Internet of Things.
RecipeWorX
Recipe Grid
Major Enhancements
Execute Commands on Events
The recipe grid is one of many controls that now supports executing commands on
events. These events vary per control, but for the recipe grid they include:
• Data Downloaded
• Data Downloading
• Double Click
• Middle Click
• Right Click
• Row Click
• Row Selected
To configure the command to be executed when this event occurs, select your grid and
go to the Behavior tab, or select your chart and go to the Chart and Axis tab. Find the
Commands on Events section, check Enable Commands on Events, then select the
Configure button.
See Execute Commands on Events for more details.
For Further Reference
• Application Note: Commanding - Commands on Events and Context Menus
• Help:
o Recipe Grid
o Executing Commands on Events

GENESIS64
98
Recipe Navigator
Major Enhancements
Enhanced Configuration
(Reference ID: 63877, 64031)
The configuration for the Recipe Navigator has been enhanced. The navigator now has
its own ribbon that offers many common configuration options, such as enabling or
disabling tooltips and alternate row colors.
The control also has a new configuration dialog. Users no longer need to use the
properties panel to configure their Recipe Navigator (though they are still free to do so).
For Further Reference
• Help: Recipe Navigator
Execute Commands on Events
The recipe navigator is one of many controls that now supports executing commands
on events. These events vary per control, but for the recipe navigator they include:
• Ready
• Recipe Selected
• Started
To configure the command to be executed when this event occurs, go to Runtime tab.
Find the Commands on Events section, check Enable Commands on Events, then
configure the form below.
See Execute Commands on Events for more details.
For Further Reference
• Application Note: Commanding - Commands on Events and Context Menus
• Help:
o Recipe Navigator
o Executing Commands on Events

GENESIS64
99
Customizable Context Menu
(Reference ID: 57682)
The context menu for the Recipe Navigator can now be customized in version 10.96.
Various parts of the Recipe Navigator can have different context menus – for instance, a
different set of options can be presented for the context menu of a recipe node and a
recipe folder.
To configure the context menu:
1. Configure your Recipe Navigator.
2. Go to the Runtime page.
3. Go to the Context Menu section.
4. Check Enable.
5. Choose the Group for the context menu you'd like to edit.
6. Add, remove, or edit items in the Items table.
Many other controls also support the customizable context menu. See Customizable
Context Menu.
For Further Reference
• Application Note: Commanding - Commands on Events and Context Menus
• Help:
o Recipe Navigator
o Customizable Context Menu
ReportWorX Express
See ReportWorX Express & Excel Add-In.
Workflows
See BridgeWorX64 & Workflows.

Hyper Historian
100
Hyper Historian
New: Data Exporter
(Reference ID: 67825)
New in version 10.96, the Data Exporter is a powerful, high-performance extension
module for Hyper Historian that makes it easier to regularly export your logged data to
third party storage components. Data Exporters work by scheduling tasks to sort logged
data into a dataset and then transfer that dataset into a storage space, such as a data
lake.
The data explorer currently supports these storage types:
• Microsoft Azure Data Lake
• Microsoft Azure SQL
• Microsoft SQL Server
• Apache Kafka
• Apache Hadoop
• Local CSV Files
Users who previously used the Hyper Reader – a command-line tool to export data from
Hyper Historian into a SQL Server database – should be able to use data exporters to
accomplish the same tasks without having to use the command line. The Hyper Reader
is still included for backwards compatibility, but we expect users will prefer to use the
Data Exporter and ICONICS recommends it for new projects.
Data exporters are configured in Workbench under Historical Data > Hyper Historian
> Data Exporters.
For Further Reference
• Application Note: Hyper Historian - Data Exporter
• Help: Data Exporter
Logger
Major Enhancements
Configure and Browse Hyper Historian Tags from AssetWorX
Hyper Historian tags can now be optionally configured from within AssetWorX. See
Configure and Browse Hyper Historian Tags from AssetWorX.

Hyper Historian
101
Log Real-Time Expressions Directly
(Reference ID: 52034, 66533)
New in version 10.96, users can configure expressions directly in a collected tag.
Previously, in order to log a real-time expression, the user needed to create an
expression object in the Unified Data Manager, then use that expression object in an
AssetWorX property or Unified Data Manager register, and then log that property or
register. Now, users have the option to configure the expression directly in the Hyper
Historian collected tag, greatly simplifying the process. Also, because they do not
require any external pieces, these real-time expressions can be more easily used on
Hyper Historian Collector nodes.
To log an expression, create a new tag under Historical Data > Hyper Historian >
Data Collections, select the browse button next to Signal Name. Select the
Expressions tab and configure your expression.
These expressions can utilize real-time sampling functions, such as
timesincelastchange(), trueforduration(), currentdatetime(), and currentdatetimeutc().
Logged real-time expressions differ from calculated tags in several ways. Real-time
expressions are evaluated at the time of the log, whereas calculated tags are calculated
after the fact. Real-time expressions do not require their component tags to be logged
individually, whereas calculated tags do. Real-time expressions cannot be recalculated
after the fact.
In most cases, users will want to log real-time expressions when they want to make
relatively simple adjustments to their raw tags (such as adding two tags together, or
scaling a tag), and calculated tags when they wish to do more complex calculations or
do calculations on data that has already been logged in the past.
For Further Reference
• Help: Add Tag
Additional Enhancements
Ref ID
Description
First Available In
69807
Calculated Condition/Event tags can now be used in performance calculations. Previously, a
complex object was returned that was not usable in expressions.
New for 10.96
63854
TraceWorX messages generated when a calculation delay is detected now identify the specific
collector causing the delay.
10.95.5
66873
Added support for tracing datasets using extended point tracing. (See knowledgebase article
KB-3225 about how to enable extended point tracing.)
10.95.5

Hyper Historian
102
Data Replay
Major Enhancements
Enhanced OPC HDA Point Names
(Reference ID: 62426)
HDA point names may now contain additional specifications for Percent Good/Bad and
other aggregate configuration properties. This allows greater control over the data
returned by Hyper Historian to OPC HDA clients. This feature first appeared in 10.95
Update 4.
Note, the behavior of these settings is as defined by the OPC UA specifications (Part 13:
Aggregates).
This is an example tag that includes aggregate parameters:
@ICONICS.HyperHistorian.1\hh:\Configuration\Signals:RandomFast(PctGood=20;PctBad
=100;).History
These keywords are all optional. (For instance, you can specify PctGood without PctBad.)
All available keywords are:
• PctGood - Percent Good (integer, 0-100, default 100)
• PctBad - Percent Bad (integer, 0-100, default 0)
• UncAsBad - Treat Uncertain as Bad (Boolean, true or false, default false)
• SlopedExt - Sloped Extrapolation (Boolean, true or false, default false)
For Further Reference
• Help: OPC HDA Point Names
Performance Calculations
Major Enhancements
New Functions: Nextevent, Resetevent and Isevent
(Reference ID: 63766, 63744)
Version 10.95.4 added new expression functions: nextevent, resetevent and isevent.

Hyper Historian
103
These new functions are designed to allow periodic processing based on some other
event (a value change, etc.). Previously, the user would have to create very fast time-
based functions and use logic in the calculation itself to see if the process needed to be
completed.
Here is an example use case scenario. We have a Boolean value named Start, which
determines whether a product line is making product. When it is in production, we need
to make periodic calculations to monitor the production line. We also need to know
when the line started and stopped production.
First, create a calculation trigger as a data trigger. Select “Trigger On” as “Expression”.
Then, use the following expression:
IF {{data:Calc.Start}} THEN nextevent(5000, (IF !isevent() THEN 1 ELSE 2)) ELSE
resetevent(3)
Second, create a performance calculation and add the created trigger to the list of
triggers in the “Triggers” section. This performance calculation will run based on created
trigger events and the trigger value will contain one of the following values:
1) Production line started
2) Periodic check when production line is in production
3) Production line stopped
The trigger value can then be used in your performance calculation tag's logic.
For Further Reference
• Help: Performance Calculation Enhancements
Additional Enhancements
Ref ID
Description
First Available In
65737
Arrays are now allowed as parameters to C# custom functions.
10.95.5

Installation
104
Installation
Ref ID
Description
First Available In
61814
A silent installation can now be run without copying the installation media locally. This is done
by specifying the location of the CustomSetup.ini file in the registry. Create a registry key at
HKEY_LOCAL_MACHINE\SOFTWARE\ICONICS\Installation. In the key, create a string value
named CustomSetupIniPath. Set the data value to be the path to the INI file. Example data
value: C:\Users\MyUser\Desktop\MyFile.ini. For more information about the silent installation,
see the Installation – Silent Installation application note.
New for 10.96
61741
Backups created by the installation when upgrading configuration databases are now removed
when the upgrade has successfully completed.
10.95.4

IoTWorX & Internet of Things - New: Information Broker
105
IoTWorX & Internet of Things
New: Information Broker
(Reference ID: 67831, 67769)
What is Information Broker? Information Broker is a set of features for BridgeWorX64
and the IoTWorX Point Managers designed to connect GENESIS64 and ICONICS
products to MQTT brokers, such as Mosquitto and ActiveMQ. MQTT connectivity was
available previously, but Information Broker makes working with datasets and JSONs
much easier.
The Information Broker features should give users the ability to:
• Publish information to an MQTT broker from Commanding, GraphWorX64
scripting, or BridgeWorX64 transactions.
• Subscribe to MQTT messages as events (for clients such as AlarmWorX64 Viewer)
or datasets (for clients such as GridWorX Viewer).
• Use BridgeWorX64 transactions to more easily work with JSONs, converting them
to and from datasets.
• The IoTWorX edge device deployment optionally includes an MQTT broker.
See these related features:
• Enhancements to MQTT Support, Including Datasets
• New Activity: Information Broker Publisher
• New Activities: JSON Content Reader and Generic JSON Writer
• MQTT Broker Module
For Further Reference
• Application Note: ICONICS - Information Broker MQTT Quick Start
• Help:
o Information Broker Publisher
o JSON Content Reader
o Generic JSON Writer
o MQTT Brokers

IoTWorX & Internet of Things - Edge Installation & Provisioning
106
Edge Installation & Provisioning
Major Enhancements
Additional Operating System Support
(Reference ID: 50650)
Version 10.96 has a new implementation that leverages Docker containers and Azure IoT
Edge. This allows IoTWorX to support a new set of operating systems for its edge device
installation. These operating systems have been tested and confirmed by ICONICS:
• Raspbian Buster (ARM32v7)
• Raspbian Stretch (ARM32v7)
• Ubuntu 16.04 (AMD64)
• Ubuntu 18.04 (AMD64)
• Ubuntu Server 16.04 (AMD64)
• Ubuntu Server 18.04 (AMD64)
Customers may choose other Linux AMD64 or ARM32v7 operating systems from the list
of Tier 2 Azure IoT Edge supported operating systems. Compatibility can be reasonably
assumed for Tier 2 Linux AMD64 or ARM32v7 operating systems but is not guaranteed.
Windows IoT Enterprise edge devices are still supported using the 10.95 edge
installation. Version 10.96 server-side GENESIS64 installation can manage Windows IoT
Enterprise devices running the 10.95 edge software, however, not all new 10.96 features
will be available on the 10.95 edge devices. (See Create 10.95 IoT Projects and
Templates.)
For Further Reference
• Application Note: IoTWorX – Quick Start
• Help: IoTWorX Edge Device System Requirements
IoTWorX Installer for Ubuntu (AMD64)
(Reference ID: 50650)
A new IoTWorX installer is available for Ubuntu (AMD64) devices. It is a web or
command line installer that installs and configures all software, including Azure IoT
Edge, IoTWorX shared folders, and the initial configuration databases.
Note that since Ubuntu Server has no graphical user interface the installation must be
run in console mode and cannot use the installation wizard as on regular Ubuntu.

IoTWorX & Internet of Things - Device Management & Configuration
107
To launch the installer, cd into the Linux64/Disk1/InstData/VM folder. Run this
command: sudo sh ./IcoIoT_64.bin
This installer is currently available only for Ubuntu and Ubuntu Server. Raspbian devices
must use the manual installation process described in the IoTWorX – Quick Start
application note.
For Further Reference
• Application Note: IoTWorX – Quick Start
• Help: IoTWorX Installer for Ubuntu (AMD64)
Remotely Deploy and Update Modules
(Reference ID: 64963)
The modules installed on an edge device can be deployed and updated remotely in
version 10.96. Right-click a device and choose Configure Modules to see what modules
are deployed on that device. Select Click to configure modules to make changes,
including installing or uninstalling modules. This dialog can also be used to upgrade the
version of the containers on a module, when new versions become available.
For Further Reference
• Help: Remotely Deploy and Update Modules
Device Management & Configuration
Major Enhancements
Device Twins
IoTWorX now uses Azure device twins. A device twin is a digital representation of the
edge device's settings, stored in the cloud.
Device twins are used to exchange settings and status information with the device.
Utilizing device twins, users can preconfigure packages to be automatically downloaded
when a device is provisioned, configure a device even when it is offline, and get status
information and detailed errors from devices even when they have not been properly
configured (such as when a configuration file fails to load).
The device twin also stores the configuration in the cloud, allowing devices to be safely
re-provisioned without losing the configuration.
For Further Reference
• Application Note: IoTWorX – Quick Start

IoTWorX & Internet of Things - Device Management & Configuration
108
• Help: Device Twins
Enhancements to IoT Projects
The layout of IoT projects in Workbench has been enhanced in 10.96. Some of these
improvements include:
• All devices configured in the Azure IoT Hub are automatically detected
• Devices can be grouped or hidden
• Wizard to configure modules such as SNMP, IoT Visualizer, and Mosquitto
• Use template configurations to apply similar configurations to multiple devices
• Create configuration and deploy in one step
Note that projects and templates created with a 10.95 version may not benefit from
these enhancements.
For Further Reference
• Application Note: IoTWorX – Quick Start
• Help: IoT Gateway Configuration in Workbench
Create 10.95 IoT Projects and Templates
(Reference ID: 67525)
For backwards compatibility, users can configure an IoT project to manage 10.95 edge
devices.
When creating a new IoT project, set the Template Version to 10.95. Templates and
devices configured in this project will be usable with edge devices running version 10.95
IoTWorX software.
Creating a specific 10.95 project is best for users that have a large number of 10.95 edge
devices, but for those who only have a few edge devices, a better option is to create a
single 10.96 project, then within that project create a 10.95 template. When creating a
new device template, set Template Version to 10.95. (Users can also create 10.96
templates within a 10.95 project.)
Note that 10.95 templates cannot benefit from new 10.96 features, such as device twins.
This means that 10.95 devices must be online and provisioned to be managed via the
IoT project, and the process may be slower than working with 10.96 devices.
For Further Reference
• Application Note: IoTWorX – Quick Start
• Help: Create 10.95 IoT Projects and Templates

IoTWorX & Internet of Things - Device Management & Configuration
109
Edge Device Landing Page
(Reference ID: 67707)
Version 10.96 edge devices now have a landing page when navigating to
http://deviceIpAddress. This landing page is lightweight and responsive.
This landing page provides easy access to both the IoT Visualizer and the Diagnostics
and Configuration pages, eliminating the need to remember the specific URLs for these
handy pages.
For Further Reference
• Help: IoTWorX Console
Configure Multiple Devices with Templates
(Reference ID: 60931, 60501)
Starting in 10.95.3, users can use Device Templates to configure to multiple devices
simultaneously.
Devices are organized into device groups. Edit a device group and set the
Configuration Template. The template will be applied to every device in the group by
default.

IoTWorX & Internet of Things - Device Management & Configuration
110
Individual devices can override this and use a different database for some or all of their
applications. To set a specific database for a device, open Configure Application
Settings for the device, go to the Server Applications section, check the Override
Template box for the desired application, then set a database (Catalog column) for that
application. Apply the changes. Once an application's database has been overridden,
changes to that application can be configured under the device itself, otherwise it must
be configured under the template.
Templates include a folder for Nodes. Nodes associate connection strings for publishers
and subscribers with specific devices. This allows the user to use a single template
database for many devices even though each device may require different connection
strings.
Once the template and device have been configured, right-click on the device or device
group and select Deploy Device(s) Configuration. This will deploy the associated
configurations to the device or devices in question.
For Further Reference
• Application Note: IoTWorX – Quick Start
• Help: Device Templates
Deploy Custom Files to Devices
(Reference ID: 66707)
Users can now configure custom files and certificates to deploy to a remote edge
device. This allows the user to easily send Mosquitto configuration files, certificates,
KPIWorX symbols, and other files to a device.
To designate files to send, open Workbench, expand your IoT project > Device
Templates > your template > Project Files > Archives. Create a new archive, then add
your files to the appropriate sections. Add a node to Project Files > Nodes to associate
your archive with one or more devices. When the configuration is deployed to the edge
device, these files will be deployed to the device as well. Items on the Files tab will be
deployed into the common data folder (usr/share/ICONICS/).
The Project Files provider is also available for standard (non-IoT) projects. See New:
Project Files.
For Further Reference
• Help:
o Device Templates
o Deploy Custom Files to Devices

IoTWorX & Internet of Things - Platform Services
111
Platform Services
Major Enhancements
Support for ICONICS Security
(Reference ID: 67839)
Edge devices can now contain a security configuration. This allows the IoT Visualizer to
be secured and for system administrators to limit the actions certain users can take via
the Visualizer.
The edge device security configuration is based on ICONICS suite security, but with a
limited set of features based on the features that are available on edge devices.
For Further Reference
• Application Note: IoTWorX – Security and GenEvent
• Help:
o IoT Visualizer
o Support for Security
Support for GenEvents
(Reference ID: 67902)
GenEvents on the edge device can now be recorded and viewed locally in the IoT
Visualizer. GenEvents are logged for incidents such as a user writing to a point or
logging in.
For Further Reference
• Application Note: IoTWorX – Security and GenEvent
• Help:
o IoT Visualizer
o Support for GenEvents
REST Interface for Third Party Containers
Other containers running on an edge device can communicate with IoTWorX containers
using the REST API. This allows partners and systems integrators to create their own
containers to integrate with ICONICS components on an edge device.
For Further Reference
• Application Note: (available upon request)
• Help: What is an IoT Device?

IoTWorX & Internet of Things - Communicator Modules
112
GenBroker and Health Monitor
(Reference ID: 63672)
As of 10.95.4, GenBroker and Health Monitor support were added to the IoT device
installation.
Version 10.96 IoT edge devices do not currently support GenBroker or Health Monitor,
but these configurations are still supported when deploying and managing 10.95 edge
devices.
For Further Reference
• Help: IoTWorX Console
Communicator Modules
Major Enhancements
MQTT Broker Module
(Reference ID: 67831)
To make it easier to talk to devices that send MQTT messages, when deploying modules
to an edge device, users can choose to deploy the Mosquitto MQTT broker.
This functionality is part of our new Information Broker. See the sections on New:
Information Broker.
For Further Reference
• Help: MQTT Brokers
Modbus Module
When deploying modules to an edge device, users can choose to deploy the Modbus
Point Manager module, allowing the data collection from Modbus devices without
having to install a separate OPC server on the edge device.
For Further Reference
• Help: Modbus Module
BACnet Module Under Construction
BACnet connectivity for the 10.96 IoTWorX edge devices will be introduced in a future
update.

IoTWorX & Internet of Things - New: IoT Hyper Collector
113
Note that users who require BACnet connectivity can continue to use the 10.95 version
of the IoTWorX edge software, and that version 10.96 servers can communicate with and
deploy to 10.95 edge devices. (See Create 10.95 IoT Projects and Templates.)
Please contact your local sales representative or email [email protected] with questions
or feedback.
New: IoT Hyper Collector
(Reference ID: 66536)
Replacing the IoT Collector module, the IoT Hyper Collector allows local data to be
buffered locally, allowing store-and-forward capability and historical playback on the
edge device. Logged historical data can be sent via Azure IoT Hub or Platform Services.
The Hyper Collector allows multiple collection rates, multiple loggers, and absolute
deadband for points to give a lot of control of the number of messages being sent.
The Hyper Collector is based off of Hyper Historian. Hyper Historian users will be
familiar with the configuration dialogs of Hyper Collector, giving them a more consistent
experience across products.
The configuration of historical publish lists has been simplified. Rather than having a
specific publish list for historical points, users can now configure a single publish list for
both real-time and historical points and enable which points should be buffered on a
point-by-point basis. (See Publish List Configuration Simplified.)
For Further Reference
• Application Note: IoTWorX – Hyper Collector
• Help: Collector
IoT Visualizer
Major Enhancements
Writing to Points
(Reference ID: 68514)
A new widget, the KPI Process Point, allows Visualizer users to write to points.
Writing to points can be secured with the new security features for IoTWorX. See
Support for ICONICS Security and Support for Security.)

IoTWorX & Internet of Things - Internet of Things Workbench Provider
114
For Further Reference
• Help:
o IoT Visualizer
o Writing to Points
Support for Security
(Reference ID: 67385, 67386)
The Visualizer can now be secured. Security can be configured for an edge device to
require users to log into the Visualizer to access certain functionality.
See Support for ICONICS Security for more details about security in IoTWorX edge
devices.
For Further Reference
• Application Note: IoTWorX – Security and GenEvent
• Help:
o IoT Visualizer
o Support for Security
Viewing GenEvents
(Reference ID: 68513)
A new widget, the alarm viewer, allows Visualizer users to see GenEvents.
See Support for GenEvents for more details about GenEvents in IoTWorX edge devices.
For Further Reference
• Application Note: IoTWorX – Security and GenEvent
• Help:
o IoT Visualizer
o Viewing GenEvents
Internet of Things Workbench Provider
Major Enhancements
Enhancements to MQTT Support, Including Datasets
(Reference ID: 67831, 66597)
Prior to version 10.96 users were able to publish or subscribe simple messages to MQTT
brokers. Now, users have the ability to send and receive datasets.

IoTWorX & Internet of Things - Internet of Things Workbench Provider
115
MQTT communication requires some configuration in Workbench. First, under Internet
of Things > MQTT Broker, an MQTT broker connection must be configured. Then
under Internet of Things > Subscriber Connections, a subscriber with a Connection
Type of MQTT must be configured. In the MQTT Basic Settings section, go to MQTT
Broker and choose the MQTT broker object you created earlier.
Once that is configured the tag browser should contain a new item under the Internet of
Things. The new item should have the same name as your subscriber connection, and
under it should be the Publish method.
To call the new Publish method, users can invoke the Call Method global command, run
a GraphWorX64 script using FwxClientWrapper.MethodCallAsync, or call the new
BridgeWorX64 Information Broker Publisher activity. This allows you to send information
to the MQTT broker.
To receive information from the MQTT broker, use an event client (such as
AlarmWorX64 Viewer or BridgeWorX64) to subscribe to the subscriber connection
object under Internet of Things in the tag browser. (This is the same object that
contained the Publish method.)
If the incoming information is a JSON, a custom JSON decoder can be used to transform
the message to a dataset that can be used by ICONICS clients. In Workbench, create a
custom decoder under Internet of Things > Custom Encoders/Decoders. Set Plugin
to CustomJson and Message Type to The whole message is a dataset. Then select
your MQTT subscriber connection under Subscriber Connections, choose your decoder
as the Default Decoder, go to the Dataset Support section, and choose whether you'd
like to overwrite or append values as new updates arrive from the MQTT broker.
The dataset should now be browsable under Internet of Things as your subscriber
connection name. This dataset can be read by a GridWorX Viewer, BridgeWorX64, or
other clients that work with datasets.
This functionality is part of our new Information Broker. See the sections on New:
Information Broker.
For Further Reference
• Application Note: ICONICS - Information Broker MQTT Quick Start
• Help: MQTT Broker

IoTWorX & Internet of Things - Internet of Things Workbench Provider
116
Publish List Configuration Simplified
In version 10.95, there were three types of publish lists, real-time, historical, and
analyzer. Now, in version 10.96, there is only a single type of publish list. All real-time
and historical settings can be configured in the single publish list. This not only
simplifies the configuration but also eliminates the need to have multiple publish lists
for the same set of points if they are to be published in different ways.
To create the equivalent of the real-time or historical publish lists, go to the Published
Points tab of your publish list and enable the appropriate boxes for the type of
publishing you would like to do for each point. The same point can have multiple
publishing options enabled.
For real-time publishing, enable Real Time Publishing. For historical publishing, enable
Local Buffering and HDA or Cloud Buffering and HDA. (Local buffering makes the
data available locally on the edge device to the IoT Visualizer, and cloud buffering
makes it available via the cloud to remote servers and Hyper Historians. Local buffering
is required to enable cloud buffering.)
For analyzer publish lists, create an Analyzer Group under your device template, then
on the publish list's General tab choose that group for Analyzer Group.
In addition, the collection rate for samples used to be specified in the publish list. Users
who wanted to collect different tags at different rates needed to use a unique publish
list per rate. Now, a new type of object called Collection Groups has been introduced.
To add a new collection group, expand Internet of Things and bring up the properties
of Collection Groups. Add a new item to the list, give it a name and collection rate.
Once a collection group has been created it can be used in your publish list. In the
publish list properties on the General tab, a default collection group can be chosen. The
collection rate of this collection group is applied to all points in the publish list except
where specified on the Published Points tab. To change a point's collection rate from
this default, go to the Published Points tab and change the Collection Group for that
tag.
For Further Reference
• Application Notes:
o IoTWorX – Quick Start
o IoTWorX – Hyper Collector
o IoTWorX - Analyzer
• Help:
o Publish Lists

IoTWorX & Internet of Things - Internet of Things Workbench Provider
117
o Publish List Configuration Simplified
New Custom Encoder Keywords
(Reference ID: 61098, 62662)
IoTWorX configurations now have additional keywords available for Custom Encoders.
These keywords were available starting in 10.95.3 but were only browsable in the
keyword selection form as of 10.95.4.
• ACCESSRIGHTS - Point access rights property (byte) – e.g. 1 = READ, 2 = WRITE, 3
= READ WRITE.
• DESCRIPTION - Point description property (string).
• FORMAT - Point format property (string).
• HIGHRANGE - High range of point AnalogRange property (double).
• LOWRANGE - Low range of point AnalogRange property (double).
• MEMBER - Represents a complex object that wraps properties such as value,
description, etc. Each property will be exposed as a specific point. It can only be
used for decoders.
• UNITS - Point units property (string).
For Further Reference
• Help:
o Keyword Selection Form Window
o Custom Encoders/Decoders
Additional Enhancements
Ref ID
Description
First Available In
63663
63661
63662
Added a "Select All" option to the context menu to the "Configure Device Group Settings"
dialog, the "Create IoT Packages" page, and the "Deploy Packages" page.
10.95.4
61111
After deleting items from the registry and selecting "Update IoT Nodes and Connections", the
old connections and nodes will now be deleted.
10.95.3
56751
Previously, when creating an IoT project all the devices would initially appear as offline.
Selecting Update Devices would show them as online and able to be configured. This has been
improved - the devices should show their correct status immediately after creating an IoT
project.
10.95.1

IoTWorX & Internet of Things - IoT General
118
IoT General
Additional Enhancements
Ref ID
Description
First Available In
63400
Enhanced the TraceWorX messages logged when publishing a list that contains duplicate tag
names to help users identify the source of the issue.
New for 10.96
61454
When tracing at DEBUG_VERBOSE, the IoT Point Manager now logs the first 1024 characters of
received messages. Previously, only the first 100 characters of the message could be logged in
TraceWorX.
10.95.5
63552
Added a button in the Publish List header to remove duplicates.
10.95.4
70536
70537
Starting in 10.95.3, WebSockets communication is supported for AMQP and MQTT.
10.95.3

KPIWorX
119
KPIWorX
Major Enhancements
Support for Apple Watch
(Reference ID: 67803)
New in version 10.96, you can view KPIs on your wrist using
the KPIWorX app and your Apple Watch!
KPIWorX on the Apple Watch can support a variety of charts
such as pie, donut, bar, column, and line. It can use the same
data sources as standard KPIWorX, from OPC to databases
to web services and more. Watch users can use the crown to
scroll through a trend history or highlight different bars in a
bar chart to see more information.
Watch decks are configured in KPIWorX on your desktop,
tablet, or phone, then viewed on the watch. Swipe to the
side to get to the next chart in the deck.
Multiple decks can be configured and can even be linked with location data. When
choosing a deck in the watch, the decks are sorted by distance, with the closest ones at
the top of the list. This makes it easy to find the deck most relevant to your current
location.
Data on the watch comes from live data sources and refreshes once every twenty
seconds or when the chart is first loaded. A refresh can also be triggered via 3D touch.
KPIWorX support for Apple Watch requires Apple Watch Series 2 or later.
For Further Reference
• Application Note: KPIWorX – Support for Apple Watch
• Help: Using KPIWorX on Apple Watch
Enhanced Sizing of Widgets
(Reference ID: 66930)
Previously, it could be difficult to get the data you wanted on one dashboard, especially
when working with smaller devices. Charts and other widgets could wind up squished,
as shown below:

KPIWorX
120
We made several improvements to try to make displays act better when the vertical
space is limited.
First was an enhancement to the size of rows in grid mode. In previous versions, adding
more rows to a dashboard would keep the same vertical canvas size and simply shrink
the row height. Now the row height is restricted to not go below a minimum value. This
value is set as a proportion of the window size. If adding more rows or shrinking the
window size would make the rows go below that minimum height, the canvas is
expanded instead, and a scroll bar is added.
Second, we improved the behavior of many widgets when rendered at a small size. For
example, filter widgets change from a scrollable list to a dropdown menu.
The end result is a much better looking and easier to use dashboard at a smaller
window size.

KPIWorX
121
For Further Reference
• Help: Add and Modify Widgets
Security for KPIWorX Application Actions
(Reference ID: 55320)
Security now includes a set of KPIWorX application actions, allowing better control over
KPIWorX's behavior and the ability to define different behavior for different users.
The KPIWorX application actions include:
• Data Browser
o Show Asset Navigator
o Show Data Tag Browser
o Show Favorites
• Edit Filters
• Edit Mode
• Edit Navigation
• Menu
o File New
o File Open
o Layout Management
o Location
o Reset
o Save
o Save As
o Save As Default
o Show Header
o Symbols
o Themes
o Watch Mode
• Share
The previous way to alter these settings (such as starting in presentation mode) involved
editing config files, and they applied to all users. These configuration file flags are no
longer supported in favor of the more intuitive and granular application actions.
For Further Reference
• Help: Security for KPIWorX Application Actions

KPIWorX
122
Enhanced Filtering
(Reference ID: 67800)
There are now three types of filters in KPIWorX. The filters that existed previously, which
could be applied in presentation mode by selecting parts of a widget, are now called
"runtime filters". In addition to runtime filters, KPIWorX can now have widget-level filters
and dashboard-level filters (sometimes referred to as global filters).
Widget-level filters and dashboard-level filters work in similar ways. They are
configurable in edit mode only. They can only work with data coming from AnalytiX-BI.
They both require the user to choose a column, select either a basic or advanced filter,
and choose the filter properties. They both can filter on more than one column at a
time.
If more than one filter type is active at once, data must match all active filters in order to
be shown.
Widget-Level Filter
Widget-level filters are configured on the Widget Property panel in the Filters section.
Drag a column into the field and configure it as either a basic or advanced filter. More
than one column can be added at a time. Widget-level filters are static (no aliases or
dynamic data sources).
Widget-level filters are designed to give users an easy way to remove unwanted data
from certain widgets without having to create new AnalytiX-BI views or dataflows for
each unique widget.
Dashboard-Level Filter
Dashboard-level filters are
configured from the filter button in
the Home menu's Edit section. Drag
a column onto the page and
configure it as either a basic or
advanced filter. Dashboard-level filters can filter based on the logged-in user. (See the
Filter Based on Security Context section below.)
Dashboard-level filters are designed to focus a dashboard on a particular area, such as a
particular point in time or a particular asset.

KPIWorX
123
Dashboard-level filters differ from runtime filters (the type of filters available prior to
10.96) in several ways. Runtime filters require a widget, whereas dashboard-level filters
do not. Dashboard-level filters cannot be changed in presentation mode, and do not
appear as part of the filters panel. Runtime filters will persist if the user follows a link to
a new dashboard, dashboard-level filters will not.
Runtime Filter Panel
Runtime filters, previously the
only type of filter available for
KPIWorX, now have a filter panel
that shows all active runtime
filters.
This panel is available in the
header next to the security login
and edit/presentation mode
buttons. The number next to the
icon shows the number of filters currently applied. The filter panel can be used to see
the active runtime filters, undo or redo filters, clear specific filters, or clear all filters at
once.
Filter Based on Security Context
Dashboard-level and widget-level filters in advanced
mode can take advantage of two new aliases:
• @@user – The currently logged user or empty
string if no user is logged in.
• @@customid - The value of the custom identifier
field for the currently logged-in user. This field is
configured for each user in Workbench under the
security provider.
These aliases are case-insensitive and cannot be
combined with any other characters when used in a filter.
An example use case for these filters is to create a
database table that maps usernames or custom
identifiers to assets in your AssetWorX tree, then add
that table into your AnalytiX-BI data model. You can then add a dashboard-level filter to
restrict the dashboard to only the assets relevant to the logged-in user.
Filter Types Comparison
This table provides an overview of the three types of filters and how they can be used.

KPIWorX
124
Characteristic
Runtime
Dashboard-Level
Widget-Level
Scope
Entire dashboard
Entire dashboard
Widget only
Configuration
From presentation
mode, select value
in widget
Home > Filter
Widget Settings
panel
Changeable in edit
mode
❌
✔
✔
Changeable in
presentation mode
✔
❌
❌
Can be saved with
dashboard
✔
✔
✔
Persist when following
dashboard links
✔
❌
❌
Visible in filter panel
✔
❌
❌
Filter based on security
context
❌
✔
✔
For Further Reference
• Help: Enhanced Filtering
Tables and Symbols Can be Dashboard Links
(Reference ID: 47879, 55397)
Prior to 10.96, users could configure a charts widget's behavior to be "link", so when a
user selected a chart element they would be taken to a new dashboard, filtered to that
element.
New in 10.96, symbols and tables can also have these links. This gives dashboard
designers more navigation options. When following one of these links, any runtime
filters will persist, applying to the new dashboard.
Tables are configured similarly to charts. In edit mode, select the widget and go to the
Widget Settings panel. In the Behavior section, choose the link option, then fill the
Target field with the link name of your target dashboard. Choose a NavigationColumn.
The navigation column determines the filter that gets added to the new page – the
chosen column will be filtered on the value of that column in the selected row.
KPIWorX
125
Symbols simply have a Target field on the Widget Settings panel. Clicking or tapping
anywhere on the symbol will take you to the target dashboard.
See the next section, Share Dashboard Name, for an easier way to get the right name to
put in the target field for any of these links.
For Further Reference
• Application Note: KPIWorX – Creating Dashboard Links
• Help: Tables and Symbols as Dashboard Links
Share Dashboard Name
(Reference ID: 47879)
Users have had the ability to load a KPIWorX
dashboard via a command from GraphWorX64 or
AssetWorX, or to specify a target dashboard for
chart links, but it has always been a challenge to
find the appropriate dashboard name.
Now, users can choose the Share option on a
dashboard and pick Dashboard Name. This will
retrieve the proper dashboard name for use in
commanding and the Target field of widgets.
The user can email this name or copy it to the
clipboard.
Note, this option only appears when sharing a dashboard that has been saved.
For Further Reference
• Application Note: KPIWorX – Creating Dashboard Links
• Help: Share Dashboard Name
Set Widget Order in Stack Mode
(Reference ID: 71780)
At certain aspect ratios where the horizontal space is limited (such as on a phone
screen), KPIWorX dashboards go into stack mode. In stack mode, the widgets are
displayed in a vertical line (or "stack"), and the dashboard is scrollable.
Stack mode is not new in 10.96, but what is new is the ability to reorder stacked widgets.
Sometimes when entering stack mode, the order KPIWorX puts the widgets in is not the
same order in which an operator would prefer to see the widgets. Now, when this
happens, the stack order can be adjusted.

KPIWorX
126
To change the widget order, view your dashboard in edit mode and in stack mode (on a
desktop, resize your browser, shrinking it horizontally, until you see your widgets align
themselves in a stack), then activate a widget and use the arrows on the top or bottom
of the widget to change its order.
Changing the order in stack mode will not affect the widget order in standard mode.
Widgets will retain their order in stack mode even if the dashboard is toggled in and out
of stack mode.
For Further Reference
• Help: Set Widget Order in Stack Mode
Theme Manager
(Reference ID: 70532, 70533, 70534, 70535)
Starting in 10.95.3, KPIWorX includes a Themes button in the Settings menu.
Themes allow the user to customize the colors of various KPIWorX elements, including:
• Header colors
• Navigation colors
• Browser/Property grid colors
• Canvas color
• Widget colors
KPIWorX comes with a number of pre-built themes and allows the user to customize
and save their own themes and apply them across multiple dashboards.
For Further Reference
• Help: Modify Dashboard Layout and Style
Additional Enhancements
Ref ID
Description
First Available In
67951
Added a new "Current Day" preset to the calendar widget.
10.95.5
62529
Favorites now allow folders instead of just points.
10.95.4
62530
Enhanced the "favorites" feature. There are now public and private favorites, similar to Asset
Navigator favorites. Public favorites are available to everyone (including users who are not
logged in), and private favorites are only available for logged-in users.
10.95.4

KPIWorX
127
Ref ID
Description
First Available In
63542
KPIWorX now allows resizing the navigation and saved Dashboards side panel.
10.95.4
65408
Ctrl-C and Ctrl-V can now be used to copy and paste widgets.
10.95.4

MobileHMI & HTML5 WebHMI - Common
128
MobileHMI & HTML5 WebHMI
Note, features common to the desktop (WPF) platform will be listed in the desktop
sections and not in this. For example, features common between MobileHMI's
TrendWorX64 Viewer and the desktop TrendWorX64 Viewer will be listed only in the
TrendWorX64 Viewer section. Features in this section are specific to MobileHMI apps
and the HTML5 WebHMI.
Common
Major Enhancements
Mobile Device Health for CFSWorX
(Reference ID: 66092)
A key feature of ICONICS' new CFSWorX product is the ability to send notifications to
workers based on their locations and other information received from their devices. To
support this ability, the MobileHMI apps for iOS, Android, and Universal Windows
Platform (UWP) were enhanced to provide this information to the server.
The mobile health information provided is:
• Position
• Battery status
• Signal strength
See the application note, CFSWorX – Setting up Mobile Device Health for more
information on how to configure mobile health data for CFSWorX.
For Further Reference
• Application Note: CFSWorX – Setting up Mobile Device Health
• Help: Setting Up Mobile Device Health
Remote Expert Mode
(Reference ID: 63760)
An exciting new feature for MobileHMI is Remote Expert Mode. This feature allows users
to take a mobile device, such as a tablet or a wearable like RealWear's HMT-1, into the
field to look at an issue and elicit help from a remote expert who might be sitting in an
office or at home. With remote expert mode, your experienced technicians can better
get that expertise out into the field.

MobileHMI & HTML5 WebHMI - HTML5, iOS, Android
129
The worker can engage in a video call with the remote expert, sharing what he's looking
at. The worker can also share a video still with the remote expert, who can make
annotations to help the worker understand what steps need to be taken to solve the
issue.
For Further Reference
• Application Note: MobileHMI - Remote Expert Mode
• Help: Remote Expert Mode
HTML5, iOS, Android
Major Enhancements
Feature Parity Improvements
HTML5 browsers and the MobileHMI apps for iOS and Android can now use the
following controls and functionality that were previously only available in the desktop
GraphWorX64 app (WPF) or the Universal Windows Platform (WPF) MobileHMI app.
• New in 10.96
o Camera control (see HTML5 Support) [67811]
o Web browser control [40664]
o Clone dynamic in popup menus [59969]
o Target property for drag and drop commands [63836]
• Added in 10.95.4
o Data Explorer custom styles for its GridWorX, TrendWorX64, AlarmWorX64,
and Schedule Viewer components [62571]
• Added in 10.95.3
o Schedule Control
▪ BACnet Calendar View [62608]
▪ BACnet Schedule View [62608]
▪ Weekly view [62655]
▪ Holidays view [62660]
▪ Exceptions view [62661, 62723]
▪ Support for saving changes to schedules [62726]
o AlarmWorX64 Viewer's Flip View [62684]
There have been more smaller feature parity improvements as well. See the Additional
Enhancements section for more details.

MobileHMI & HTML5 WebHMI - HTML5, iOS, Android
130
HTML5 Support for Integrated Authentication
(Reference ID: 63760)
As of 10.95.4, HTML5 supports Integrated Authentication with ICONICS security, where
possible. Note, not all browsers support this functionality, and the system must be
configured to meet these specifications:
1. Both the server and the clients must be joined to the same domain (or trusted
domains).
2. The IIS Application Pool of AnyGlass (IcoAnyGlass) must run under the
LocalSystem account. (This is the default when installing.)
3. The Authentication settings of the AnyGlass application in IIS must allow
“Windows Authentication” and must disallow “Anonymous Authentication”.
4. In the FrameWorX Server Location dialog, on the Servers tab, the Client
Authentication must be set to “Integrated Windows Authentication”.
5. In Workbench, Security must be connected to Active Directory, and the
Automatic log in option must be Enabled (this is the default).
Known Supported Browsers
• Internet Explorer – Works out of the box.
• Edge – Works from a remote machine, but not from the same machine as the IIS
server. This is a known Edge issue.
• Firefox – Additional configuration is necessary (it is required to add the server url
into network.negotiate-auth.trusted-uris).
Known Unsupported Browsers
• Chromium browsers (Chrome, Opera, etc.) – There is a known issue in
Chromium which causes the NT-based login to fail for WebSockets. As
WebSockets are necessary for HTML5 deployment, this means that these
browsers cannot support Integrated Authentication until the issue is fixed. As of
the publishing of this document, the issue has not yet been fixed, but it seems
likely that it will be in the near future. For more information about this Chromium
issue, see https://bugs.chromium.org/p/chromium/issues/detail?id=423609.
For Further Reference
• Help: HTML5 Support for Integrated Authentication

MobileHMI & HTML5 WebHMI - HTML5, iOS, Android
131
Additional Enhancements
MobileHMI & HTML5 Common
Ref ID
Description
First Available In
52392
More target types were added to the Load Display command in HTML5. Load Display now
supports all of the same target types as desktop (WPF) except for the popup types.
New for 10.96
55511
Users attempting to open HTML5 displays in versions of Internet Explorer older than version 11
will be given a "Your browser is not supported" message.
New for 10.96
56561
Optimized the HTML5 server to reduce memory consumption.
New for 10.96
57255
The HTML5 context menu can now be customized by editing the ico.anyglass.parsing.config
file. Edit the file and set the various elements to "false" to disable them. The home page link
can also be customized by editing the HomeUrlItem value.
New for 10.96
60565
Users should no longer need to clear their cache after updating the HTML5 server to get the
latest updates.
New for 10.96
65496
68676
Improved the performance of scrolling using the mouse wheel or dragging the scroll bars.
New for 10.96
68647
Reduced the amount of "_waitForClient" messages logged into the Windows Application event
log.
New for 10.96
70114
The screen size threshold for hiding the login button in the upper right corner of the AppHub
has been changed so that 1334x750 resolution devices (such as the iPhone 8) will show the
login button. Previously, devices of this size were hiding the login button.
New for 10.96
70559
The http://ipAddress/anyglass/ landing page has been redesigned for cosmetic purposes and
for easier access to common links.
New for 10.96
63736
67377
67379
Added two new options in the ico.anyGlass.clientCommunicationLayer.config file (located by
default in Program Files\GENESIS64\WebSites\AnyGlass\Bin) to increase the security of
cookies:
<ForceHttpsCookie enabled="false" />
<CookieLifetime value="5000000" />
The ForceHttpsCookie option, when set to true, will set the Secure flag for cookies that
ICONICS HTML5 pages use. This ensures that cookies will only be transmitted across encrypted
connections (HTTPS). Note that when this setting is true your HTML5 pages will no longer
function over HTTP.
CookieLifetime is the time in minutes that the cookies will exist. Set a value of -1 to indicate
that cookies will expire when the session ends.
The default values for these settings are consistent with the behavior in previous versions.
In addition, the HttpOnly flag has been enabled for the ICONICS HTML5 cookies.
10.95.5
63737
Session tracking cookies are now regenerated after a user logs out and back in.
10.95.5
62517
Configured sounds (such as alerts in the AlarmWorX64 Viewer) should now play in HTML5
displays. There is no additional configuration required.
10.95.4
62860
Multilevel popup menus (popup menu pick actions configured inside popup menus) are now
supported in HTML5 displays.
10.95.2
MobileHMI & HTML5 AlarmWorX64 Viewer
Ref ID
Description
First Available In
71079
71080
The desktop (WPF) and Universal Windows Platform (UWP) AlarmWorX64 Viewer pie and
donut charts now show values when the ShowFieldName advanced property is enabled.
Previously they only showed the name and not the value. This makes the behavior consistent
with the HTML5 AlarmWorX64 Viewer.
New for 10.96
61430
The default value for the acknowledge dialog is now "Selected Items" instead of "All Items".
This was changed to help prevent the accidental acknowledgment of more alarms than
intended.
10.95.5

MobileHMI & HTML5 WebHMI - HTML5, iOS, Android
132
Ref ID
Description
First Available In
62972
50322
Added support for flip view to the AlarmWorX64 Viewer.
10.95.1
MobileHMI & HTML5 AssetWorX Navigator
Ref ID
Description
First Available In
71166
Added a Read Default Commands property to the Asset Navigator. This is configured on the
Controls tab in the Selected Asset section.
When this property is disabled it prevents assets selected using the "Read Data Source" data
source from triggering the default command. Selecting assets by other means (such as clicking
or tapping on them in the Asset Navigator) will still trigger the default command.
This property is enabled by default, which is consistent with the behavior in previous versions.
New for 10.96
MobileHMI & HTML5 Data Explorer
Ref ID
Description
First Available In
62571
The HTML5 Data Explorer control now supports custom styles for its GridWorX, TrendWorX64,
AlarmWorX64, and Schedule Viewers.
10.95.4
MobileHMI & HTML5 Fault Viewer
Ref ID
Description
First Available In
63793
The legacy FDDWorX Viewer did not support runtime column filtering in HTML5. This feature is
supported in the new Fault Viewer.
New for 10.96
MobileHMI & HTML5 GraphWorX64
Ref ID
Description
First Available In
59907
Holding down the middle mouse button now allows the user to pan around GraphWorX64
HTML5 displays.
Note, desktop (WPF) uses Alt+middle mouse button to perform a pan, however this
combination was not possible to use in a browser.
New for 10.96
61219
The load display TargetType of "New Instance (Separate Process)" is now supported in HTML5.
It opens the display in a new tab.
Note that Internet Explorer's behavior is slightly different than other browsers when clicking on
the same "new instance" load display button multiple times. Instead of opening multiple tabs,
it will reload the display in the already opened tab. This is a limitation of Internet Explorer.
New for 10.96
61482
Added a box zoom functionality. Hold down ALT and drag a rectangle with the left mouse
button to designate a zoom area.
New for 10.96
61737
In HTML5, pick actions triggered by the PressedWhen property would trigger any time the
data source changed, and the resulting value matched the trigger condition. This has been
changed to be consistent with desktop (WPF) GraphWorX64, where the pick action is only
triggered when the condition changes from false to true.
New for 10.96
65499
The "localsim:property:Source" and "localsim:property:OriginalSource" variables are now
supported in HTML5 displays. (Previously the Source and OriginalSource properties were only
available for embedded GraphWorX64 Viewers.)
New for 10.96
67425
The source property of an embedded GraphWorX64 Viewer now always returns the full path to
the display. Previously it could return a full or partial path, depending on how the source for
the viewer was set.
New for 10.96
69228
There are new non-scripting ways to get the context of an embedded GraphWorX64 Viewer.
Users can access "localsim" variables to get the source display name and current global aliases.
For example, if we assume the GraphWorX64 Viewer is named "gwx1", these variables can be
accessed to get the source and global aliases, respectively:
New for 10.96

MobileHMI & HTML5 WebHMI - HTML5, iOS, Android
133
Ref ID
Description
First Available In
localsim:property:gwx1.Source
localsim:property:gwx1.CurrentGlobalAliases
64941
ImageBrushes are now supported in HTML5 primitives, like paths or polygons.
10.95.5
68363
Clicking and holding the left/right or up/down arrows on a scrollbar will now continue scrolling
after a small delay. Previously it would only scroll one time, regardless of how long the button
was held down.
10.95.5
62528
Added a ReleaseDataWhenHidden property for all of the primary panel types, such as grid,
stack panel, and wrap panel. This property behaves the same as the ReleaseDataWhenHidden
property on layers, except ReleaseDataWhenHidden defaults to true for layers and false for
panels (to ensure compatibility with previous versions).
10.95.4
63449
Added support for the localsim:property:Width, localsim:property:Height,
localsim:property:ActualWidth, and localsim:property:ActualHeight properties inside
embedded GraphWorX64 Viewers.
10.95.4
63805
Multi-line tooltips are now supported.
10.95.4
61035
Extremely large font sizes (such as 600 point) are now properly displayed in HTML5 displays.
10.95.3
62596
51299
Drag and drop is now supported in HTML5 displays. Commands from buttons (if enabled) and
from the Asset Navigator (if enabled on the commands configured in Workbench) can be
dragged to certain viewers like GraphWorX64 Viewer, AlarmWorX64 Viewer, and
ScheduleWorX Viewer. Process points can also be dragged (if enabled) into a TrendWorX64
Viewer, which creates a new pen.
10.95.3
62631
HTML5 Smart Pins now support the NoZoom property.
10.95.3
62761
The value in a data entry process point is no longer written when the field loses focus by
default. The user has to press Enter or Tab. This is now consistent with WPF GraphWorX64.
10.95.3
62793
Added a loading indicator to HTML5 GraphWorX64 Viewers.
10.95.2
62795
Tooltips are now supported in HTML5. On touch devices, tooltips will be displayed during a
long tap.
10.95.2
62801
Data entry is now supported for datetime process points in HTML5. The implementation is the
same as what was added in version 10.95 for desktop (WPF) and Universal Windows Platform
(UWP).
10.95.2
62802
HTML5 TimeDate dynamics now support the TimeDateKind property.
10.95.2
62828
HTML5 displays will now use the display's Title property as the HTML title (displayed in the
browser title bar or tab).
10.95.2
62837
The localsim::currentPanX, localsim::currentPanY and localsim::currentZoom variables are now
writable in HTML5 displays. This is now consistent with the desktop (WPF) behavior.
10.95.2
57321
The @@self, @@parent, and @@ancestor[n] keywords for localsim:property tags are now
supported in HTML5 displays.
10.95.1
63032
53378
The PressedWhen property of pick actions, which allows the pick action to be triggered by a
data source, is now supported in HTML5 displays.
10.95.1
63046
Users can now add a carriage return to the end of the text of a data entry using Shift + Enter.
10.95.1
63089
HTML5 split panels now support the SplitterThickness property.
10.95.1
MobileHMI & HTML5 GridWorX Viewer
Ref ID
Description
First Available In
67949
Changed HTML5 GridWorX chart cursor behavior to be consistent with the desktop (WPF)
version. Previously they were always visible in HTML5 charts. Now, cursors are now disabled by
default. They can be enabled in the configuration, or via the runtime context menu, as in the
desktop version.
10.95.5
MobileHMI & HTML5 Schedule Control
Ref ID
Description
First Available In
62542
The HTML5 BACnet Schedule Viewer now attempts to save calendar entries by list modification
instead of saving the entire property value. If the list modification fails (for instance, if it is not
supported by the device), it will fall back to saving the entire property value.
10.95.4

MobileHMI & HTML5 WebHMI - Windows 10/Universal Windows Platform (UWP) App
134
MobileHMI & HTML5 TrendWorX64 Viewer
Ref ID
Description
First Available In
65949
The colors automatically chosen for new pens in runtime for HTML5 are now the same as those
chosen in the desktop (WPF) and Universal Windows Platform (UWP) trend viewers.
New for 10.96
63246
Previously, the selection boundaries of the time range in Summary View were very wide. This
was done to make it easier to "grab" using a touch-capable device. However, it made it difficult
to tell exactly where the range began and ended. This has been improved. The boundaries are
now narrower lines. The "grab" area is still the same, so this should not affect the ease of
changing the time range on touch systems.
10.95.4
63329
In 10.95 Update 3, a new feature was added to allow the writing of pen cursor values to
predefined data tags. In the TrendWorX64 Viewer configuration, select a pen, then go to the
Values tab. There is a new section for "Cursors", with checkboxes for "Write first cursor value"
and "Write second cursor value", and browsable fields to choose the data sources for each.
This is now supported in HTML5.
10.95.4
MobileHMI & HTML5 Security
Ref ID
Description
First Available In
64658
Users can now control the security login dialog with voice commands, using "username" and
"password" to move between fields. On RealWear devices, the RealWear built-in keyboard can
be brought up to fill in the username and password by voice, or a QR code can be scanned.
This solves an issue where RealWear users were able to bring up the login dialog with voice
commands, but then could not interact with it.
New for 10.96
MobileHMI & HTML5 Server
Ref ID
Description
First Available In
62094
The 128-character limit was removed from the QR code field.
10.95.4
Windows 10/Universal Windows Platform (UWP) App
Major Enhancements
Enhanced HTTPS Security
(Reference ID: 63782, 63783, 63784)
Several features have been implemented to boost security when using HTTPS.
The user must now explicitly choose between HTTP and HTTPS protocols when
configuring a server connection.
In earlier versions, the user would fill in the name or IP address of the server and the app
would try both HTTP and HTTPS. This could be a security vulnerability, as a malicious
actor could block the HTTPS connection and then intercept or modify the
communication over HTTP. That vulnerability has now been eliminated.

MobileHMI & HTML5 WebHMI - Windows 10/Universal Windows Platform (UWP) App
135
In addition, there is now an Ignore certificate errors option in the server configuration
on the Servers page. Previously, this functionality was always on (always ignoring errors)
in order to allow users to work with self-signed certificates. Now this option is
configurable. When it is disabled, the server must use a valid certificate from a trusted
certificate authority, the certificate must be valid (not expired), and the server address
must match the certificate domain name.
For Further Reference
• Help: Enhanced HTTPS Security
Support for GDFX File Format
(Reference ID: 69864)
Standard GraphWorX64 display files (GDFX) can now be loaded in the Universal
Windows Platform (UWP) app. Displays no longer need to be saved as GDFXP.
The GDFX format is now supported in all three platforms (desktop/WPF, HTML5, and
UWP).
For Further Reference
• Help:
o Creating a New Mobile Display
o Support for GDFX File Format
Compact Overlay
(Reference ID: 64688)
MobileHMI now supports Windows 10's compact overlay feature. This feature
automatically shrinks the window and allows the app to stay on top of other windows,
similar to the "picture-in-picture" feature of some television sets.
Select the button in the title bar to put the app in compact overlay mode.
The display will continue to have all normal runtime functionality in compact overlay
mode. Note that for best results the displays should be designed to be displayed at such
a small resolution using either display scaling or responsive features.
For Further Reference
• Help: Compact Overlay

MobileHMI & HTML5 WebHMI - Windows 10/Universal Windows Platform (UWP) App
136
Windows Mixed Reality Support
(Reference ID: 58617)
The ICONICS MobileHMI UWP app now supports the Windows Mixed Reality platform.
Now, in addition to HoloLens, users with any Windows Mixed Reality device can use
MobileHMI's 3D and mixed reality features.
For Further Reference
• Help: Windows Mixed Reality Support
iBeacon Location Services
(Reference ID: 63763)
The MobileHMI app can now detect iBeacons and automatically execute an action, such
as loading a specific display.
To configure the action for a beacon:
1. Open Workbench.
2. Expand MobileHMI > Configuration.
3. Right-click on Augmented Reality and add a new location.
4. Give the location a name.
5. Set the Type to iBeacon.
6. Set Value to the beacon's GUID. It should be in the format of UUID:Major:Minor.
7. Configure your action in the Actions section.
8. Apply the changes.
When the MobileHMI app is running and the user approaches a beacon, an overlay will
appear that allows the user to trigger the command.
This feature is similar to the functionality to launch commands based on GPS location.
For Further Reference
• Help:
o Augmented Reality
o iBeacon Location Services
Azure-Based Push Notifications
(Reference ID: 68034)
The MobileHMI UWP app previously had push notifications, but they could only be used
for notifying alarms.

MobileHMI & HTML5 WebHMI - Windows 10/Universal Windows Platform (UWP) App
137
Now, in addition to the previous alarm push notifications, there's a new style of
notifications available. These new notifications leverage Azure functionality to deliver
notices to specific devices or specific users. Also, commanding can be used to generate
any custom notification message. It does not have to be linked to alarms or events.
Currently these push notifications are only supported on the UWP platform, and the
UWP app must be customized per organization. Contact your ICONICS sales
representative for information on how to get your own customized version of the UWP
app.
Support for iOS and Android apps is planned for a future version.
For Further Reference
• Help: Azure-based Push Notifications
Updated Client-Side Speech Recognition
Windows 10 clients can now benefit from client-side speech recognition. See Updated
Client-Side Speech Recognition for more details.
Feature Parity Improvements
The MobileHMI UWP app can now use the following controls and functionality that were
previously only available in the desktop GraphWorX64 app (WPF) or HTML5 apps (iOS
and Android).
• New in 10.96
o Smart Symbols [46756]
o Heatmap control [58650]
Additional Enhancements
MobileHMI Windows 10 App (UWP) Common
Ref ID
Description
First Available In
62922
In order to prevent situations where unauthorized users (usually web users) access a
GraphWorX64 page and use up license seats, GraphWorX64 no longer consumes a license
when launched in runtime mode, when no user is logged in, and when no display is loaded
(other than the "File Access Denied" display). As soon as a user logs in, GraphWorX64 enters
configure mode, or a FrameWorX data point is requested a license will be consumed.
10.95.1
MobileHMI Windows 10 App (UWP) AlarmWorX64 Viewer
Ref ID
Description
First Available In
67429
The AlarmWorX64 Viewer and GridWorX Viewer can now sort by the text of a hyperlink
column. Previously, sorting by a hyperlinked column would only sort based on the URL or
serialized command rather than the visible text.
New for 10.96

MobileHMI & HTML5 WebHMI - Windows 10/Universal Windows Platform (UWP) App
138
Ref ID
Description
First Available In
71212
71204
Added a new property to AlarmWorX64 Viewer pie and donut charts called "ShowFieldValue".
When set to true the value is shown in the data labels, when set to false a percentage is shown.
This property can be configured on the Advanced tab of a chart. (Note, this feature is currently
only available for desktop (WPF) and Universal Windows Platform (UWP) platforms. We plan to
add support for HTML5 in a later version.
New for 10.96
MobileHMI Windows 10 App (UWP) Asset Navigator
Ref ID
Description
First Available In
71166
Added a Read Default Commands property to the Asset Navigator. This is configured on the
Controls tab in the Selected Asset section.
When this property is disabled it prevents assets selected using the "Read Data Source" data
source from triggering the default command. Selecting assets by other means (such as clicking
or tapping on them in the Asset Navigator) will still trigger the default command.
This property is enabled by default, which is consistent with the behavior in previous versions.
New for 10.96
MobileHMI Windows 10 App (UWP) GraphWorX64
Ref ID
Description
First Available In
46756
Smart symbols are now supported in the Universal Windows Platform (UWP) app.
New for 10.96
48044
Commanding-related runtime window properties, such as CommandingName,
CommandingDisplayName, and MaxCommandsScope are now available on GDFXP displays.
New for 10.96
MobileHMI Windows 10 App (UWP) GridWorX Viewer
Ref ID
Description
First Available In
67429
The AlarmWorX64 Viewer and GridWorX Viewer can now sort by the text of a hyperlink
column. Previously, sorting by a hyperlinked column would only sort based on the URL or
serialized command rather than the visible text.
New for 10.96
MobileHMI Windows 10 App (UWP) TrendWorX64 Viewer
Ref ID
Description
First Available In
54364
In version 10.95, the Zoom command was enhanced to work with the desktop (WPF)
TrendWorX64 Viewer. Now the HTML5 TrendWorX64 Viewer can work with the zoom
command as well.
New for 10.96
Workbench - New: Project Files
139
Workbench
New: Project Files
New Provider: Project Files, for Backups and Pack-and-Go
(Reference ID: 42104, 66707, 66958)
A new provider has been added that allows users to store files and pack them along
with their Pack and Go project, or simply provide storage and versioning for important
files that may need to be recovered at a later date.
The Project Files provider contains two subfolders, Archives and Nodes. Archive items
define sets of files to store, and Nodes associate those archives with a particular
machine (allowing the same configuration database to be used for multiple machines).
When creating or editing an archive, the user can pick between these Types:
• The archive is used as a simple backup storage – This type of archive is used to
store backups and multiple versions of files. These files will not be packed in a
Pack and Go operation.
• The files in the archive can be restored during Unpack operations – This type
of archive will pack the files in a Pack and Go operation and restore them when
the package file is unpacked.
When choosing the "unpack" type, users can pick one of these Destination Types
where the files will be placed on unpack:
• Anyglass Folder – C:\Program Files\ICONICS\GENESIS64\WebSites\AnyGlass in a
default installation.
• Binaries Folder – C:\Program Files\ICONICS\GENESIS64\Components in a default
installation.
• Common Data Folder – C:\ProgramData\ICONICS in a default installation. (This
is the only option available in IoT projects, and it refers to /usr/share/iconics in
that case.)
• Published Displays Folder – C:\Program
Files\ICONICS\GENESIS64\WebSites\PubDisplay in a default installation.
• Custom Folder – The user can choose a custom location, specified in the
Custom Folder field.

Workbench - New: Project Files
140
When unpacking, all files on the Files tab of this archive will be placed in this location.
They will be placed in the root directory unless a folder is specified as part of the File
Path column. For example, a file with a File Path of Subfolder\Display1.gdfx in an
archive with the Destination Type of Custom Folder and C:\Temp as the Custom
Folder will create a file at C:\Temp\Subfolder\Display1.gdfx when unpacked.
Files in other tabs will be placed in the proper locations based on the tab.
To add files or certificates, go to the appropriate tab and select one of the Import
options (such as Import files). Browse for the file or files you'd like to import and select
Open. Apply the changes when done.
The Files tab has an Advanced Import option that allows the user to choose an entire
folder at once.
Select the Extract the file button for a file to download a copy of the default (usually
the latest) version. Users can also right-click on an archive and choose Restore archived
files to restore the default version of each file to its original location.
Multiple versions can be kept for each file. Select the Manage file versions button
next to the file in question to upload a new file version, choose which version is the
default, delete versions, or download a specific version of the file.
Select the Delete the file (X) button next to a file to delete it and all of its versions from
the archive.
Remember to hit the apply button after each of these actions.
The System Files tab is for special GraphWorX64 system files that have to be stored in a
special location (Isolated Storage). These files are for user settings, symbols, the
materials toolbox, and similar settings. Use the Import system files link to choose
which sorts of files you'd like to store in the archive.
Nodes can be used to specify which archives to extract on which systems. Expand
Project Files, edit Nodes, and add items to the list to associated archives with
machines. Nodes are optional – if no items exist in the nodes list, all archives with the
"unpack" type will be unpacked for every system. Nodes have no effect on archives with
the "backup" type.
This provider is also available in IoT project templates, where it can be used to deploy
files to edge devices. See Deploy Custom Files to Devices.

Workbench - PowerShell Support
141
For Further Reference
• Help: About Project Files
PowerShell Support
Major Enhancements
New Commands
A host of new commands has been added to Workbench's PowerShell support. These
new commands allow the user to perform the following Workbench actions via
PowerShell scripts:
• Log in or out of security (both synchronous and asynchronous options) [66423]
• Copy, paste, move, and multiply Workbench entities [68516]
• Interact with applications, application projects, application servers, audit
messages, available file paths, and SQL Server connections [64810]
• Interact with the Recent Tasks panel, including downloading pack files or export
files [65362, 68560]
• Backup, restore, attach, and detach SQL databases [68524]
• Recursively delete objects and their children [68518]
For Further Reference
• Application Note: Workbench – New PowerShell Enhancements in 10.96
• Help: About ICONICS PowerShell Extension
Find and Replace Support
(Reference ID: 68575)
Users can now perform a global find and replace across their entire Workbench project.
This feature is currently only available via PowerShell commands, but we plan to add
user interface dialogs to support it in a future version.
For Further Reference
• Application Note: Workbench – New PowerShell Enhancements in 10.96
• Help: About ICONICS PowerShell Extension
Improvements to "Name" Parameter
(Reference ID: 59765)
The "name" parameter, used to identify an entity in many Workbench commands, has
been enhanced to allow a wider variety of formats. Now when supplying a value for the
"name" parameter you can choose to use:

Workbench - Workbench General
142
• A string representing the name of the entity
• A string representing the full path of the entity (for example,
"Assets/Equipments/Alarms")
• An integer representing the identifier of the entity in the database
• The IEntityKey representing the key of the entity
• The IEntity representing the entity itself
As an additional enhancement, the "name" parameter now supports wildcards.
For Further Reference
• Application Note: Workbench – New PowerShell Enhancements in 10.96
• Help: About ICONICS PowerShell Extension
Workbench General
Ref ID
Description
First Available In
37209
Users can now change the location for the output of Workbench tasks, such as Pack & Go and
Project Reporting. Go to the Project tab and use the Task Folder Configuration button.
New for 10.96
43210
Selections of multiple items can now be dragged from the tag browser into a grid. Only
appropriate points are added when dragging (so, for example, if dragging points into an alarm
subscription grid, only alarm points will be added).
New for 10.96
44174
Editing the project properties (right-click on a project and select Configure Application(s)
Settings) will no longer reapply the entire set of active databases. Now, only applications that
have been changed will have their databases activated.
New for 10.96
47482
When configuring a project (right-click on a project and select Configure Application(s)
Settings) there is a new option on the General Settings tab called, "Disable the services for the
applications not available in in this project". Checking this box will automatically disable the
point manages and disable and stop the services for any modules that have been disabled on
the Applications tab.
New for 10.96
55199
General performance improvements.
New for 10.96
58415
Users can now be notified whenever a drag & drop is triggered, giving them the option to
cancel accidental actions. This feature can be enabled under Tools > Drag&Drop.
New for 10.96
58574
There is a new option when importing a file called "Ignore GUID". When this option is enabled
the import will ignore the GUIDs in the import and user the name to identify items.
New for 10.96
58657
When going to Project > SQL Configuration and selecting the green arrow to test a connection
a "busy" message is now shown.
New for 10.96
59294
Import and export tasks now have a default description appropriate to the provider that was
imported or exported. This makes it easier to identify items in the Recent Tasks pane without
having to manually edit the import/export description.
New for 10.96
61827
Selecting a checkbox in a grid will now immediately cause the Apply button to become
available. Previously the user would have to click something outside the cell for the Apply
button to become available.
New for 10.96
63858
There is now a single stoplight on the Home tab for the BridgeWorX64 provider. It controls
both the Scheduler and Point Manager.
New for 10.96
64876
Configuration databases can now be upgraded if the SQL Server database property "Change
Tracking" is disabled.
New for 10.96
66963
Improved the error message that Workbench shows when the connection to the server fails in
order to help the user better troubleshoot the situation.
These detailed error messages can be disabled in IcoCustomSetup.ini using this entry:
[Sql]
ShowVerboseErrors=0
New for 10.96

Workbench - Audit Log
143
Ref ID
Description
First Available In
67150
In the Configure Application(s) Settings dialog on the Applications tab there is a new column
of buttons. These buttons allow the user to quickly create or overwrite the configuration for
this specific application. The configuration will be created or updated in the database specified
in the SQL Server and Catalog columns.
New for 10.96
68030
The Pack Project feature now allows the user to specify a file to populate the list of aliases for
find and replace.
New for 10.96
68261
Long tooltips now include line breaks to make them easier to read.
New for 10.96
68781
The log for CSV import/export tasks now includes the number of rows parsed. Very large CSV
files can take a long time to parse, and the extra logging gives the user more feedback on this
process.
New for 10.96
68916
70655
72586
Added additional messages and made enhancements to various error and validation messages
to improve the clarity and enhance the ease of use of Workbench.
New for 10.96
70181
Local cache database files are now stored under ProgramData\ICONICS\Cache rather than
ProgramData\ICONICS. Note that this only affects new installations or providers where the
user has updated the local cache settings. Existing cache files will remain in their original
location.
New for 10.96
70254
When typing into the Database field of the "Upgrade Database" dialog, the database contents
are no longer queried until the user selects the "Download the list of providers that must be
upgraded" button. This prevents unnecessary traffic to databases that may not exist.
New for 10.96
62419
In the "Configure Services" option of Workbench, you can now choose "Auto (Delayed)" as a
Start Mode.
10.95.4
59904
56756
Added the full path of entities to the header of their tab.
10.95.3
60125
Reduced the idle CPU usage of the ICONICS Workbench Configuration service
(IcoConfigService).
10.95.3
60376
The "local cache" feature of configuration databases can now be enabled in Workbench. Right-
click on a project, select "Configure Application(s) Settings", then go to the Applications tab.
The "Local Cache" column enables this feature.
Previous to this column, the local cache for most configurations had to be enabled by
modifying the IcoSetup64.ini file.
10.95.3
57930
Added a warning/confirmation message when detaching or deleting a database.
10.95.2
58261
Imports now ignore duplicate items.
10.95.2
56565
In a task log, it is now possible to copy only the selected items to the clipboard. Previously the
entire log had to be copied.
10.95.1
Audit Log
Ref ID
Description
First Available In
66970
The audit log feature is enabled by default. To disable the audit log, go to Workbench > Tools
and select the "Audit Log Enabled" button. It should change to "Audit Log Disabled".
New for 10.96
61025
In the Audit Log, the JSON column has been moved to be the last column. This makes the User
and Host columns easier to view.
10.95.3
56734
For every system change, the audit log now records a JSON detailing what was updated.
10.95.1
Project Reporting
Ref ID
Description
First Available In
62148
Enhanced Project Reporting so that BACnet reports no longer browse each object. This was
causing unnecessary and excessive overhead.
10.95.4
62243
Improved the performance of writing to the database in Project Reporting.
10.95.4
62245
62248
When running a BACnet report, the percentage complete is updated more frequently, and
more messages are shown.
10.95.4

Platform Services - New: Web API
144
Platform Services
New: Web API
(Reference ID: 67778, 71844)
Version 10.96 introduces a new service and Workbench provider called Web API. Web
API is the new gateway for all third-party components that use REST. It provides the
framework for these new features:
• CFSWorX mobile health and integration with third parties
• KPIWorX support for Apple Watch
• Web Login with External Identity Providers (OIDC and SAML 2.0)
• Voice Machine Interface and Text Machine Interface
In addition, the Web API provides a new REST endpoint for retrieving data points from
FrameWorX and its point managers. The new Web API REST endpoint is secured by
OAuth 2.0, and supports writing to points. (Note, the OData Connector service still
exists, and its endpoint is still functional.)
An example REST URI for the Web API service would be:
http://localhost/fwxapi/rest/data?pointname=svrsim:sine double med -100 100.
You can find the Web API in Workbench under Platform Services. Configuration for the
new features listed above will be described with those features. No configuration is
necessary for the REST endpoint.
The Windows service associated with the Web API is the ICONICS Web API Service
(IcoWebAPIService). This service must be running to support the REST endpoint and the
aforementioned other features.
For Further Reference
• Help: Web API
Commanding
Major Enhancements
Existing Commands Updated for New Features
There have been a number of updates to commands related to other enhancements (for
example, the Create Pen and Edit Pen commands have been updated to be able to use
the new plot types mentioned in Stacked Plots).

Platform Services - Commanding
145
Details about these commanding changes can be found in the descriptions of the
relevant enhancements.
Batch Commands and Command Return Values
(Reference ID: 67821)
Previously, multiple commands could be triggered at the same time (such as with
multiple pick actions on a single button) but they were executed independently from
each other.
Now, with 10.96, you can configure a chain of commands, be sure they will always
trigger in the correct order, and even set up conditional branches and looping.
Many preexisting commands have been updated to provide results or return values that
can be used in subsequent steps in batch commands. Some examples of what can be
returned are:
• Create Pen returns pen name
• Delete Pen returns number of pens deleted
• Export Data returns file name of export
Batch commands are a script-free way to make your displays and project much more
powerful. You can create drill-down sequences, write to a value to notify the user that
their command succeeded, and more.
Batch commands become even more powerful if you execute them in the new custom
context menus or on the new control events.
For Further Reference
• Application Note: Commanding – Batch Commands
• Help:
o Batch Commands
o Commanding
Execute Commands on Events
(Reference ID: 67808)
Commands used to be limited to responding to the user, most often from a button
press or other direct interaction. Now, with 10.96, commands can be executed
automatically on certain events.
Combine this with the new batch commands, and you may never need to use scripting
again!

Platform Services - Commanding
146
Events are configured in the individual control. It varies per control, but there is usually a
Commands on Events section, Enable Commands on Events checkbox, then a
Configure button.
Controls that include this commanding support include:
• AlarmWorX64 Viewer
• Asset Navigator
• BridgeWorX64 Navigator (new control)
• BridgeWorX64 Viewer (new control)
• Camera Control
• Data Diagram
• Fault Viewer (new control)
• GridWorX Viewer
• Heatmap
• Recipe Grid
• Recipe Navigator
• ReportWorX64 Navigator
• ReportWorX64 Viewer
• Security Indicator (new control)
• Table (new control)
• TrendWorX64 Viewer
For Further Reference
• Application Note: Commanding - Commands on Events and Context Menus
• Help: Help: Executing Commands on Events
New Command: Edit Trend Chart
(Reference ID: 57477, 57637)
The new Edit Trend Chart command can be used to change a wide variety of properties
of an existing TrendWorX64 Viewer chart and legend, such as sampling interval and
whether the legend is visible.
When configuring the Edit Trend Chart command, first edit the SelectedProperties
parameter, and select the properties of the chart you would like to change. Properties
that are selected will then show up as additional parameters of the command.
This powerful new command can be used along with the new batch commands and the
command event support to configure your TrendWorX64 Viewer with drilldown actions.
For Further Reference
• Application Notes:

Platform Services - Commanding
147
o TrendWorX64 Viewer – New Features in 10.96
o TrendWorX64 Viewer - How to Configure Drilldown
• Help: Edit Trend Chart Command
New Command: Send Notification
(Reference ID: 68107)
The Send Notification command can be used to send new push notifications to
ICONICS apps. Currently only the MobileHMI Universal Windows Platform (UWP) app
supports this command.
See Azure-Based Push Notifications for more details.
For Further Reference
• Help: Send Notification
Set Freeze Mode Command Can Now Play/Pause Camera Control
(Reference ID: 65780)
The Set Freeze Mode command can now be used to play or pause the video playback
in a camera control. Set the camera control as the command target. The freeze action
pauses the video, the unfreeze action plays, and the toggle action toggles between the
two.
See Play or Pause Video Feedback with Commanding.
For Further Reference
• Help: Set Freeze Mode Command
Additional Enhancements
Ref ID
Description
First Available In
40983
All commanding properties now support tags.
New for 10.96
59085
The Write Value command now supports numbers when writing to Boolean values. A value of
zero is False and any non-zero number is True.
New for 10.96
68519
The global Write Value command can now be used to write to an array. The entire array must
be written. The value to write must be a string able to be converted to a comma-separated list
of values (such as "12,5,6,10").
New for 10.96
69093
68863
69094
The Select Element global command has a new value for the Element property called
DataEntry. By using the DataEntry element, the Select Element command can be used to focus
a particular data entry field. This allows displayed designed for hands-free operation to use
voice commands to write values into process points.
New for 10.96
63607
Added a new global command, "Scan". For iOS and Android devices, the Scan command will
initiate the "Scan code" feature. For the Universal Windows Platform (UWP) app, the Scan
command will turn on or off Augmented Reality mode, determined by the Action parameter.
(iOS and Android devices ignore the Action property.)
The "Scan" command is ignored for desktop (WPF) clients.
10.95.4

Platform Services - Data Browser
148
Ref ID
Description
First Available In
60695
The desktop (WPF) runtime "Print" option for the TrendWorX64 Viewer now has a new
"Landscape" option to print in landscape mode. The Print global command also supports the
new Landscape parameter.
10.95.3
62610
52286
Added a new "Apply Discard" command. This command takes a GridWorX Viewer as a target,
and it performs the same actions as the "Apply Changes" and "Discard Changes" context menu
items. Change the "Action" property to define whether it performs an apply or discard action.
This was added for desktop (WPF) and Universal Windows Platform (UWP) in 10.95.2, and for
HTML5 in 10.95.3.
10.95.3
57297
New "Log Event" command allows sending a custom GenEvent message.
10.95.2
Data Browser
Ref ID
Description
First Available In
66990
Improved the loading speed of the data browser when enumerating OPC Classic or OPC UA
servers under Data Connectivity > OPC Data Access, Data Connectivity > OPC UA, Alarms and
Notifications, and Historical Data.
10.95.5
Expressions
Major Enhancements
New Expression Functions
(Reference ID: 62514)
To complement the pre-existing indexof() function, the functions lastindexof(),
indexofany(), and lastindexofany() have been added to expressions as of 10.95.4.
• Lastindexof – Returns the zero-based index of the last occurrence of a substring
within a string or returns the zero-based index of the last occurrence of an item
in an array.
• Indexofany – Returns the zero-based index of the first occurrence within a string
of any character from a specific set of characters.
• Lastindexofany – Returns the zero-based index of the last occurrence within a
string of any character from a specific set of characters.
In addition, as of 10.95.4 the indexof() function was modified to make the "startIndex"
parameter (the third parameter) optional, and to add a fourth optional parameter for
"count". This keeps indexof() consistent with the new functions but will not affect pre-
existing projects.
For Further Reference
• Help: New Expression Functions in V10.96

Platform Services - FrameWorX
149
Additional Enhancements
Ref ID
Description
First Available In
62514
61943
62577
62578
The functions indexof(), lastindexof(), indexofany(), and lastindexofany() have been added to
expressions.
10.95.4
FrameWorX
Ref ID
Description
First Available In
61438
FrameWorX can now recognize its own machine name or alias in point names and treats these
points as local points. This eliminates some unnecessary communication overhead. Previously,
points such as \\MyServer\ac:somePath would still go through the FrameWorX network, even if
"MyServer" was a FrameWorX alias pointing to the local server.
New for 10.96
63869
OPC UA clients may now specify a username and password when connecting. The username
and password are verified against ICONICS security when determining if the client can access
the requested points. Previously, OPC UA clients could only connect anonymously, at which
point the credentials of the user specified in Platform Services Configuration > Passwords tab
> "OPC UA -> FWX" would be used. (Clients may still connect anonymously and use the “OPC
UA -> FWX" credentials.)
10.95.4
64524
Added new "heartbeat" tracing to GenBroker/GenClient communications. This tracing is
designed to assist in troubleshooting issues when communication to an OPC server has failed.
When enabled, it will log a trace message that says, "[Heartbeat] Elapsed: X" at the configured
rate.
To enable this tracing, add these entries into the IcoSetup64.ini file:
[GenClient\Debug]
HeartbeatTraceLevel=700
HeartbeatTracePeriod=5000
HeartbeatTraceLevel is the level at which the traces will appear in TraceWorX, and
HeartbeatTracePeriod is the rate, in milliseconds, of how often the heartbeat should be logged.
These entries can either go into the [GenClient\Debug] or [GenBroker\Debug] sections (or
both). [GenClient\Debug] affects the FrameWorX Server and GenClient Point Manager.
[GenBroker\Debug] affects the GenBroker64 service. The relevant service must be restarted
after making changes to these entries.
10.95.4
Language Aliasing
Default Languages for Users and Groups
(Reference ID: 62604, 62735)
First introduced in 10.95.3, users and groups can now be assigned a default language.
When the user logs into security, their default language will automatically be selected
for the purposes of Language Aliasing.
The default language is configured in Workbench's Security provider on a user or group
in the General Properties section.

Platform Services - Licensing
150
For Further Reference
• Help: Users and Groups
Licensing
Ref ID
Description
First Available In
54421
More than 255 Hyper Historian remote collectors can now be added to the same license
server.
10.95.5
65489
When checking the node name of a machine against the reserved license nodes, only the "raw"
node name will be used. Previously, the entire node name was used, which was a combination
of the machine name, session ID, and username, such as, "MachineA:0:UserX". Now, only
"MachineA" will be checked.
10.95.5
OData Connector
Ref ID
Description
First Available In
62108
OData Connector now returns NULL for empty data fields. Previously, it would return no
record. Returning NULLs helps guarantee consistent results sets. To revert to the old behavior,
go to Platform Services Configuration -> Point Managers -> OData Connector Point Manager,
and set ODataRemoveAssetPropertiesWithNullValue to true.
10.95.4
62422
Added additional request tracing. Since this tracing can put a load on the server, it is disabled
by default. When enabled, requests will be traced from start to end. Messages from the same
request can be correlated as they will contain the same request id (GUID). To enable this
tracing, edit C:\Program
Files\ICONICS\GENESIS64\Components\FwxServer.PointManagers.config. Search for
"ODataPointManager". In the <Params> section under it, add these lines:
<Param>
<Name>EnableRequestTracing</Name>
<Value xsi:type="xsd:boolean">true</Value>
<Hidden>false</Hidden>
</Param>
<Param>
<Name>MaxConcurrentRequests</Name>
<Value xsi:type="xsd:int">-1</Value>
<Hidden>false</Hidden>
</Param>
The MaxConcurrentRequests property controls the number of concurrent requests that can be
handled by the server. The default is -1, which means 100 times the number of CPU cores on
the machine.
Once the config file has been edited, these values can be changed by modifying the
EnableRequestTracing and MaxConcurrentRequests parameters under Platform Services
Configuration -> Point Managers tab -> OData Connector Point Manager.
10.95.4
62682
By default, the OData provider read static properties directly from the AssetWorX database on
start-up, and then never checked them again. Now, if the static property has database caching
enabled (meaning it is read/write), it will be treated the same as a dynamic property, and its
value will be refreshed when the next scheduled property refresh occurs.
10.95.3
62847
The OData Connector can now optionally expose AssetWorX Runtime as an OData service. The
OData endpoint for AssetWorX Runtime is disabled by default. Users should use the
EnableODataEndpoint property to enable the AssetWorX OData endpoint.
10.95.2
56992
Added write support for real-time tags in the OData Connector. For more details, please refer
to your local OData Connector online documentation:
http://localhost/ODataConnector/rest/Help/Html?method=post.
10.95.1

Platform Services - OPC UA
151
OPC UA
Ref ID
Description
First Available In
67021
Classic OPC DA updates with a quality of "Bad - Last Known Value" previously would be
converted to OPC UA updates of "Bad", and the value would be discarded. Now they are
converted to "BadUncertain" and include the value.
10.95.5
Security
Major Enhancements
Web Login with External Identity Providers
(Reference ID: 67812)
In version 10.96, users have the option of linking ICONICS security to an external
OpenID Connect or SAML 2.0 identity provider. Instead of logging into the ICONICS
security login dialog, users will be directed to a custom login page or the login page of
a compatible identity provider, log in with their credentials for that provider, and then
ICONICS security will recognize them as an ICONICS user and grant them the
appropriate permissions.
For example, when properly configured, users could log in with an Okta account and be
authenticated with ICONICS security. Okta would validate the authentication of the login
and pass an identity token to ICONICS security. ICONICS security would match that
token to an existing ICONICS user and log them in.
Organizations that already provide security via a compatible identity provider can have
users log into ICONICS with those credentials, without having to require them to
remember a separate password for their ICONICS account.
Note that support for specific identity providers, such as Okta, relies on their continued
support for the OpenID Connect or SAML 2.0 standards.
For Further Reference
• Application Note: Security - Working with Identity Providers (SAML, Azure AD,
OpenID)
• Help: Web Login with External Identity Providers

Platform Services - Security
152
Use ICONICS Security as an OpenID Connect Identity Provider
(Reference ID: 67812)
Also in version 10.96, third-party clients, such as Cortana, Alexa, Google Assistant, and
the Apple Watch, can authenticate with ICONICS security as an OpenID Connect identity
provider. This allows these clients to get access to secured data points.
This support works with both built-in security (database or active directory) and external
identity providers.
For Further Reference
• Application Note: Security - Working with Identity Providers (SAML, Azure AD,
OpenID)
• Help: Use ICONICS Security as an OpenID Connect Identity Provider
Azure Active Directory Support
(Reference ID: 67814)
Previously, ICONICS security could synchronize with Active Directory, but only for in-
house Active Directories. Now in version 10.96, ICONICS security can also synchronize
with Azure Active Directory.
Web login support can also be enabled for Azure Active Directory, allowing users to log
in via Microsoft's login screen. Using Microsoft's login screen allows you to use single-
sign-on between Azure Active Directory and ICONICS Security and gives ICONICS
security any additional features of the Azure Active Directory login, such as multi-factor
authentication.
For Further Reference
• Application Note: Security - Working with Identity Providers (SAML, Azure AD,
OpenID)
• Help: Global Settings
Testing Mode
(Reference ID: 71687)
Previously, security was either active (enabled) or inactive (disabled). When it was active,
all permissions defined in security applied, and when it was inactive no permissions were
applied and users were allowed to do anything, even without logging in.

Platform Services - Triggers
153
Now in 10.96, users can put security into testing mode. This is set in Workbench under
Security > Global Settings on the General tab. Instead of a checkbox, Security active
is now a radio button where the user can pick from Inactive, Testing, and Active.
Testing mode is designed to be a temporary state to allow system designers to test their
security permissions without risking locking themselves out of security. When in testing
mode, if no user is logged in then all permissions are allowed (similar to having security
inactive). But when a user logs in, its permissions are applied as if security were active.
Testing mode should not be used for live production systems. Make sure to change your
security to active when putting a system live.
For Further Reference
• Help: Global Settings
New Security Indicator Control
There is a new Security Indicator control. See New: Security Indicator for more details.
Default Languages for Users and Groups
First introduced in 10.95.3, users and groups can now be assigned a default language.
See Default Languages for Users and Groups.
Additional Enhancements
Security Workbench Provider
Ref ID
Description
First Available In
61461
The user is no longer allowed to delete the active configuration object.
New for 10.96
68337
The allowed password length was increased to 128 characters.
New for 10.96
70971
When selecting the Users folder, the Project Details now includes the Custom Identifier column
instead of the Description column.
New for 10.96
Triggers
Triggers General
Ref ID
Description
First Available In
61821
61473
Enhanced Data Triggers to support multiple tags.
10.95.4
62853
Previous value, previous quality, and previous timestamp are now exposed properties of Data
Triggers.
10.95.2
Triggers Workbench Provider
Ref ID
Description
First Available In
61472
When adding a new trigger in the Workbench in the related values tab, there is a new option
to enter a description for tags.
10.95.4

Platform Services - Unified Data Manager
154
Ref ID
Description
First Available In
61474
Added the ability to reorder related values for triggers.
10.95.4
Unified Data Manager
Unified Data Manager Workbench Provider
Ref ID
Description
First Available In
65817
The maximum scan rate for Unified Data Manager registers is no longer limited.
10.95.5

Tools - Bulk Asset Configurator
155
Tools
Bulk Asset Configurator
Ref ID
Description
First Available In
65170
When a parameter field is left blank in the ClassInstantiation or ClassInstantiationRowBased
sheets, the Bulk Asset Configurator now instantiates those assets using the default value for
those parameters, as defined in the equipment class.
10.95.5
ConverterWorX
Ref ID
Description
First Available In
65431
Added new option to the ConverterWorX Importer under GraphWorX64 Translation - General:
"Config mode rotations disabled for (None, Rectangles or All)"
In GraphWorX32, the user could set the Angle property of an object to rotate it. If the object
also had a rotation dynamic, the Angle property was ignored in runtime, though the object
would still appear rotated in configure mode. In GraphWorX64, the Angle property would be
added to whatever rotation was specified by the rotation dynamic. So, in the rare event that a
display used both the Angle property and a rotation dynamic, the runtime behavior was not
consistent between GraphWorX32 and GraphWorX64. The objects would be rotated to
different angles.
Use this ConverterWorX option if you have objects with both an Angle property and a rotation
dynamic. The Angle property will be discarded in the converted GraphWorX64 display, making
the runtime behavior consistent between GraphWorX32 and GraphWorX64 for these objects.
Select the type of objects (only rectangles, or all objects) where you would like to discard the
Angle property.
10.95.5
59898
Appropriate default values are now supplied for the "Host Name" and "SQL Instance Name"
fields in ConverterWorX.
10.95.3

For more, visit www.iconics.com
© 2019 ICONICS, Inc. All rights reserved. Specications are subject to change without notice.
AnalytiX and its respective modules are registered trademarks of ICONICS, Inc. GENESIS64,
GENESIS32, Hyper Historian, BizViz, PortalWorX, MobileHMI and their respective modules,
OPC-to-the-Core, and Visualize Your Enterprise are trademarks of ICONICS, Inc. Other product
and company names mentioned herein may be trademarks of their respective owners.
Founded in 1986, ICONICS is an award-winning independent software provider
oering real-time visualization, HMI/SCADA, energy management, fault detection,
manufacturing intelligence, MES, and a suite of analytics solutions for operational
excellence. ICONICS solutions are installed in 70 percent of the Global 500 companies
around the world, helping customers to be more protable, agile and ecient, to
improve quality, and to be more sustainable.
ICONICS is leading the way in cloud-based solutions with its HMI/SCADA, analytics,
mobile and data historian to help its customers embrace the Internet of Things (IoT).
ICONICS products are used in manufacturing, building automation, oil and gas,
renewable energy, utilities, water and wastewater, pharmaceuticals, automotive,
and many other industries. ICONICS’ advanced visualization, productivity, and
sustainability solutions are built on its agship products: GENESIS64™ HMI/SCADA,
Hyper Historian™ plant historian, AnalytiX® solution suite, and MobileHMI™ mobile
apps. Delivering information anytime, anywhere, ICONICS’ solutions scale from the
smallest standalone embedded projects to the largest enterprise applications.
ICONICS promotes an international culture of innovation, creativity, and excellence
in product design, development, technical support, training, sales, and consulting
services for end users, systems integrators, OEMs, and channel partners. ICONICS
has over 375,000 applications installed in multiple industries worldwide.
World Headquarters
100 Foxborough Blvd.
Foxborough, MA, USA, 02035
+1 508 543 8600
Australia
+61 2 9605 1333
Canada
+1 647 544 1150
China
+86 10 8494 2570
Czech Republic
+420 377 183 420
European Headquarters
Netherlands
+31 252 228 588
France
+33 4 50 19 11 80
Germany
+49 2241 16 508 0
India
+91 265 6700821
Italy
+39 010 46 0626
Middle East
+966 540 881 264
Singapore
+65 6667 8295
UK
+44 1384 246 700
Six-time Partner of the Year Winner
ICONICS Sales Oces
