
Andie Philo;Mike Angstadt
MONTGOMERY COUNTY-NORRISTOWN PUBLIC LIBRARY
Microsoft
PowerPoint 2016:
Step-by-Step Guide

MICROSOFT POWERPOINT 2016: STEP-BY-STEP GUIDE Revised: 2/27/2018
MC-NPL Computer Lab • 1001 Powell St • Norristown, PA 19401
Page 2 of 84
Table of Contents
INTRODUCTION ............................................................ 4
EXPLORING THE POWERPOINT 2016 ENVIRONMENT .... 5
TITLE BAR ........................................................................ 5
QUICK ACCESS TOOLBAR .................................................... 5
RIBBON ........................................................................... 6
Active Tab ................................................................ 6
Contextual Tabs ....................................................... 6
Groups and Buttons................................................. 7
Buttons with Arrows ................................................ 7
Dialogue Box Launcher ............................................ 8
Ribbon Display Options button................................ 8
Dynamic Resizing .................................................. 10
File Tab .................................................................. 11
CUSTOMIZE THE RIBBON .................................................. 12
STATUS BAR................................................................... 13
Current information .............................................. 13
Views ..................................................................... 14
Zoom Slider ............................................................ 14
Customization ....................................................... 15
WORKSPACE .................................................................. 16
MANAGING A PRESENTATION .................................... 18
ENTERING CONTENT ........................................................ 18
SAVING YOUR PRESENTATION ............................................ 18
BACK-UP SAVINGS ........................................................... 19
CLOSING A PRESENTATION ................................................ 19
CREATING A NEW BLANK PRESENTATION .............................. 19
GETTING STARTED WITH SLIDES ................................. 20
PLACEHOLDERS ............................................................... 20
SLIDE LAYOUTS ............................................................... 20
CUSTOMIZING SLIDE LAYOUTS ........................................... 20
WORKING WITH SLIDES .................................................... 21
Insert a new slide .................................................. 21
Copy and Paste a slide ........................................... 21
Duplicate a slide .................................................... 22
Delete a slide ......................................................... 22
Move a slide .......................................................... 22
MANAGING SLIDES AND PRESENTATION .................... 23
SLIDE VIEWS .................................................................. 23
ORGANIZING SLIDES INTO SECTIONS ................................... 24
ADDING NOTES TO SLIDES ................................................ 25
APPLYING A THEME .................................................... 26
WHY USE THEME ELEMENTS? ........................................... 26
THEME ELEMENTS ........................................................... 27
APPLYING A THEME ......................................................... 28
WORKING WITH IMAGES ............................................. 30
INSERTING AN IMAGE FROM FILE ....................................... 30
RESIZING AN IMAGE ........................................................ 31
MOVING AN IMAGE ........................................................ 32
INSERTING AN IMAGE USING A PLACEHOLDER ...................... 32
INSERTING A CLIP ART IMAGE ............................................ 33
INSERTING AN IMAGE FROM A WEBSITE .............................. 35
INSERTING A SCREENSHOT ................................................ 36
Full window capture .............................................. 36
Partial window capture ......................................... 38
INSERTING AN IMAGE AS BACKGROUND FOR A SLIDE .............. 39
TRANSITIONS ............................................................... 41
APPLYING A TRANSITION .................................................. 41
PREVIEWING A TRANSITION .............................................. 42
MODIFYING A TRANSITION ............................................... 42
Modifying the Duration ......................................... 42
Adding a Sound ..................................................... 43
REMOVING A TRANSITION ................................................ 43
ANIMATIONS ............................................................... 44
FOUR TYPES OF ANIMATIONS ............................................ 44
GETTING STARTED .......................................................... 44
APPLYING ANIMATIONS ................................................... 44
ADDING MULTIPLE ANIMATIONS TO AN OBJECT ................... 46
COPY ANIMATIONS WITH THE ANIMATION PAINTER .............. 47
THE ANIMATION PANE .................................................... 48
Opening the Animation Pane ................................ 48
Reordering Effects ................................................. 48
Previewing Effects ................................................. 49
Effect Triggers ....................................................... 49
THE EFFECT OPTIONS DIALOGUE BOX ................................. 51
Animating Text ...................................................... 51
Setting Effect Timings ........................................... 51
USING THE MOTION PATH ANIMATION....................... 52
SETTING THE BACKGROUND IMAGE .................................... 52
INSERTING THREE OBJECTS: TWO PICTURES FROM FILES AND A
SHAPE ........................................................................... 53
FORMATTING THE EXPLOSION 2 SHAPE ............................... 53
FORMATTING THE BIPLANE AND SNOOPY ............................ 54
ASSIGNING THE MOTION PATHS ......................................... 55
ANIMATING THE EXPLOSION 2 SHAPE ................................. 56
SETTING START OPTIONS AND TIMINGS FOR THE ANIMATIONS . 56
VIEWING THE SLIDE SHOW ............................................... 57
LAUNCHING THE ANIMATION PANE .................................... 57

MICROSOFT POWERPOINT 2016: STEP-BY-STEP GUIDE Revised: 2/27/2018
MC-NPL Computer Lab • 1001 Powell St • Norristown, PA 19401
Page 3 of 84
SELECTION AND VISIBILITY PANE ........................................ 57
ADD ANIMATION ............................................................ 58
SETTING MORE EFFECT OPTIONS ....................................... 59
CHECKING SPELLING ................................................... 59
RUNNING A SPELL CHECK ................................................. 59
CORRECTING A SINGLE MISSPELLING .................................... 60
PRESENTING THE SLIDE SHOW .................................... 61
STARTING A SLIDE SHOW .................................................. 61
ADVANCING AND REVERSING SLIDES ................................... 61
JUMPING TO A NON-ADJACENT SLIDE ................................. 62
STOPPING OR ENDING SLIDE SHOW .................................... 62
ZOOMING IN .................................................................. 62
PRESENTATION TOOLS AND FEATURES ................................ 63
Laser Pointer ......................................................... 63
Pen and Highlighter (Annotations) ........................ 63
Accessing the Desktop ........................................... 64
Menu Access Options ............................................ 65
Keyboard Shortcuts ............................................... 65
SLIDE SHOW SET UP OPTIONS ........................................... 66
Accessing Slide Show Setup Options ..................... 66
PRINTING PRESENTATIONS ......................................... 70
VIEWING THE PRINT PANE ................................................ 70
PRINT SETTINGS.............................................................. 70
CHOOSING PRINTING OPTIONS .......................................... 70
Select Slides ........................................................... 70
Slides per Page ...................................................... 71
Collation ................................................................ 72
Page orientation ................................................... 72
Color ...................................................................... 72
EDIT HEADER AND FOOTER ............................................... 73
HANDOUT MASTER SLIDE OPTIONS .................................... 74
ADDING BACKGROUND MUSIC .................................... 75
INSERTING A VIDEO ..................................................... 76
TRIMMING VIDEO ........................................................... 77
POSTER FRAME .............................................................. 78
Using a Frame from the Video .............................. 78
Using an Image File ............................................... 79
PLAYING VIDEOS IN PRESENTATION MODE .......................... 79
INSERTING A YOUTUBE VIDEO ........................................... 79
Choosing a video ................................................... 80
Inserting into PowerPoint ..................................... 82
INSERTING A CHART .................................................... 83
COPYING AND PASTING THE CHART .................................... 83
UPDATING THE EXCEL FILE ................................................ 84
PROFESSIONAL-LOOKING PRESENTATIONS ................. 85
Created & Maintained by:
Andrea Philo
Mike Angstadt
MONTGOMERY COUNTY-NORRISTOWN PUBLIC LIBRARY
NORRISTOWN, PENNSYLVANIA
WWW.MC-NPL.ORG
Note to Home Students:
This lesson plan will frequently refer to flash drives that we have our students use
during class. Instead of saving files to a flash drive, you may save them to your
computer’s hard drive.
We preload these flash drives with an assortment of files that are used during class.
These files can be downloaded from on our Class Resources page. Our class handouts
and exercises can also be downloaded there. The website address is:
www.mc-npl.org/class-resources

MICROSOFT POWERPOINT 2016: STEP-BY-STEP GUIDE Revised: 2/27/2018
MC-NPL Computer Lab • 1001 Powell St • Norristown, PA 19401
Page 4 of 84
Introduction
Microsoft PowerPoint 2016 is presentation software that allows you to create dynamic slide
presentations that include animation, narration, images, videos and more. These features are meant to
accompany the oral delivery of the topic.
Originally designed for the Macintosh computer, the initial release was called "Presenter", developed
by Dennis Austin and Thomas Rudkin of Forethought, Inc. In 1987, it was renamed to "PowerPoint" due
to problems with trademarks. In August of the same year, Forethought was bought by Microsoft for
$14 million USD ($29.1 million in present-day terms), and became Microsoft's Graphics Business Unit.
As of 2012, various versions of PowerPoint claim 95% of the presentation software market share, with
installations on at least 1 billion computers. Among presenters world-wide, this program is used at an
estimated frequency of 350 times per second.
What is Microsoft Office? The term “Microsoft Office” refers to Microsoft’s entire suite of office
productivity applications. Microsoft PowerPoint is one of the many applications that are grouped
under of the “Microsoft Office” umbrella.
What is Office 365? Office 365 is a service where you pay a monthly subscription fee (around $10 a
month) to use Microsoft Office programs (as opposed to paying $100 or more up front, as was
traditionally done). One benefit to using Office 365 is that software updates are free (for example, if a
new version of Microsoft PowerPoint comes out, you can upgrade to that new version for free).
In this class, we will be using PowerPoint 2016, which is the latest version.

MICROSOFT POWERPOINT 2016: STEP-BY-STEP GUIDE Revised: 2/27/2018
MC-NPL Computer Lab • 1001 Powell St • Norristown, PA 19401
Page 5 of 84
Exploring the PowerPoint 2016 Environment
Open PowerPoint by using the Start menu or by double-clicking on the Desktop icon.
Title Bar
1. Note the title bar section which has window controls at the right end, as in other Microsoft Office
programs.
2. Note that a blank presentation opens with a default file name of Presentation1.
Quick Access Toolbar
The Quick Access Toolbar is located all the way to the left
on the title bar. It contains frequently used commands
and can be customized using the drop-down menu.
1. Point to each small icon to view its ScreenTip.
2. Be aware that the Undo button is not located
anywhere else in the application except for on the
Quick Access Toolbar.
3. Click the Customize Quick Access Toolbar button, check New on the menu. Notice how a new
button has appeared.
4. Click the Customize Quick Access Toolbar button again and select Show Below the Ribbon. This
repositions the toolbar to be below the ribbon.
5. Note that when the toolbar is below the ribbon, its customize button is very difficult to see, due to
its white color.
6. Move the Quick Access Toolbar back above the ribbon by clicking the customize button and
selecting Show Above the Ribbon.
Takes 30min
60min
Save
Undo
Customize
Redo/Repeat
Start Slideshow

MICROSOFT POWERPOINT 2016: STEP-BY-STEP GUIDE Revised: 2/27/2018
MC-NPL Computer Lab • 1001 Powell St • Norristown, PA 19401
Page 6 of 84
Ribbon
The Ribbon contains all of the tools that you use to interact with your
Microsoft PowerPoint file. It is located at the top of the window. All of
the programs in the Microsoft Office suite have one.
The ribbon has a number of tabs, each of which contains buttons, which are organized into groups.
Depending on the object you have selected in the document, several contextual tabs may appear
which provide additional formatting options for that object.
Try clicking on other tabs to view their buttons (do not click on the “File” tab yet), and then return to
Home tab.
Active Tab
By default, PowerPoint will open with the Home tab of the Ribbon active. Note how the Active tab has
a white background, and the Inactive tabs do not.
Contextual Tabs
Contextual tabs are displayed when certain objects, such as an images and text boxes, are selected.
They contain additional options for modifying the object. Contextual tabs stand out because they are
darker in color and are located to the right of all the other tabs.
1. Click into the text box that says “Click to Add Title”.
2. Notice that a dark Contextual Ribbon named “Drawing Tools” has appeared. This contextual
ribbon has one contextual tab named “Format”.
3. Click outside of the text box to deselect it. Notice how the Contextual Ribbon disappears. This is
because the text box is no longer selected.
4. Click on the text box again.
Teacher’s note:
Make sure they are clicked inside the text box, or else
most of the buttons in the Ribbon will be disabled.
Mention Handout 1

MICROSOFT POWERPOINT 2016: STEP-BY-STEP GUIDE Revised: 2/27/2018
MC-NPL Computer Lab • 1001 Powell St • Norristown, PA 19401
Page 7 of 84
Groups and Buttons
On each Tab, the Buttons (a.k.a. commands or tools) are organized into Groups. The groups have
names, but the names are not clickable.
Hover over some active buttons on the Home tab to observe ScreenTips. The ScreenTips display the
name of the button, along with a short description of what the button does.
Buttons with Arrows
Note that some buttons have images on them and some have images and an arrow. The arrow
indicates that more information is needed to carry out the function of the button. Some arrowed
buttons have two parts: the button proper and the list arrow.
A one-part arrowed button, called a menu button, will darken completely when you point to
it:
1. In the Drawing group, point to the Shapes button.
2. Note there is no difference in shading between the left and right of the
button when you point to each section.
On a two-part arrowed button, called a split button, only one section at a time will
darken when you point to it.
1. In the Slides group, point to the top part of the New Slide button. This is the
“button proper” section of the button. Note how it is darkened separately
from the arrow portion of the button.
2. Point to the bottom portion, the section with the arrow. This is the “list
arrow” section of the button. Note how it is darkened separately from the
left portion.
3. The button proper is the section of a two-part button that will carry out the
default option or the last used option.
4. The list arrow section will open an options menu.

MICROSOFT POWERPOINT 2016: STEP-BY-STEP GUIDE Revised: 2/27/2018
MC-NPL Computer Lab • 1001 Powell St • Norristown, PA 19401
Page 8 of 84
Dialogue Box Launcher
On some groups there is a Launcher button which will open a dialogue box with related but less
common commands. Click a launcher bu tton, and then close the dialogue box.
Ribbon Display Options button
This button provides options that will hide the Ribbon from view. The main benefit to this is that it
allows your workspace to take up more of the screen.
1. Locate the Ribbon Display Options button (to the left of the window control buttons).
2. Click on it. Three options appear.
3. Select Auto-hide the Ribbon. This option essentially makes PowerPoint go into “full screen” mode.
It hides not only the Ribbon, but also the Quick Access Toolbar, title bar, and Window Controls.

MICROSOFT POWERPOINT 2016: STEP-BY-STEP GUIDE Revised: 2/27/2018
MC-NPL Computer Lab • 1001 Powell St • Norristown, PA 19401
Page 9 of 84
4. To get the ribbon to show after Auto-hiding it:
a. Point to the top-center of the screen and click. (Clicking the three dots does the same
thing.) The full ribbon can be seen and used. However, as as soon as the body of the
document is clicked it will hide again.
b. Click in the middle of the document. Notice how the ribbon hides again.
5. To get a partial display of the ribbon to stay in view:
a. Click the “mini” Ribbon Display Options button on the top right.
b. Click Show Tabs. Note this option has brought back our Quick Access Toolbar, title bar,
Window Controls, and part of the ribbon; only the Tabs are visible. The buttons are not.
c. Click the Home tab. Notice how the buttons come into view.
d. Click in the middle of the document. Notice how the buttons disappear again.
6. To get the Ribbon back, point to the top-center of the screen and click.
a. Click in the middle of the slide. Notice how the Ribbon disappears again.
b. Because we’ve hidden the Ribbon, we now have a “mini” Ribbon Display Options button.
Click it.
7. To get the entire ribbon to stay in view:
a. Click Ribbon Display Options
b. Click Show Tabs and Commands. This option keeps entire ribbon visible at all times. It is
the default option. We will keep this option selected for the remainder of class.
Note: A shortcut for changing to the “Show Tabs” view is to double-click the Active Tab. If
the buttons in the Ribbon suddenly disappear, then you may have done this by accident!

MICROSOFT POWERPOINT 2016: STEP-BY-STEP GUIDE Revised: 2/27/2018
MC-NPL Computer Lab • 1001 Powell St • Norristown, PA 19401
Page 10 of 84
Dynamic Resizing
If you use PowerPoint on other computers, be aware that the button placement on the Ribbon might
look slightly different. For instance, a button might be a different size or be positioned in a slightly
different place. The reason for this is that the Ribbon auto-adjusts itself based on the size of the
PowerPoint window.
1. Notice what the buttons in the Editing group currently look like.
2. Click the Restore Down button to shrink the size of the PowerPoint window.
3. Notice how the group looks different now. The entire group was collapsed into a single button.
Click on the button to reveal the contents of the group.
4. Click the Maximize button to bring the window back to full screen.

MICROSOFT POWERPOINT 2016: STEP-BY-STEP GUIDE Revised: 2/27/2018
MC-NPL Computer Lab • 1001 Powell St • Norristown, PA 19401
Page 11 of 84
File Tab
The File tab provides a Backstage view of your document. Backstage view gives you various options for
saving, opening a file, printing, or sharing your document. Instead of just a menu, it is a full-page view
which makes it easier to work with.
1. Click on the File tab.
2. Notice that the ribbon and the document are no longer in view. Note the commands on the left
side of the screen that you use to perform actions TO a document rather than IN a document.
3. Other things you can do in the Backstage view:
a. Click the Info menu option. The Info section of the File tab offers an easy to use interface
for inspecting documents for hidden properties or personal information.
b. Click the New menu option. In this view you can create a new Blank presentation, or choose
from a large selection of Templates.
c. Click the Open menu option. The Open pane is used to open existing files on your
computer.
i. It immediately presents you with a list of presentations that you have recently
opened, so you can quickly find and open them again. The computers in the
Computer lab have this feature turned off for privacy reasons.
ii. Clicking OneDrive allows you to open a file that is stored in OneDrive, which is
Microsoft’s internet cloud service.
iii. Clicking Browse opens a File Explorer dialog, which allows you to find the file on
your computer. We will be using this option in class.
d. Click the Save As menu option. This pane allows you to save your file.
4. To return to the document from the Backstage view, click the large, left pointing arrow
in the top-left corner of the screen.

MICROSOFT POWERPOINT 2016: STEP-BY-STEP GUIDE Revised: 2/27/2018
MC-NPL Computer Lab • 1001 Powell St • Norristown, PA 19401
Page 12 of 84
Customize the Ribbon
It is possible to add your own, customized tabs to the ribbon. Although you will rarely need to do this
in your everyday usage, our goal here is to expose you to the extent to which the PowerPoint
environment can be customized.
To demonstrate this, will create a new tab containing our favorite tools.
1. Right-click in a clear space on the ribbon and click Customize the Ribbon. This opens a dialog box.
2. Click on the New Tab button, located beneath the right pane.
3. Notice how a new tab called New Tab (Custom) has appeared in the list on the right.
4. Notice how our new tab contains one group called New Group (Custom).
5. Let’s assign a name to the new tab and its group.
a. Right-click on the words New Tab (Custom) and click Rename.
b. In the Rename dialog, type your first name and click OK.
c. Right-click on the words New Group (Custom) and click Rename.
d. When renaming a group, it presents you with a grid of icons. You may optionally choose an
icon that you would like to associate with the group. Group icons are used for when a
group is added to the Quick Access Toolbar.
e. Type Favorite Tools into the Display Name field and click OK.
6. The left pane contains the buttons that are available to us.
a. Confirm that Favorite Tools group is selected (has a dark background). If it is not selected,
click on it to select it.
b. Click on New File in the left pane and then click the Add button.
c. Click on New Slide in the left pane and then click the Add button.

MICROSOFT POWERPOINT 2016: STEP-BY-STEP GUIDE Revised: 2/27/2018
MC-NPL Computer Lab • 1001 Powell St • Norristown, PA 19401
Page 13 of 84
7. Click on OK at the bottom of the PowerPoint Options dialogue box.
8. Click on the tab you created to view its contents.
Status Bar
The Status Bar is below the presentation window area.
Current information
The left end gives current information about the presentation, such as the slide number being viewed
and the theme of the slide.

MICROSOFT POWERPOINT 2016: STEP-BY-STEP GUIDE Revised: 2/27/2018
MC-NPL Computer Lab • 1001 Powell St • Norristown, PA 19401
Page 14 of 84
Views
At the right end of the status bar are shortcuts to the different views that are available. Each view
displays the slide show in a different way, allowing you to carry out various tasks more efficiently.
Normal
This view allows you to edit the content of your slides. It contains two
tabs on the left side of the screen—Slide and Outline—that help you
navigate to the other slides in your presentation. It is selected by default.
Slide Sorter
Displays smaller versions of all of the slides in the presentation, making it
easy to rearrange them.
Reading View
Similar to Slide Show view, it displays you presentation in a full-screen
window.
Slide Show
Use this view when you want to show your slideshow in a presentation
setting. Displays your slides full-screen.
Zoom Slider
Also at the right end of the Status Bar is the Zoom Slider. This allows you to adjust how large the slides
are displayed on the screen. It does not adjust the actual size of the slides—just how big or small they
are rendered on the screen (like moving a newspaper away from or closer to your eyes).

MICROSOFT POWERPOINT 2016: STEP-BY-STEP GUIDE Revised: 2/27/2018
MC-NPL Computer Lab • 1001 Powell St • Norristown, PA 19401
Page 15 of 84
Customization
1. Right-click on the Status Bar to display the Customize Status Bar menu.
2. Notice how Theme does not have a checkmark next to it. That means this piece of information is
not currently being displayed in the status bar.
3. Click on Theme to enable it.
a. Notice how the Customize Status Bar menu remains on the screen.
b. Notice how the status bar now contains the words Office Theme. This is the name of our
presentation’s currently selected theme (we will talk about what a theme is later).
4. Click on Theme a second time in the Customize Status Bar menu to turn it off.
5. Click in a clear space to dismiss the Customize Status Bar menu.

MICROSOFT POWERPOINT 2016: STEP-BY-STEP GUIDE Revised: 2/27/2018
MC-NPL Computer Lab • 1001 Powell St • Norristown, PA 19401
Page 16 of 84
Workspace
Underneath the Ribbon is the workspace.
1. The section on the left is the Slide Navigation Pane.
a. The Slide Navigation Pane displays a thumbnail of each the slide in your presentation.
b. Clicking on a slide in this area causes the slide to be displayed in the Slide Pane on the right,
which allows you to edit the slide.
c. The slide that is currently being displayed in the Slide Pane has an orange border around it.
d. The Slide Navigation Pane is resizable.
i. Point to the grey vertical line.
ii. Notice how tour cursor changes to a resize cursor.
iii. Click and drag to resize.
2. The large section on the right is called the Slide Pane. It displays the active slide (the slide that is
selected in the Slide Navigation Pane).

MICROSOFT POWERPOINT 2016: STEP-BY-STEP GUIDE Revised: 2/27/2018
MC-NPL Computer Lab • 1001 Powell St • Norristown, PA 19401
Page 17 of 84
3. In the Status Bar, click the Notes button.
a. Notice the words “Click to add notes” has appeared above the status bar. This is called the
Notes pane.
b. The Notes pane is used for adding notes to a slide that only the presenter can see. These
notes are not visible during the slide show, but they can be printed.
c. Click the Notes button again to hide the Notes pane.
4. In the Status Bar, click the Comments button.
a. Notice the pane on the right. This is called the Comments pane.
b. Comments allow you to write messages to the other people who are editing the
presentation (or even to yourself). They are useful for collaboration. Comments are not
visible during the slide show.
c. Click the Comments button again to hide the Comments pane.
MICROSOFT POWERPOINT 2016: STEP-BY-STEP GUIDE Revised: 2/27/2018
MC-NPL Computer Lab • 1001 Powell St • Norristown, PA 19401
Page 18 of 84
Managing a Presentation
When PowerPoint opens, it will display a blank presentation ready for you to start working with. The
words that you type and the formatting that you use become your presentation.
Entering content
Let’s enter a title into the first slide of our presentation.
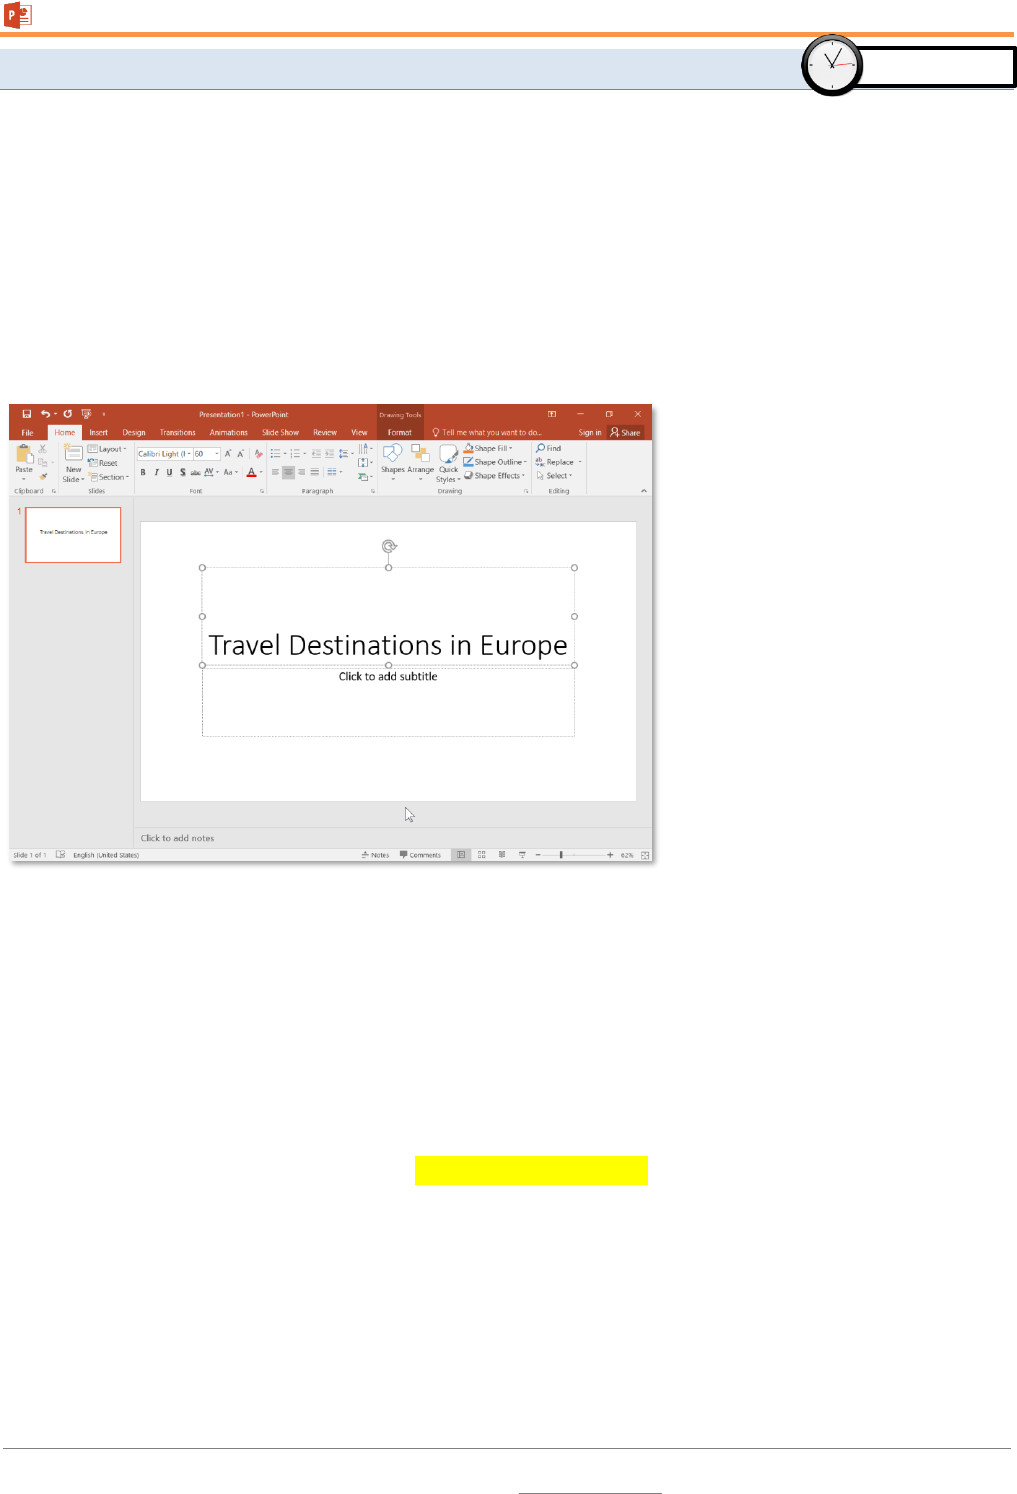
1. Click in the text box that says Click to add title. This is called a placeholder. We will talk more
about placeholders later.
2. Type Travel Destinations in Europe.
Saving your presentation
Each presentation you create is temporary unless you save it as a file with a unique name and location.
1. Prepare your save to location by inserting your flash drive.
2. Click on the File tab, click Save As, then click Browse. A Save As dialogue box will open.
3. When the Save As dialogue box opens, use the folders/navigation pane to navigate to the flash
drive. Be sure the address bar indicates a save location of Computer→KINGSTON (E:)
4. In the File name field, name your file “My Travel Presentation”.
5. Click Save.
Takes 10min
60min

MICROSOFT POWERPOINT 2016: STEP-BY-STEP GUIDE Revised: 2/27/2018
MC-NPL Computer Lab • 1001 Powell St • Norristown, PA 19401
Page 19 of 84
Back-up savings
It is important to save your work routinely, just in case PowerPoint crashes or your computer crashes.
To do this, click the Save button on the Quick Access Toolbar. If you want to keep your original
document and save your changes to a new file, choose Save As… from the File menu.
Microsoft Office applications, including PowerPoint, include a feature called AutoRecover that auto-
saves your file every 10 minutes so it can be recovered in the event that your computer crashes or
PowerPoint crashes. However, it’s best to frequently save changes yourself by clicking the Save button
to ensure that your most recent changes are saved.
Closing a presentation
1. Close the presentation by clicking on the Close button on the File Tab.
2. If you choose to close by click on the red X in the top corner of the window, you will not only close
the presentation but the program as well.
Creating a new blank presentation
If you followed Step 1 above to close, the PowerPoint program is open, but there is no presentation to
work in.
1. On the File Tab, click New. This will open a view where you can choose a presentation template.
2. Click on Blank presentation. Note that our new presentation has a default name of Presentation 2.
Note: In this course we will not be addressing saving a PowerPoint file under a different
file name or in a different format.
Please refer to our Excel 2016 or Word 2016 Step-by-Step Guides for information and
instructions on how to save Microsoft Office files with different file names and in
different formats. These guides can be found on our Class Resources page:
www.mc-npl.org/class-resources
MICROSOFT POWERPOINT 2016: STEP-BY-STEP GUIDE Revised: 2/27/2018
MC-NPL Computer Lab • 1001 Powell St • Norristown, PA 19401
Page 20 of 84
Getting Started with Slides
Placeholders
1. Open a new, blank PowerPoint presentation if one is not already open.
2. Note the slide on the right side of the work area.
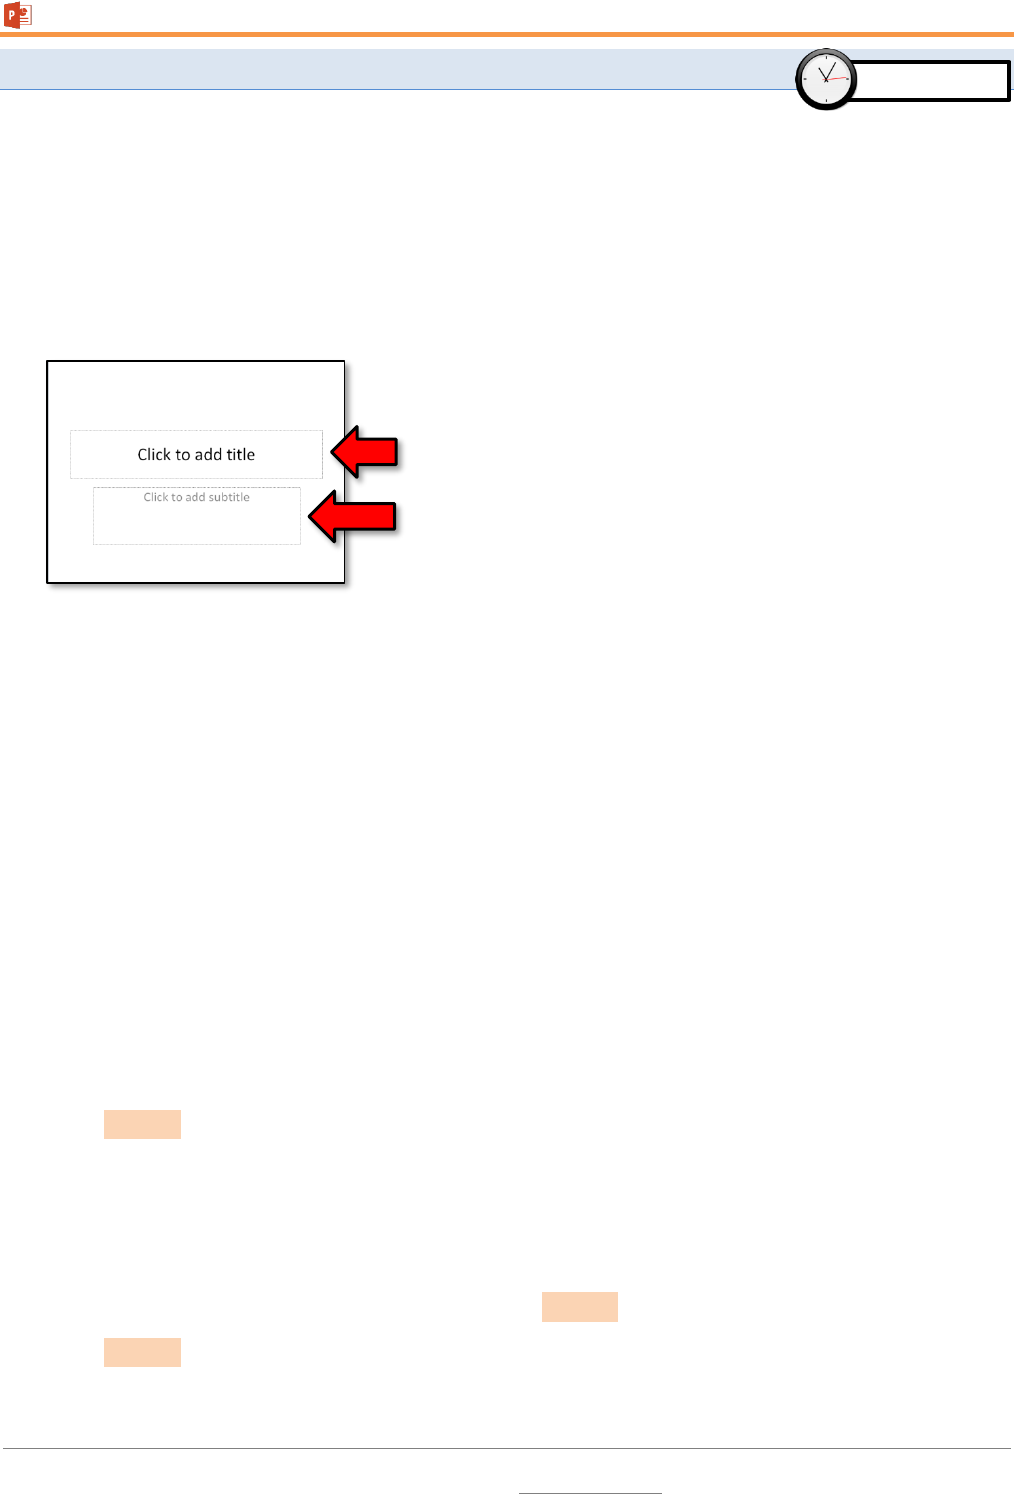
3. Note the areas on the slide that are enclosed by dotted borders. These are called placeholders.
Placeholders are essentially suggestions on how to layout your slide. They can contain many
different items, including text, pictures, and charts.
Slide Layouts
Placeholders are arranged in different layouts that can be applied to existing slides, or chosen when
you insert a new slide. A slide layout arranges your content using different types of placeholders,
depending on what kind of information you might want to include in your presentation.
1. When PowerPoint is first opened to a new presentation, the first slide will always be a Title Slide
layout.
2. To check this, on the Home tab, in the Slides group, click on the Layout button. Note that the
layout of the slide, Title Slide, is “lit up” or selected.
Customizing Slide Layouts
1. Let’s open PetSlideShow.pptx. We are going to use this presentation to practice working with
slides.
2. Take a look at the slides to get an idea of the scope of the presentation.
3. Select Slide 3 . Note the location of the two text boxes on the slide.
4. In the Slides group on the Home tab, click on the Layout button.
5. Note that the selected layout is named Title and Content.
a. Change the layout by clicking on the Section Header option.
b. Note how the location of the text boxes on Slide 3 has changed.
6. Select Slide 2 .
Takes 20min
60min

MICROSOFT POWERPOINT 2016: STEP-BY-STEP GUIDE Revised: 2/27/2018
MC-NPL Computer Lab • 1001 Powell St • Norristown, PA 19401
Page 21 of 84
7. Let’s delete one of the placeholders on this slide.
a. Position your mouse on the left dotted border of the “Click to add text”
placeholder so it changes to a move cursor (see image at right).
b. Click the border to select it. Clicking inside the text box will put the text box in edit mode.
c. Press Backspace or Delete on your keyboard.
8. Let’s add a text box to the slide:
a. Click on the Insert tab on the Ribbon and then, in the Text group, click the Text
Box button. Your cursor will turn into and upside-down cross (see image at right).
b. Click, hold and drag your mouse to draw a text box.
c. If you don’t enter any text, the text box will disppear when you click outside of it. Click
outside the text box.
Working with Slides
Insert a new slide
1. Select Slide 1 .
2. Click the bottom half of the New Slide button. This allows you to choose which layout the new
slide should use.
3. Click a Two Content slide layout.
4. Now, click the top half of the New Slide button.
5. Note a new slide was created with the Two Content layout. Unlike the bottom half, clicking the
top half of the new slide button does NOT let you choose the layout of the new slide. It sets the
layout of the new slide to be the same layout as the current slide (with one exception: if the
selected slide uses the “Title” layout, the new slide will use the “Title and Content” layout).
6. Undo the two new slides.
Copy and Paste a slide
We need Section Header type of slide just like our Slide 3 to separate our Adoptable Dogs from other
types of pets that we have pictures of. The easiest way to do this is to copy Slide 3 and paste it where
we want it to go.
1. Select Slide 3 (the “Man’s Best Friend” slide).
2. In the Clipboard group on the Home Ribbon click the Copy button.
Tip: For more control over your content, you may prefer a blank slide (a slide without
placeholders) over one of the existing layouts. Blank slides can be customized by adding
your own text boxes, pictures, charts, and more.
MICROSOFT POWERPOINT 2016: STEP-BY-STEP GUIDE Revised: 2/27/2018
MC-NPL Computer Lab • 1001 Powell St • Norristown, PA 19401
Page 22 of 84
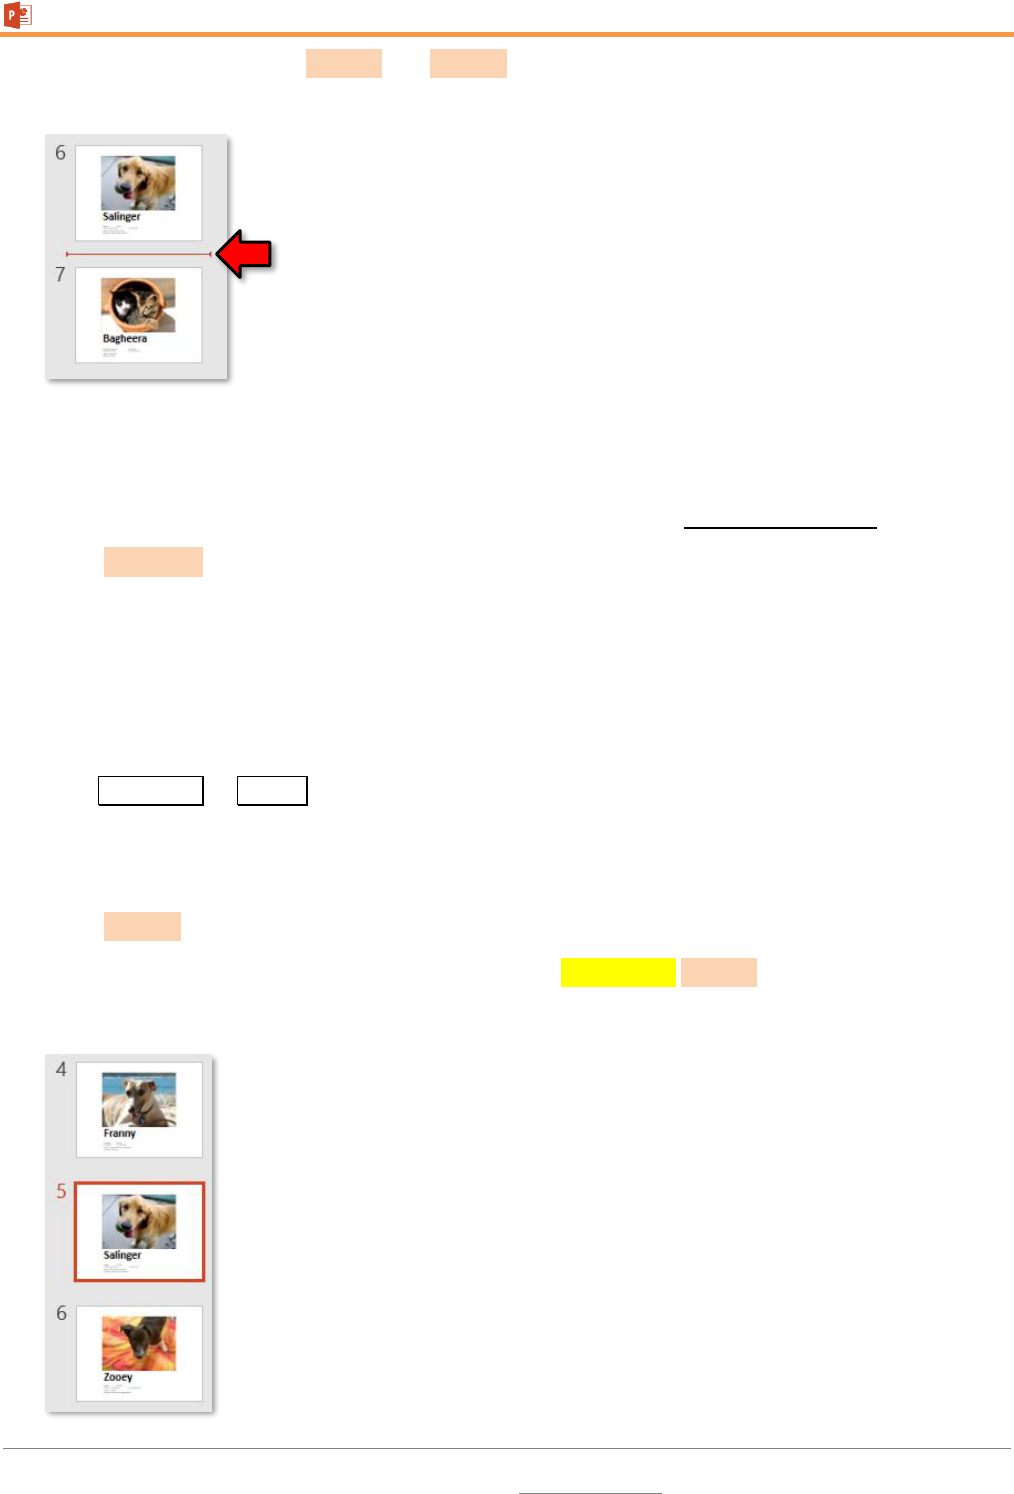
3. Click in the space between Slide 6 and Slide 7 on the Slide Navigation Pane. Note the orange
horizontal line that appears.
4. Click the Paste button in the Clipboard group. (Note: we will edit the content later)
Duplicate a slide
Duplicating a slide copies the selected slide and, in one step, pastes it directly underneath
1. Select any slide .
2. Click the bottom half of the New Slide button.
3. Click Duplicate Selected Slides from the options menu.
Delete a slide
1. Select the slide you just duplicated.
2. Press Backspace or Delete on your keyboard.
Move a slide
The Slide Navigation Pane can be used to rearrange slides.
1. Select Slide 6 (“Salinger”).
2. Click and drag the slide thumbnail upwards until it is underneath Slide 4 (“Franny”).
3. Let go of the mouse when it is in the correct position.

MICROSOFT POWERPOINT 2016: STEP-BY-STEP GUIDE Revised: 2/27/2018
MC-NPL Computer Lab • 1001 Powell St • Norristown, PA 19401
Page 23 of 84
Managing Slides and Presentation
(Still using PetSlideShow.pptx)
As you add slides to your presentation, PowerPoint offers a variety of views and tools to help you
organize and prepare your slide show.
Slide Views
We just moved a slide using the Slide Navigation Pane in Normal View. However, this approach can be
difficult if you have a large number of slides in your presentation. Using a different view of the slides
can help make rearranging them easier.
1. On the status bar, find the Slide Sorter view and click on it. This view makes it easier to visualize
your slide show.
2. Use the zoom slider so you can see all slides (around 70%).
3. Let’s move the Salinger slide ( Slide 5 ) back to her original position following Zooey ( Slide 6 ).
a. Click and drag the Salinger slide ( Slide 5 ).
b. Let go when the slide is in the correct place.
4. Click on the Reading View and note that the active slide is displayed in nearly full screen. There
are navigational controls on right side of the status bar to move between slides.
5. Click on the Slide Show view. Note there is no status bar nor any readily apparent navigational
tools.
a. Hover your mouse over the lower left corner of the slide and note the controls there.
b. Use the keys on your keyboard (including the arrow
keys, Page Up and Page Down , Space Bar , and Enter ) to move through the slides in Slide
Show view.
c. Press the Esc key to end the slide show. We will talk more about Slide Show view later.
6. Return to the Normal view .
Time check: 60min
Takes 15min
60min

MICROSOFT POWERPOINT 2016: STEP-BY-STEP GUIDE Revised: 2/27/2018
MC-NPL Computer Lab • 1001 Powell St • Norristown, PA 19401
Page 24 of 84
Organizing Slides into Sections
You can organize your slides into sections to make your presentation easier to navigate. Sections can
be collapsed or expanded in the left pane and named for easy reference. In this example, we will add
two sections: one for dogs that are available for adoption, and another for cats and other pets.
Let’s create a section that includes the slides on Adoptable Dogs.
1. Select Slide 3 as this is the slide that we want for the beginning of the section.
2. On the Home tab, in the Slides group, click the Section command.
3. Choose Add Section from the drop-down menu. An Untitled Section appears in the left pane.
4. To rename the section, right-click on the section and click Rename Section.
5. Enter “Adoptable Dogs” in the dialogue box, then click the Rename button.
6. Point to the triangle next to the Adoptable Dogs section name. Note that the ScreenTip says
Collapse Section.
7. Click on the triangle to collapse the section.
8. Note that the Adoptable Dogs section includes all the remaining slides in the presentation.
Let’s create another section for the slides on Cats and other Pets.
1. Expand the Adoptable Dogs section by clicking on the triangle.

MICROSOFT POWERPOINT 2016: STEP-BY-STEP GUIDE Revised: 2/27/2018
MC-NPL Computer Lab • 1001 Powell St • Norristown, PA 19401
Page 25 of 84
2. Select Slide 7 . This will be the beginning of our new section.
3. Follow the steps above, naming the section Cats and Other Pets.
4. Collapse both sections.
Adding Notes to Slides
PowerPoint gives you the ability to add notes to your slides, often called “speaker notes”, to help you
deliver or prepare for your presentation. You can enter and view your speaker notes using the Notes
pane or the Notes Page View.
To use the Notes Pane:
1. Select a slide to add notes to ( Slide 1 ).
2. Locate the Notes pane at the bottom of the screen, directly below the Slide pane. If the Notes
pane is not visible, click the Notes button in the status bar.
3. Click and drag the top edge of the pane to make it bigger or smaller, if desired.
4. Type something in the Notes pane.

MICROSOFT POWERPOINT 2016: STEP-BY-STEP GUIDE Revised: 2/27/2018
MC-NPL Computer Lab • 1001 Powell St • Norristown, PA 19401
Page 26 of 84
To use the Notes Page View:
1. Go to the View tab and click the Notes Page button in the Presentation Views group.
2. Click in the text box where the Note is and type more content. Note that you must click on top of
the text that is already in the text box to get an insertion point—clicking in a blank area inside of
the text box will not give you an insertion point.
3. To get back to Normal view, click the Normal button in the Presentation Views group, or use the
button in the status bar.
4. Note the added content in the Notes field of Slide 1 .
5. Close PetSlideShow.pptx and don’t save changes.
Applying a Theme
A theme is a predefined combination of colors, fonts, and effects that can be applied to your
presentation. PowerPoint includes built-in themes that allow you to easily create professional-looking
presentations without spending a lot of time formatting.
You've already been using a theme, even if you didn't know it. The theme is called Office Theme, and
it consists of a white background, the Calibri font, and primarily black text. Themes can be applied or
changed at any time.
Why Use Theme Elements?
If you're using theme elements, you'll probably find that your presentation looks pretty good. All of the
colors will work well together, which means you won't have to spend as much time formatting your
presentation. But there's another great reason to use theme elements: When you switch to a different
theme, all of those elements will update to reflect the new theme. You can drastically change the look
of your presentation in just a few clicks. Remember, the colors and fonts will only update if you're
using Theme Fonts or Theme Colors. If you choose one of the Standard Colors or any of the Fonts that
are not Theme Fonts, then your text will not change when you change the theme.
Takes 15min
60min

MICROSOFT POWERPOINT 2016: STEP-BY-STEP GUIDE Revised: 2/27/2018
MC-NPL Computer Lab • 1001 Powell St • Norristown, PA 19401
Page 27 of 84
Theme Elements
1. To explore themes open the BusinessProfile.pptx from your flash drive.
2. Click on the Design tab on the Ribbon and note there is a theme that is currently active. The
currently active theme has a gray border around it.
3. Point to the theme and note the name of the theme – Office Theme.
4. Make sure Slide 1 is selected.
5. Select the text in the Title box (the larger box).
6. Click on the Home tab and in the Font group, click on the list arrow for font color.
a. Note the top section of colors, Theme Colors. These colors are used by themes. They will
change depending on what theme you are using.
b. Note the Standard Colors section. These colors are NOT used by themes. If you use one of
these colors in you presentation, they will NOT change when you change the theme.
c. Click in a clear space to close the menu.

MICROSOFT POWERPOINT 2016: STEP-BY-STEP GUIDE Revised: 2/27/2018
MC-NPL Computer Lab • 1001 Powell St • Norristown, PA 19401
Page 28 of 84
7. Click on the list arrow for font and note the top section which lists the Theme Fonts used in the
Office theme.
8. Note that it’s generally a good idea to always use Theme Colors and Theme Fonts. The reason is
that they help ensure that your presentation will still look good if the theme is changed.
If you use Standard Colors, or any of the fonts that are not Theme Fonts, then your text will always
remain in that font and color—event when you change themes. That is generally not a desirable
result because the color/font might not look good with the new theme. Theme Colors and Fonts,
however, will change depending on the theme, which helps to ensure that your presentation will
still look good if the theme is changed.
9. Also note that themes change the slide layouts as well. For example, one theme may choose to
position slide titles at the top of the slide, while another theme might position them at the bottom.
Applying a Theme
1. Click on the Design tab.
2. Locate the Themes group. Each small image represents a theme.
3. Hover over a theme to see a live preview of it in the presentation. The name of the theme will
appear as you hover over its image.
4. Click the “more” button to access more themes.
5. Find and click on the Atlas theme to apply it to the slides (themes are in alphabetical order).

MICROSOFT POWERPOINT 2016: STEP-BY-STEP GUIDE Revised: 2/27/2018
MC-NPL Computer Lab • 1001 Powell St • Norristown, PA 19401
Page 29 of 84
6. Now let’s look at each of our slides to make sure that the application of a new theme did not
adversely affect any of our slides.
o You shouldn’t just take it for granted that a presentation will look “good” in all themes.
o This is especially true if the presentation uses non-theme fonts or if you inherited a
presentation from somebody else.
o Notice how the text on Slide 2 is white and hard to see.
o Notice the text on Slide 5 is too small to read.
7. Close BusinessProfile.pptx and don’t save changes.
Good stopping point for Session 1

MICROSOFT POWERPOINT 2016: STEP-BY-STEP GUIDE Revised: 2/27/2018
MC-NPL Computer Lab • 1001 Powell St • Norristown, PA 19401
Page 30 of 84
Working with Images
Adding clip art and pictures to your presentation can be a great way to illustrate important information
or add decorative accents to existing text. You can insert pictures from your computer, search the
internet for clip art, or add a screenshot of your own. Once an image has been inserted, you can resize
and move it to the location you want.
Inserting an Image from File
Inserting an image from file means that the picture you want to insert is saved somewhere on your
computer. You will be navigating to the picture so you need to know exactly where it is. For the
purposes of this class, the picture is on your flash drive.
1. Open WellnessPlan.pptx from your flash drive.
2. Select Slide 3 . We are going to insert a picture on that slide.
3. Click the Insert tab, then click the Pictures button in the Images group. The Insert
Picture dialogue box appears.
4. Navigate to the picture file named blood pressure.png we have placed on your flash
drive and select it.
5. Click the Insert button on the Insert Picture dialogue box.
6. Your picture is now on the slide, but it needs some tweaking…
Takes 35min

MICROSOFT POWERPOINT 2016: STEP-BY-STEP GUIDE Revised: 2/27/2018
MC-NPL Computer Lab • 1001 Powell St • Norristown, PA 19401
Page 31 of 84
Resizing an Image
1. Note that the picture has some circles and squares around its border. These are sizing handles.
2. Sizing handles display when an object, such as this picture is selected, meaning it is the current
focus of the program.
3. Note also the Picture Tools contextual tab that has opened above the Ribbon. This tab will display
as long as the picture is selected.
4. Click somewhere off of the image. Note the Picture Tools contextual tab is gone and you are back
on the Home tab.
5. Click on the image to select it. The Picture Tools contextual tab has returned.
6. Position your mouse over any one of the corner sizing handles. The cursor will become a pair of
directional arrows or a Sizing cursor.
7. Click, hold, and drag towards the center of the picture or away from it until the image is the
desired size.
8. The side sizing handles change the image's size but do not keep the same proportions. If you want
to keep the image's proportions, always use the corner handles.
Resize proportionally
Adjust the width only
Adjust the height only
Rotate

MICROSOFT POWERPOINT 2016: STEP-BY-STEP GUIDE Revised: 2/27/2018
MC-NPL Computer Lab • 1001 Powell St • Norristown, PA 19401
Page 32 of 84
Moving an Image
You may also need to move the picture so it fits with the other content.
1. Position your mouse until you see it turn into a cross with arrows or a Move cursor.
2. Click, hold, and drag your mouse until the image is positioned. Then release the mouse.
3. Deselect the picture.
Inserting an Image Using a Placeholder
(Still using WellnessPlan.pptx)
1. On the Home tab, in the Slides group, click the bottom half of the New Slide button and click Title
and Content.
2. Inside the larger text section there are placeholder icons that facilitate the insertion of various
media. Mouse over the placeholder icons until you see a ScreenTip that says Pictures and then
click on it.
3. In the Insert Picture dialogue box, select blood pressure.png and click Insert.

MICROSOFT POWERPOINT 2016: STEP-BY-STEP GUIDE Revised: 2/27/2018
MC-NPL Computer Lab • 1001 Powell St • Norristown, PA 19401
Page 33 of 84
Inserting a Clip Art Image
(Still using WellnessPlan.pptx)
1. Select Slide 2 . We’re going to insert a clip art image on this slide.
2. Click on the Insert tab. In the Images group, click the Online Pictures button.
3. A dialogue box opens that prompts us to enter a search term.
4. Note the words Bing Image Search – Search the web. Microsoft PowerPoint will search the
Internet for images using its search engine, Bing (a competitor to Google).
5. Type doctors in the search field and press Enter .

MICROSOFT POWERPOINT 2016: STEP-BY-STEP GUIDE Revised: 2/27/2018
MC-NPL Computer Lab • 1001 Powell St • Norristown, PA 19401
Page 34 of 84
6. Note the message in the yellow box below. PowerPoint has filtered the search results to only
show images that are licensed under Creative Commons licenses.
a. What is Creative Commons? It is a type of copyright license that is frequently used on the
internet. In general, it is a liberal license that gives you permission to use the image for
free.
b. HOWEVER, Creative Commons allows content creators to add “gotchas” such as “cannot
use for commercial purposes” or “must provide attribution to the original author”.
MICROSOFT POWERPOINT DOES NOT SHOW YOU THESE. So, at the end of the day, it is up
to you to verify that you are abiding by the author’s SPECIFIC license terms—and finding the
specific license terms is not always an easy task.
c. For this reason, if you are planning to use clip art for any professional purpose, we
recommend using a clip art website that contains only public use images. One such website
is pixabay.com. Public use images give you complete control over how you may use them.
d. Another alternative is to purchase clipart (also called “stock images”). This is how
businesses typically obtain clip art.
7. Find a picture you like and point to it.
8. Click on the gray sub title beneath it.
9. Notice how a web browser opens that takes you to the website that the image came from. At this
point, you could navigate the website to find the specific license terms of the image, and to verify
that you are abiding by the terms (again, not always an easy task, depending on the website).
10. Close the web browser to return to PowerPoint.

MICROSOFT POWERPOINT 2016: STEP-BY-STEP GUIDE Revised: 2/27/2018
MC-NPL Computer Lab • 1001 Powell St • Norristown, PA 19401
Page 35 of 84
11. Now, we will insert the image into our document.
a. Click on the picture to select it.
b. Click the Insert button.
12. Resize and move it so it fits with the other content.
Inserting an Image from a Website
(Still using WellnessPlan.pptx)
You can also insert images from a specific website into your presentation. Again, be aware that many
images on the internet are protected by copyright. When you find an image you like, you should read
the website’s fine print to determine if you can use the image or not. This is especially important if you
are making a presentation for commercial purposes (for example, as part of your job).
1. Select Slide 5 . This slide is about healthy eating, so let’s find a picture related to this topic.
2. Open Internet Explorer using the Start Menu.
3. Click into the address bar at the top of the screen and type
www.pixabay.com. Pixabay is a website that contains images that you can
download and use for free, without restriction.
4. Type “healthy food” into the search box and press Enter .
5. Click on an image you like (except for the ones in the first row—these cost money).
Show Slide 5

MICROSOFT POWERPOINT 2016: STEP-BY-STEP GUIDE Revised: 2/27/2018
MC-NPL Computer Lab • 1001 Powell St • Norristown, PA 19401
Page 36 of 84
6. On the next screen, notice the copyright notice on the right. It says “CC0 Creative Commons”.
This means you can use the image however you want. You don’t even have to give the original
author credit.
7. Right-click in the middle of the image and click Copy.
8. Switch back to PowerPoint using the taskbar.
9. In the Home tab, under the Clipboard group, click the Paste button proper.
10. Resize and move the image so it’s not covering up any text.
11. Close Internet Explorer.
Inserting a Screenshot
(Still using WellnessPlan.pptx)
Screenshots are pictures that capture the visible windows and items displayed on your computer
screen. They may include an open window of a website, items on your Desktop, or an open program.
We are going to capture an entire website window and then part of a window to use in our
presentation.
Full window capture
1. Open Internet Explorer from the Start Menu.
2. In the address field, type www.healthline.com.
3. Switch back to the PowerPoint presentation.
Tip: If you’re planning on making the image really big on the slide, it’s best to use a high-
resolution version of the image. To do this, click the green “Free Download” button on the
right. This will download an image file to your hard drive. Then, follow the instructions found
in the “Inserting an Image from File” section to insert the image file into the presentation.
Show Slide 5

MICROSOFT POWERPOINT 2016: STEP-BY-STEP GUIDE Revised: 2/27/2018
MC-NPL Computer Lab • 1001 Powell St • Norristown, PA 19401
Page 37 of 84
4. Select Slide 6 .
5. On the Insert tab, in the Images group, click the Screenshot button.
6. Notice that drop-down appears which shows thumbnails of the other windows that are open on
our computer. In our case, we just have one other window open—Internet Explorer.
o Note that it may show you a thumbnail of an empty window (pictured below). This is a
Windows bug.
o Also note that if any of your windows are minimized, they will NOT appear here.
7. Click on the thumbnail for Internet Explorer.
8. A dialog appears, asking if we want to “hyperlink” the screenshot to the website URL. Click Yes.
This will associate the website address with the screenshot, allowing us to return to the website if
we forget where it came from.
9. The screenshot will appear in your slide.

MICROSOFT POWERPOINT 2016: STEP-BY-STEP GUIDE Revised: 2/27/2018
MC-NPL Computer Lab • 1001 Powell St • Norristown, PA 19401
Page 38 of 84
10. Right-click on the screenshot. Because we answered Yes in the previous dialogue, it is giving us an
Open Hyperlink option. Clicking this option will open the webpage that the screenshot came from.
11. Click in a clear space to dismiss the context menu.
12. Click Undo to remove the screenshot. Next, we are going to insert only a portion of that website
window.
Partial window capture
1. Click on the Internet Explorer window to activate it and then click back into the presentation. In
order to successfully execute a partial window capture, the window we want to capture has to be
“behind” the PowerPoint window.
2. On the Insert tab, in the Images group, click the Screenshot button.
3. Click Screen Clipping.
4. After a few moments, notice how a faded view of your website window appears, and your cursor
turns into a cross shape.
5. Click, hold and drag your mouse to draw a box around a section of the faded website.
Tip: For best results, start at the top-
left corner of the area you would like
to select, then
click and drag
down to
the bottom-right corner.

MICROSOFT POWERPOINT 2016: STEP-BY-STEP GUIDE Revised: 2/27/2018
MC-NPL Computer Lab • 1001 Powell St • Norristown, PA 19401
Page 39 of 84
6. When you let go of the mouse button you will be back in your PowerPoint and the screen clipping
will appear in your slide. Note that performing a Screen Clipping does NOT give us the option of
saving the website URL.
7. Close PowerPoint and don’t save changes to WellnessPlan.pptx.
8. Close Internet Explorer.
Inserting an Image as Background for a Slide
It is possible to use an image of your choice to fill the background of a slide.
1. Open a blank PowerPoint presentation.
2. Click the New Slide button so that we have 2 slides.
3. Select Slide 1 .
4. Click the Design tab.
5. In the Customize group, click on the Format Background button.
6. Notice how a Format Background pane appears on the right.

MICROSOFT POWERPOINT 2016: STEP-BY-STEP GUIDE Revised: 2/27/2018
MC-NPL Computer Lab • 1001 Powell St • Norristown, PA 19401
Page 40 of 84
7. Click on the Picture or texture fill option button. The slide will fill with a textured background. You
can try some of the other textured backgrounds by clicking the Texture list arrow.
8. Click on the File button. This will open a dialog box, allowing us to select an image file as our
background.
9. Select vermont.jpg from your flash drive, and click Insert.
10. It would be nice if we could remove the “Visit Beautiful Vermont” text at the bottom of the image.
To do this, we can adjust the Offset bottom setting. Decrease Offset bottom to stretch the image
and hide the “Visit Beautiful Vermont” text.
11. Close PowerPoint and don’t save changes.
Tip: Clicking “Apply to All” will apply the
same background image to all of your slides.

MICROSOFT POWERPOINT 2016: STEP-BY-STEP GUIDE Revised: 2/27/2018
MC-NPL Computer Lab • 1001 Powell St • Norristown, PA 19401
Page 41 of 84
Transitions
If you've ever seen a PowerPoint presentation that had "special effects" between each slide, then
you've seen slide transitions. A transition can be as simple as fading to the next slide, or it can be a
flashy, eye-catching effect. That means you can choose transitions to fit the style of any presentation.
Applying a Transition
1. Open FlashCards.pptx from your flash drive.
2. Select Slide 1 .
3. Click the Transitions tab and locate the Transition to This Slide group.
4. Notice how the None option has a gray background. This means that the currently selected slide
does not have a transition. This is the default setting for all slides.
5. Click the More button to display all of the transitions.
a. Note that transitions are grouped into three categories; Subtle, Exciting, and Dynamic
Content.
b. The categories are self-explanatory except for Dynamic Content. In that category, the
transitions affect the content of a slide such as text boxes or images instead of the entire
slide.

MICROSOFT POWERPOINT 2016: STEP-BY-STEP GUIDE Revised: 2/27/2018
MC-NPL Computer Lab • 1001 Powell St • Norristown, PA 19401
Page 42 of 84
6. Click on the Dissolve transition in the Exciting category to apply it to Slide 1 . This will
automatically preview the transition as well.
Previewing a Transition
You can preview the transition for a selected slide at any time, using either of these two methods:
1. Click the Preview button on the Transitions tab. This previews the transition of the currently
selected slide.
2. Click the star Play Animations icon. The icon appears on the Slides tab in the left pane beside any
slide that includes a transition. This button will preview the slide’s transition AND preview the
slide’s animations.
3. To change the transition, select a different one to apply it.
Modifying a Transition
Modifying the Duration
1. Select Slide 1 as that includes the transition you wish to modify.
2. In the Transitions tab, in the Timing group, locate the Duration field. This specifies how long the
transition will take to animate. The time is measured in seconds. Enter 2.50 seconds.

MICROSOFT POWERPOINT 2016: STEP-BY-STEP GUIDE Revised: 2/27/2018
MC-NPL Computer Lab • 1001 Powell St • Norristown, PA 19401
Page 43 of 84
Adding a Sound
1. Select Slide 1 as that includes the transition you wish to add sound to.
2. In the Timing group on the Transitions Ribbon, click the list arrow next to Sound and click a sound.
3. Use the “star” in the Slides pane to preview your transition and sound.
Removing a Transition
1. Select Slide 1 .
2. On the Transitions tab, in the Transition to This Slide group, notice how the currently selected
transition is Dissolve (it has a gray background).
3. Choose None from the gallery in the Transition to This Slide group. The transition has now been
removed.
4. Close FlashCards.pptx and don’t save changes.
Note: When working with transitions, the Apply To All command in the Timing group can
be used at any time to make your presentation uniform. Use this command with caution.
Not only does it apply the same transition to every slide, but it also applies all the settings
that are currently displayed in the Timing group to every slide, such as Duration and
Sound.
Tip: How to remove the transitions from ALL slides
1.
Select any slide in the presentation and set its transition to None.
2.
On the Transitions tab, in the Timing group, click Apply to All. This will
apply the current slide’s transition (None) to all of the other slides,
effectively removing the transitions from all slides in your presentation.

MICROSOFT POWERPOINT 2016: STEP-BY-STEP GUIDE Revised: 2/27/2018
MC-NPL Computer Lab • 1001 Powell St • Norristown, PA 19401
Page 44 of 84
Animations
PowerPoint offers a variety of animations that you can use to enhance your presentation. Animations
can be used to make objects appear on a slide, exit a slide, stand out on a slide, or move around
within a slide.
Four Types of Animations
Entrance: These control how an object enters the slide. For example,
with the Bounce animation, the object will "fall" onto the slide and then bounce several times.
Emphasis: These occur while an object is already on the slide. They are used to draw attention to
an object. For example, you can make an object spin around.
Exit: These control how an object exits the slide. For example, with the Fade animation, the object
will slowly fade away.
Motion Paths: These allow an object to move along a predetermined path within the slide. For
example, in a circle.
Getting Started
1. Open TriviaNight.pptx. This slide show was designed as a way of presenting a trivia contest at a
party. There are question slides and answer slides.
2. Select Slide 2 and note that it poses a trivia question.
3. Select Slide 3 and note that this is the slide where the answer will be revealed.
4. Our focus will be on the “answer” slide ( Slide 3 ). We are going to apply animation to the clock
picture and to the text box that displays the answer to the trivia question.
5. Note that there are four objects on the slide: two text boxes, the clock, and a large white object
that contains the other three objects.
o Click on the different objects and note the image controls.
o Note that the way to deselect the large white object is by clicking outside of the slide in the
gray area.
6. Deselect whatever you have selected by clicking outside of the slide in the gray area.
Applying Animations
1. Click on the Animations tab on the Ribbon. Note that the buttons in the Animation group look
greyed out. In order to activate the tools, we need to select an object to use them on.
2. Click the clock. Note that the animation tools are active now.
3. Move the clock to the right side of the slide.
Takes 35min
60min
Show Slides 6 - 9

MICROSOFT POWERPOINT 2016: STEP-BY-STEP GUIDE Revised: 2/27/2018
MC-NPL Computer Lab • 1001 Powell St • Norristown, PA 19401
Page 45 of 84
4. Click on the More button to expand the effects gallery.
5. Note that the animation effects are grouped into categories: Entrance, Emphasis, Exit, and Motion
Paths.
6. Note also that underneath these divisions, there is a link to more varieties in each category. Click
on More Entrance Effects.
a. Note that the additional entrance effects are grouped by intensity. There are Basic effects,
Subtle, Moderate, and Exciting effects.
b. Click on some of the effects to preview them.
c. Finally, let’s all click the Fly In effect in the Basic category, and commit it by clicking the OK
button.

MICROSOFT POWERPOINT 2016: STEP-BY-STEP GUIDE Revised: 2/27/2018
MC-NPL Computer Lab • 1001 Powell St • Norristown, PA 19401
Page 46 of 84
7. Note the small 1 that appears next to the clock. This indicates that the object has an animation
applied.
8. Note that these numbers are only visible when the Animation tab is active.
a. Click on the Home tab and notice how the number has disappeared.
b. Click back on the Animation tab.
9. Note also, in the Slides Pane, the slide will now have a star symbol next to it. Clicking on the star
will launch the animation.
10. Some effects have options. Click on the clock again to select it. Note at the right end of the
Animations group there is an active Effect Options button.
11. Click on the Effect Options button and click From Left. A preview will play.
Adding Multiple Animations to an Object
If you select a new animation from the menu in the Animation group, it will replace the object's
current animation. However, you'll sometimes want to place more than one animation on an object,
for example an Entrance and an Exit effect. To do this, you'll need to use the Add Animation button,
which will allow you to keep your current animations while adding new ones.
1. Click the clock and move it to the left side of the slide.
2. In the Advanced Animation group, click the Add Animation button.
3. Find the Fill Color effect in the Emphasis section and click it. A preview will play.

MICROSOFT POWERPOINT 2016: STEP-BY-STEP GUIDE Revised: 2/27/2018
MC-NPL Computer Lab • 1001 Powell St • Norristown, PA 19401
Page 47 of 84
4. Note there are now two numbers next to the clock indicating two animations are applied to the
slide.
5. Click on the star in the Slide Navigation Pane to view the animations.
Copy Animations with the Animation Painter
In some cases, you may want to apply the same effects to more than one object. You can do that by
copying the effects from one object to another using the Animation Painter. We are going to copy the
clock animations to the text box that has the answer to the quiz question.
1. Click the clock and in the Advanced Animation group click the Animation Painter button.
2. Move your cursor towards the text box and note it has a little paintbrush next to it.
3. As soon as you click on the text box, the animation will be applied and a preview will play.
4. When the preview finishes, you will see the numbers 3 and 4 next to the text box.

MICROSOFT POWERPOINT 2016: STEP-BY-STEP GUIDE Revised: 2/27/2018
MC-NPL Computer Lab • 1001 Powell St • Norristown, PA 19401
Page 48 of 84
The Animation Pane
The Animation Pane allows you to view and manage all of the effects that are on the current slide. You
can modify and reorder effects directly from the Animation Pane, which is especially useful when you
have a large number of effects.
Opening the Animation Pane
1. In the Animations tab, in the Advanced Animation group, click the Animation Pane button.
2. Notice how the Animation Pane opens to the right. It contains a list of all the animations that are
applied on this slide.
3. Notice that the bottom two animations are highlighted orange. This is because these animations
are assigned to the text box and the text box is currently selected.
4. Deselect the text box by clicking in a clear area off the slide. Notice how the two animations are
no longer highlighted.
Reordering Effects
We are going to utilize drag and drop to re-order the animations. We’re going to make the Fill Color
“Emphasis” effect on the clock Picture appear after the Fly-In “Entrance“ effect on the text box.
1. Point to each animation and notice the ScreenTip. The ScreenTips tells you the name of the
animation.

MICROSOFT POWERPOINT 2016: STEP-BY-STEP GUIDE Revised: 2/27/2018
MC-NPL Computer Lab • 1001 Powell St • Norristown, PA 19401
Page 49 of 84
2. Locate the Fill Color Emphasis effect for Picture 2 (the clock) using the ScreenTips (the second
animation in the list).
3. Drag and drop it underneath the Fly-In Entrance effect on the TextBox (the third animation in the
list).
4. Describe what is going to happen when the animations are played:
a. Clock will fly in
b. Text box will fly in
c. Clock will color fill
d. Text box will color fill
Previewing Effects
The Play From button in the Animation Pane will play the animations starting at the selected
animation. The colored boxes to the right of the objects list will interact with a blue timeline that
shows the progress through each effect.
1. Click on the first animation to select it.
2. Click the Play From button to view all the effects.
Effect Triggers
Watching a preview of effects on a slide is different than when they play in a slide show. Something
needs to trigger an effect to appear while in slide show mode. By default, the trigger is usually a
mouse-click, but this can be changed.
1. Click the Slide Show button in the status bar to start the slide show from our current slide to
see how the effects “run”. Note that a mouse click is required to launch each effect.
2. Press Esc to exit the slide show.

MICROSOFT POWERPOINT 2016: STEP-BY-STEP GUIDE Revised: 2/27/2018
MC-NPL Computer Lab • 1001 Powell St • Norristown, PA 19401
Page 50 of 84
3. In the Animation Pane, click on the Entrance effect for the Picture 2 object (the first animation in
the list) to select it. Then, click on the drop-down arrow. Notice that the Start On Click option is
selected.
4. We’ll keep the Start On Click setting for the first animation but let’s change the other effects to
Start After Previous.
a. Click the text box’s entrance effect and click the drop-down arrow.
b. Click the Start After Previous option.
c. Change the start options on the other two effects to the same setting.
5. In order to check the effects, we’ll need to run a slide-show.
a. Click the Slide Show button to start the show from our current slide which has the effects.
b. Click the mouse once and note the other effects come on one after another without
clicking.
c. Press Esc to exit the slide show.
6. Note the numbers next to the objects have changed—they are all ones now. This number
represents how many mouse clicks it takes for the animation to play when in presentation mode.
We basically linked all the animations with one starting click, which is why they all say “1”.

MICROSOFT POWERPOINT 2016: STEP-BY-STEP GUIDE Revised: 2/27/2018
MC-NPL Computer Lab • 1001 Powell St • Norristown, PA 19401
Page 51 of 84
The Effect Options Dialogue Box
From the Animation Pane, you can access an Effect Options dialogue box which contains more
advanced options that you can use to add even more interest and control to your animations. We’ll try
a fun option for our Text Box. Remember that the text box has a Fly-In Entrance effect on it. We are
going to fine-tune that effect.
Animating Text
1. In the Animation Pane, click the Fly-In Entrance effect on the Text Box (the second animation in
the list).
2. Use the drop-down arrow and click on Effect Options.
3. On the Effect tab of the Fly In dialogue box, find the Enhancements section and change the
Animate text setting to By word. Click OK. The preview will play the enhanced effect.
4. Click on the Star in the left pane to play all the effects again.
Setting Effect Timings
We are going to change how quickly or slowly the effects materialize. Specifically, we are going to
make the Emphasis Color Fill effect run a little faster and the Animate text run slower.
1. In the Animation Pane, click on the Fill Color effect for Picture 2 (the third animation in the list).
2. Click the drop-down arrow and click Timing.
3. In the dialogue box, look for the Duration setting. It is set at 2 seconds, meaning the color fill effect
takes 2 seconds to completely execute. Use the drop-down arrow to change the setting to 1
second. Click OK.
4. Apply the same setting to the Fill Color effect on the TextBox using the above instructions.
5. Use the star in the Outline Pane to play all the animations.
6. Close TriviaNight.pptx and don’t save changes.

MICROSOFT POWERPOINT 2016: STEP-BY-STEP GUIDE Revised: 2/27/2018
MC-NPL Computer Lab • 1001 Powell St • Norristown, PA 19401
Page 52 of 84
Using the Motion Path Animation
The motion path animation provides many possibilities for creativity. We’re going to create a slide with
two Motion Path animations and one Entrance animation. We’re also going to add a background to
the slide. For the background of the slide we are going to use a picture that is on your flash drive
Setting the Background Image
1. Open PowerPoint.
2. We are not going to be writing anything on the slide so delete the placeholders.
3. We are only going to be working in one slide so hide the Slide Navigation Pane so that we have
more screen real estate. Point to the resize border and drag all the way to the left.
4. In the Design tab, in the Customize group, click on the Format Background button.
5. In the Format Background pane, click Picture or texture fill and click on the File button.
6. In the Insert Picture dialogue, navigate to your flash drive and insert sky.jpg.
7. Close the Format Background pane.
Takes 45min
60min

MICROSOFT POWERPOINT 2016: STEP-BY-STEP GUIDE Revised: 2/27/2018
MC-NPL Computer Lab • 1001 Powell St • Norristown, PA 19401
Page 53 of 84
Inserting three objects: two pictures from files and a shape
1. Go to the Insert tab on the Ribbon. In the Images group, click on the Pictures button.
2. Navigate to your flash drive and insert biplane.gif. De-select the image.
3. Repeat those steps to insert Snoopy.gif. De-select the image.
4. Go to the Insert tab on the Ribbon. In the Illustrations group, click on the Shapes button.
5. In the Shapes gallery, in the Stars and Banners section, click on Explosion 2 and draw the
shape onto the slide.
Formatting the Explosion 2 shape
1. Click the Explosion 2 shape.
2. Click on the Format tab on the Drawing Tools contextual tab.
3. On the Drawing Tools Format Ribbon, in the Shape Styles group, click on Shape Fill and click on
Yellow in the Standard Colors section.
4. Look for the Shape Outline button underneath Shape Fill and click on it.
5. Click on Red in the Standard Colors section.
6. Click back on the Shape Outline button and give the outline a Weight of 4 ½ pt.
7. Next, we want to move the Explosion 2 shape to in the upper-right corner of the slide and position
it so that it’s half way off the slide.
a. Using the Zoom Slider in the status bar, zoom out to about 60%.
b. Move the Explosion 2 shape to the upper-right corner and make it half off the slide.
8. De-select the Explosion 2 shape object.

MICROSOFT POWERPOINT 2016: STEP-BY-STEP GUIDE Revised: 2/27/2018
MC-NPL Computer Lab • 1001 Powell St • Norristown, PA 19401
Page 54 of 84
Formatting the Biplane and Snoopy
1. Click the biplane object.
2. Click on the Format tab on the Picture Tools contextual tab.
3. On the Picture Tools Format Ribbon, in the Size group, note the height and width of the Biplane
object.
4. Scroll the width up to 3.6. Note the height will change proportionally.
5. Click the Snoopy object.
6. Click on the Format tab on the Picture Tools contextual tab.
7. On the Drawing Tools Format Ribbon, in the Size group, note the height and width of the Snoopy
object.
8. Scroll the width up to 1.5. Note the height will change proportionally.
9. Click and drag the rotate object handle and rotate a little ways to the left to give Snoopy some tilt.
10. Zoom out to about 40% using the Zoom Slider in the Status Bar.
11. Move Snoopy and the biplane so they are completely off the left side of the slide.

MICROSOFT POWERPOINT 2016: STEP-BY-STEP GUIDE Revised: 2/27/2018
MC-NPL Computer Lab • 1001 Powell St • Norristown, PA 19401
Page 55 of 84
Assigning the motion paths
1. Click the biplane and click on the Animations tab on the Ribbon.
2. Click on the More button in the Animation group and scroll until you see the Motion Paths section.
3. Click on the Lines motion path.
4. After a few seconds, you will see a motion path line appear on the biplane.
a. The green dot represents where the object will start from.
b. The dotted line represents the path the object will take.
c. The red dot represents where the object will move to.
d. Notice how there is “ghosted” biplane attached to the red dot. This is another indication
for where the object will move to.
e. Because we just created the motions paths animation, the motion paths line is currently
selected.
f. Click in a clear space. Notice how the ghosted image disappears and the dots have turned
into triangles. This means the motion path line is deselected.
Note: When you select the “Lines” motion path animation, the screen seems to freeze
for a few seconds. This is because PowerPoint is playing a preview of the animation.
But because the picture is off the slide, the animation is not visible.

MICROSOFT POWERPOINT 2016: STEP-BY-STEP GUIDE Revised: 2/27/2018
MC-NPL Computer Lab • 1001 Powell St • Norristown, PA 19401
Page 56 of 84
5. Click on the dotted motion paths line, or one of its triangles, to select it again.
6. Now that it is selected, we can change the starting and ending locations. Focus your cursor on the
red dot until you see the two-headed white arrow. Click and drag it so the ghosted biplane is
completely off of the slide and next to the explosion shape.
7. Repeat the same steps to apply a motion path line to Snoopy.
8. Use the Preview button on the Animations tab to view the animation.
Animating the Explosion 2 shape
1. Click the Explosion 2 shape.
2. Locate the Zoom Entrance effect and apply it to the shape.
Setting Start options and Timings for the animations
1. Click the biplane.
2. On the Animations tab look for the Timing group.
3. Note that the start option is On Click. We will keep that option.
4. Change the Duration to 3.5 seconds.
5. Click Snoopy.
6. In the Timing group change the Start option to With Previous. We choose this option so that
Snoopy will be on the slide at the same time as the biplane.

MICROSOFT POWERPOINT 2016: STEP-BY-STEP GUIDE Revised: 2/27/2018
MC-NPL Computer Lab • 1001 Powell St • Norristown, PA 19401
Page 57 of 84
7. Change the Duration to 3.5 seconds.
8. Change the Delay to 00.50. This will delay Snoopy’s entrance onto the slide so that it appears a
split second after the biplane.
9. Click the Explosion shape.
10. In the Timing group change the Start option to After Previous.
11. Set the Duration to 00.50 seconds. We want it to explode quickly.
12. De-select the shape.
Viewing the Slide Show
1. Click on the Slide Show view and start the animations by clicking the mouse once.
2. Use the Esc key to end the show.
3. Start the show again. But this time, note that the explosion remains in view at the end of the
show. We can fix that.
4. Use the Esc key to end the show.
Launching the Animation Pane
The Animation Pane is an environment where animations for multiple objects can be handled.
1. On the Animations Ribbon, in the Advanced Animations group, click on the Animation Pane
button.
2. In the Animation Pane, click on the first picture entry (“Picture 3”). This represents the biplane
picture. The way we can tell is because the picture’s motion path line becomes selected (the green
dot in the middle of the biplane is a dot and not a triangle).
3. However, it is possible to assign objects like pictures more meaningful names. This is done using
the Selection and Visibility pane.
Selection and Visibility Pane
We will be using this tool to give our objects on our slide meaningful names. This can be very handy
when you have a slide with several objects on it.
1. Go to the Home tab on the Ribbon. In the Editing group, click the Select button and choose
Selection Pane.
2. Another side pane called Selection will open. This pane lists all of the objects on the slide.

MICROSOFT POWERPOINT 2016: STEP-BY-STEP GUIDE Revised: 2/27/2018
MC-NPL Computer Lab • 1001 Powell St • Norristown, PA 19401
Page 58 of 84
3. Click on “Picture 3” in the Selection pane. Notice how the biplane picture becomes selected (its
resize handles appear).
4. Click on “Picture 3” again. The name will turn into a text box, allowing us to rename the object.
5. Use the Delete key to clear the text box’s contents, type “Biplane” into the text box, then
tap Enter .
6. Notice how the object’s name in the Animation Pane changed.
7. Repeat the steps above to rename “Picture 4” to “Snoopy”
8. Repeat the steps above to rename “Explosion 2 5” to “Explosion”.
9. Close the Selection pane.
Add Animation
Let’s fix the issue of the Explosion shape remaining in view at the end of the show. To do this we will
have to add an Exit animation to the explosion object.
1. Click the Explosion shape.
2. Click on the Animations tab. In the Advanced Animation group, click the Add Animation button.
3. Click the Fade animation in the Exit section.
4. In the Timing group, set the Start option to After Previous.

MICROSOFT POWERPOINT 2016: STEP-BY-STEP GUIDE Revised: 2/27/2018
MC-NPL Computer Lab • 1001 Powell St • Norristown, PA 19401
Page 59 of 84
5. When all the animations have been applied, the Animation Pane should look like this:
Setting More Effect Options
Let’s make a sound play during the explosion entrance effect.
1. In the Animation Pane, click the Explosion shape’s Entrance effect (Zoom), click the list arrow and
click Effect Options.
2. In the dialogue box, on the Effect tab, in the Enhancements section, click the Explosion sound and
click OK.
3. Run the Slide Show.
4. Close PowerPoint and don’t save changes.
Checking Spelling
PowerPoint provides you with several proofing features that will help you produce professional, error-
free presentations.
Running a Spell Check
1. Open BandBoostersMeeting.pptx from your flash drive.
2. To insure the Spell Check starts at the beginning of the presentation, make sure Slide 1 is
selected.
3. Go to the Review tab.
4. Locate the Proofing group and click the Spelling button.
5. The Spelling pane will open on the right. For each error in your presentation, PowerPoint will try to
offer one or more suggestions. The table below lists all of the misspelled words the spell checker
will pick up, along with the action we want to take.

MICROSOFT POWERPOINT 2016: STEP-BY-STEP GUIDE Revised: 2/27/2018
MC-NPL Computer Lab • 1001 Powell St • Norristown, PA 19401
Page 60 of 84
Word
Action
Texlahoma
This is the name of the High School. The Spelling pane is telling us the word
Texlahoma is not in the dictionary. We now have an opportunity to add the word
to the dictionary, which is a wise choice if it is a word you are likely to use often.
Click the Add button.
Preasent
This word is incorrectly spelled.
Click Present in the list of suggestions and click Change.
june
This word should be capitalized.
Click June in the list of suggestions and click Change.
spectaculer
Change to spectacular.
GwePierce
This is supposed to be somebody’s name, but it is not written correctly.
PowerPoint does not have any suggestions for us. We will have to manually type
the correct spelling into the slide.
Click into the table on the slide and change the name to Gwen Pierce.
Click the Resume button in the Spelling pane to resume the spell check.
Funraising
Change to Fundraising.
Candybar
We prefer to spell this as one word.
Click Ignore to ignore this misspelling.
6. A “spell check complete” message will appear when the spell check is complete.
Correcting a single misspelling
By default, PowerPoint automatically checks your presentation for spelling errors and points them out
to you by underlining them with red, wavy lines. You can correct these misspellings one a time instead
of running the spell checker like we did above.
1. Right-click the misspelled word. A context menu will appear.
2. Click the correct spelling of the word from the list of suggestions.
3. The word will be corrected.

MICROSOFT POWERPOINT 2016: STEP-BY-STEP GUIDE Revised: 2/27/2018
MC-NPL Computer Lab • 1001 Powell St • Norristown, PA 19401
Page 61 of 84
Presenting the Slide Show
(Still using BandBoostersMeeting.pptx)
Once your slide show is completed, you will need to learn how to present it to an audience.
PowerPoint offers several tools and features that can assist you in making your presentation smooth,
engaging, and professional.
Starting a Slide Show
1. Click the Slide Show tab.
2. Locate the Start Slide Show group and click the From Beginning command to start the slide show
with the first slide.
3. Use your mouse to click through the slides.
4. Press the Esc key at any time to exit the show.
Advancing and Reversing Slides
1. Begin the slide show from the beginning again.
2. Move the mouse. Notice how you have to “wiggle” it a little in order for the cursor to appear.
3. Notice the faint buttons in the bottom-left of the screen. Click the first button to go back one slide
and the second button to advance one slide.
4. You may also use the arrow keys on your keyboard to advance and reverse slides.
5. The Enter key and Space Bar on the keyboard can be used to advance slides.
Other ways to start a slide show:
Quick Access Toolbar button. This will start the slide show from
the beginning.
From Current Slide button (Slide Show tab > Slide Show group).
This will start the slide show from the current slide.
Slide Show button in the status bar. This will start the slide
show from the current slide.
Takes 25min
60min

MICROSOFT POWERPOINT 2016: STEP-BY-STEP GUIDE Revised: 2/27/2018
MC-NPL Computer Lab • 1001 Powell St • Norristown, PA 19401
Page 62 of 84
Jumping to a Non-Adjacent Slide
1. Click on the fourth button.
2. Notice how thumbnails of all of the slides in your presentation appear.
3. Notice how the slide you are currently on is outlined in orange.
4. Click on a thumbnail to jump to that slide.
Stopping or Ending Slide Show
1. Click on the button with three dots (the last button).
2. Click End Show in the menu that appears.
3. You can also press the Esc key at the top left of your keyboard to end the show.
Zooming in
1. Click on the button with the magnifying glass.
2. Notice how the mouse cursor has changed to a magnifying glass.

MICROSOFT POWERPOINT 2016: STEP-BY-STEP GUIDE Revised: 2/27/2018
MC-NPL Computer Lab • 1001 Powell St • Norristown, PA 19401
Page 63 of 84
3. Click anywhere on the slide to zoom in.
4. Notice how the mouse cursor has changed to an open hand.
5. Click and drag the mouse to move around the slide.
6. Right-click to zoom back out.
Presentation Tools and Features
(Still using BandBoostersMeeting.pptx)
PowerPoint provides convenient tools and features that you can use while you are presenting your
slide show. Features include changing your mouse pointer to a pen or highlighter to draw attention to
items in your slides. In addition, you can jump around to slides in your presentation or access items
from your computer Desktop if needed.
Laser Pointer
1. Start the slide show again.
2. If you don’t have a laser pointer but have a mouse and a keyboard, you can simulate a laser pointer
by holding down the Ctrl key and holding the left mouse button down and moving your cursor
around the screen during a slide show. Try it.
3. End the slide show.
Pen and Highlighter (Annotations)
1. Select Slide 8 and start the slide show From Current Slide.
2. Click on the Pen button in the bottom left of your screen. There is no ScreenTip.
Tip: It is possible to change the color of the laser point cursor. See the
“Accessing Slide Show Setup Options” section below for instructions.

MICROSOFT POWERPOINT 2016: STEP-BY-STEP GUIDE Revised: 2/27/2018
MC-NPL Computer Lab • 1001 Powell St • Norristown, PA 19401
Page 64 of 84
3. Click Highlighter. Click and drag to highlight 2009-2010 School Year and Wrap Gifts on the slide.
4. Next, click the Pen button again and click the Pen option. Draw marks and comments like the ones
in red in the illustration below.
5. Click on the Pen button again and click a different color using the color choices provided. Draw
something else.
6. Try changing back to the Highlighter, changing the color, and highlighting something else.
7. Click on the Pen button again and choose Eraser. Click on a highlight or a drawing to erase it. You
can also click and drag to erase more than one annotation at once.
8. When you are done drawing on the slide, in order to be able to use the mouse to advance to the
next slide, you must deactivate whatever tool is currently selected. Tap Esc on the keyboard to
change back to the arrow pointer.
Accessing the Desktop
Sometimes you may need to access the Internet or other files and programs on your computer during
your presentation. PowerPoint allows you to access the Task Bar without ending your presentation.
1. If you stopped your slide show, start it up again.
2. Click on the three dots button in the bottom-left of your screen.

MICROSOFT POWERPOINT 2016: STEP-BY-STEP GUIDE Revised: 2/27/2018
MC-NPL Computer Lab • 1001 Powell St • Norristown, PA 19401
Page 65 of 84
3. Click on Screen and then click on Show Taskbar.
4. Notice how the Task Bar becomes visible.
5. Click on the slide to get rid of the Taskbar.
Menu Access Options
You can also access any of the above menu items by right-clicking anywhere on the screen during your
slide show. Try it.
Keyboard Shortcuts
1. To erase all ink markings you’ve drawn while using the pen or highlighter, press E on the
keyboard. Try it.
2. To switch between the pen pointer and mouse pointer you press Ctrl + P (pen)
or Ctrl + A (arrow) on the keyboard. Try it. Draw something with the pen if you erased
everything in the previous step.
3. To show/hide all annotations, press Ctrl + M (markup). Try it.
4. Exit the slide show. If you still have any annotations on your slide, PowerPoint will ask you if you
want to save them. Click Discard to delete them.

MICROSOFT POWERPOINT 2016: STEP-BY-STEP GUIDE Revised: 2/27/2018
MC-NPL Computer Lab • 1001 Powell St • Norristown, PA 19401
Page 66 of 84
Slide Show Set Up Options
(Still using BandBoostersMeeting.pptx)
PowerPoint has various options for setting up and playing a slide show. For example, you can set up an
unattended presentation that can be displayed at a kiosk and make your slide show repeat with
continuous looping.
Before we set up our slide show let’s apply some timings to guide how the slides will advance and also
put some slide transitions into place. It’s important to do the timings first since we’ll want to apply
the same timings to all slides, but transitions to only two of the slides.
1. On the Transitions tab, in the Timing group, in the Advance Slide settings, uncheck On Mouse Click
and set the timer for After 3 seconds.
2. Click Apply to All. This will apply these settings to all the slides in our presentation.
3. Select Slide 3 and go to the Transitions tab.
4. Click an “Exciting” transition.
5. In the Timing group, set the Duration of the transition to 2 seconds.
6. Select Slide 10 and go to the Transitions tab.
7. Select a different “Exciting” transition.
8. In the Timing group, set the Duration of the transition to 2 seconds
Accessing Slide Show Setup Options
1. Click the Slide Show tab. Locate the Set Up group. Click the Set Up Slide Show button.

MICROSOFT POWERPOINT 2016: STEP-BY-STEP GUIDE Revised: 2/27/2018
MC-NPL Computer Lab • 1001 Powell St • Norristown, PA 19401
Page 67 of 84
2. The Set Up Show dialogue box will appear with several options:
a. Show type
i. Presented by a speaker (full screen)
Show plays in full screen and is controlled by the speaker. We will keep this setting.
ii. Browsed by an individual (window)
Show is displayed in a window with visible navigation controls.
iii. Browsed at a kiosk (full screen)
Show plays in full screen, but prevents you from advancing the slides by clicking the
mouse. Therefore, this setting requires that you configure your slide show to
automatically advance slides, or else it will just stay on the first slide.
b. Show Slides
i. "All" is naturally the default, but you can choose to show only certain slides or you
can choose to display any Custom shows you have created from your original
presentation.
ii. Enter Slides 3 through 10 .
c. Show options
i. Looping continuously which will repeat the slide show until you press the Esc key.
Select that option.
ii. Checking the other two boxes will disable narration and animation from playing
during your show.
iii. This is where you can change the default pen color and laser pointer colors.

MICROSOFT POWERPOINT 2016: STEP-BY-STEP GUIDE Revised: 2/27/2018
MC-NPL Computer Lab • 1001 Powell St • Norristown, PA 19401
Page 68 of 84
d. Advance slides
If you have set timings in your slide show, they will automatically play. If you want to disable
the timings and control the slides yourself, then select Manually. We will keep our timings.
e. Multiple monitors
This section is only enabled if you have more than one monitor connected to your
computer. Presenters often use a laptop connected to a projector to display slide shows.
When this is done, the computer treats the projector as a second “monitor”.
i. Slide show monitor
Defines which “monitor” to display the slide show on. This should be set to the
projector (the computer treats the projector as another screen). This allows you to
display the presentation on one screen (the projector), while leaving the other
screen (the laptop) free to display something else, like your notes.
ii. Use Presenter View
If checked, displays a special window on your laptop’s screen (pictured below),
which displays various information such as notes you’ve assigned to the current slide
and how long the presentation has lasted.
Show Slide 10

MICROSOFT POWERPOINT 2016: STEP-BY-STEP GUIDE Revised: 2/27/2018
MC-NPL Computer Lab • 1001 Powell St • Norristown, PA 19401
Page 69 of 84
3. Click OK to apply the settings to the slide show.
4. If we have done everything correctly, our slide show should:
a. Start with Slide 3 and play 8 slides total. (Slide 3 is New Officer Announcement, Slide 10 is
Next Meeting)
b. Advance slides automatically every 3 seconds.
c. Play an “Exciting” transition on the Slide 3 that lasts 2 seconds.
d. Play an “Exciting” transition on the Slide 10 that lasts 2 seconds.
e. Play in a continuous loop until we hit Esc .
5. To watch your show, in the Start Slide Show group, click From Beginning.

MICROSOFT POWERPOINT 2016: STEP-BY-STEP GUIDE Revised: 2/27/2018
MC-NPL Computer Lab • 1001 Powell St • Norristown, PA 19401
Page 70 of 84
Printing Presentations
(Still using BandBoostersMeeting.pptx)
Viewing the Print Pane
1. Select Slide 3 .
2. Click the File tab to go to Backstage view.
3. On the File menu click Print. The Print pane appears, with the print settings on the left and the
Preview on the right.
4. Note the slide navigation underneath the preview. It indicates we are viewing a preview of Slide 3 .
There are arrows to navigate to the other slides.
Print Settings
You have several options to consider when printing. How many slides per page do you want to print?
Do you want to print your notes? Do you want to print in color? Before we begin, let’s add some notes
to a slide.
1. Click the Back button to get back to the presentation and select Slide 1 .
2. Click in the Notes pane and type something.
Choosing Printing Options
1. Click back on the File tab and click Print.
2. Note the Settings section to the left of the preview pane. We’ll look at the sections of options one-
by-one.
Select Slides
The first section is where you can indicate which slides in the presentation you want to print. By
default all the slides will print.
1. Click the list arrow in that section and note that you could elect to print the current slide or you
could indicate a custom range of slides.
2. To enter a range of Slides 3 through 10 , click on Custom Range and type 3-10 in the field provided
and then click in a clear area.
3. If you recall, in our presentation, Slide 3 is the New Officer Announcement slide. Note how the
preview navigation would seem to indicate that our old slide 3 is now slide 1. This is a little
misleading and reveals that if you are printing a subset of the presentation, the print preview
navigation slide numbers will not match the slide numbers in the original presentation.
4. Change the setting to print all of the slides.
Takes 25min
60min
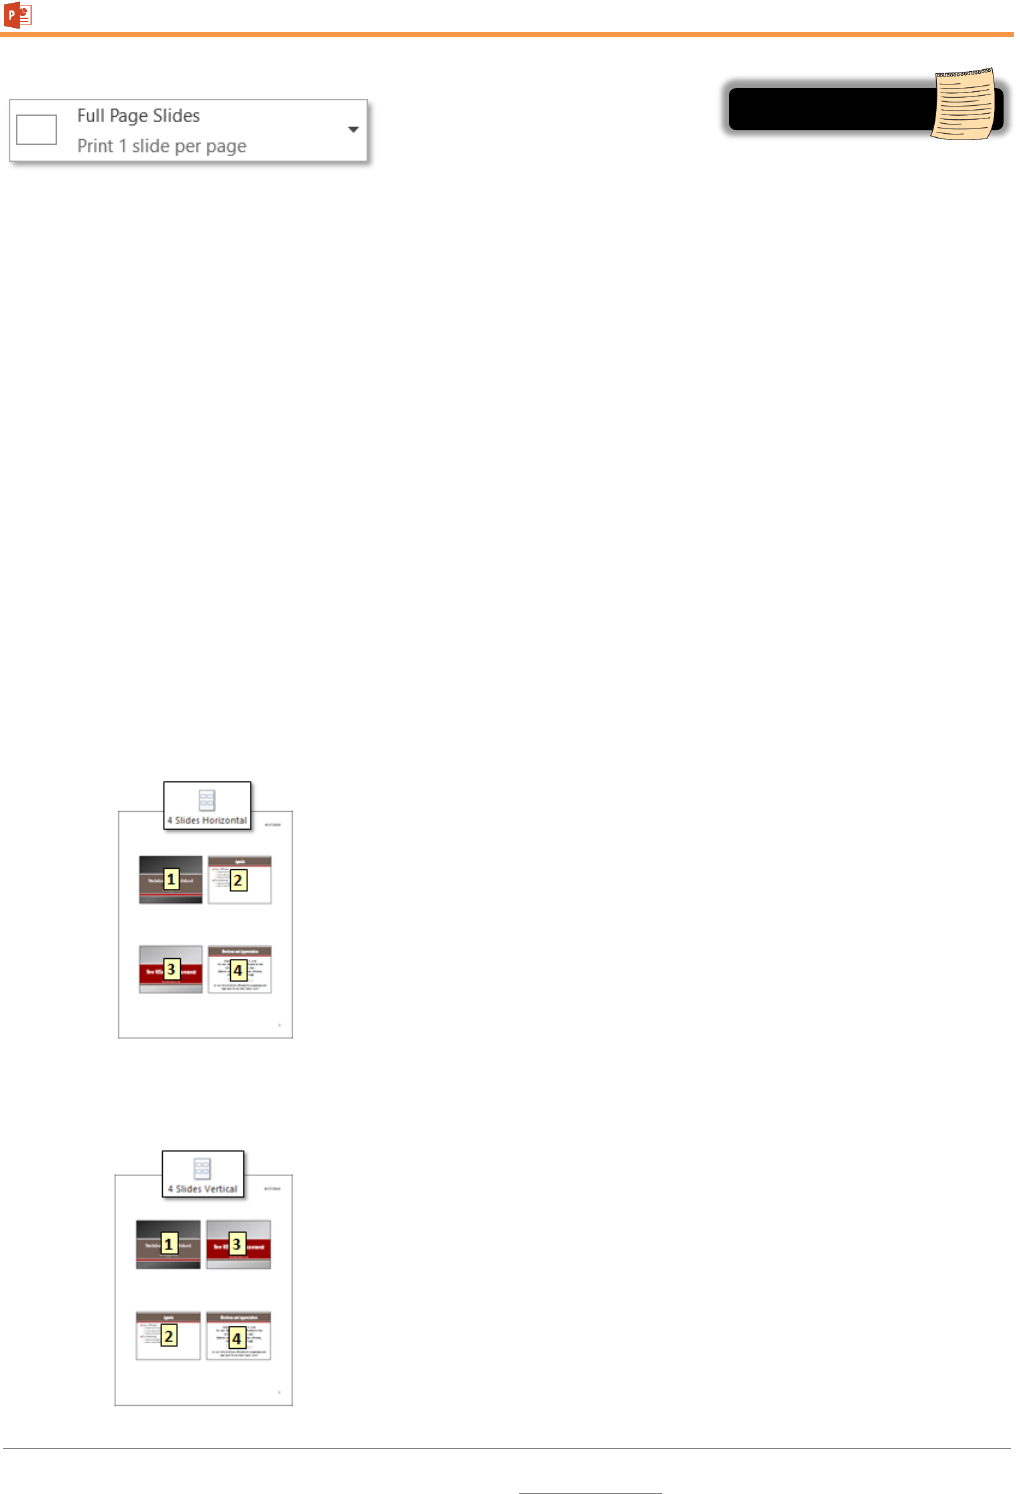
MICROSOFT POWERPOINT 2016: STEP-BY-STEP GUIDE Revised: 2/27/2018
MC-NPL Computer Lab • 1001 Powell St • Norristown, PA 19401
Page 71 of 84
Slides per Page
The second section is where you can select how many slides you want on each printed page. The
default setting is to print one slide per page.
1. Click on the list arrow to view the other options.
a. In the first section, the Print Layout section, click on Notes Pages.
b. In the preview pane, observe the smaller slide image and underneath, the Note we added
to the slide.
2. Click the list arrow again and click the Print Layout Outline. The outline includes all the text in our
slides except for the Notes.
3. Click the list arrow again and in the Handouts section, click 1 Slide and observe the preview.
a. Click 2 Slides next and observe the preview.
b. Click 3 Slides and observe the preview. This printing option is very popular as it comes with
blank lines for audience notes.
c. Click 4 Slides Horizontal next and observe the preview. In this arrangement of slides you
would read across.
d. Click 4 Slides Vertical next and observe the preview. In this arrangement of slides you
would read down.
Mention Handout 2

MICROSOFT POWERPOINT 2016: STEP-BY-STEP GUIDE Revised: 2/27/2018
MC-NPL Computer Lab • 1001 Powell St • Norristown, PA 19401
Page 72 of 84
Collation
The third section is helpful if you are printing multiple copies of the slides.
Collated means that all the pages of the first copy will print, followed by all of the pages of the
second copy, and so on. This is the default option. For example: 1, 2, 3, 1, 2, 3, 1, 2, 3.
Uncollated means that all the copies of the first page will print, followed by all the copies the
second page, and so on. For example: 1, 1, 1, 2, 2, 2, 3, 3, 3
Page orientation
The fourth section allows changing the orientation of the paper.
Change the orientation to Landscape and observe the preview. (Note: Full Page Slides will print only in
Landscape orientation.)
Color
In the final section, you can change your Print color settings.
1. Notice how our computers have defaulted to Grayscale. This is because the Lab’s printer is black
and white.
2. Next, we are going to compare what the different color settings look like. Change the print layout
to Full Page Slides and use the arrows at the bottom of the screen to go to Slide 3 .
3. Notice how the slide looks in the current Grayscale setting. Notice how the text is not very
readable.

MICROSOFT POWERPOINT 2016: STEP-BY-STEP GUIDE Revised: 2/27/2018
MC-NPL Computer Lab • 1001 Powell St • Norristown, PA 19401
Page 73 of 84
4. Change the color setting to Color. Notice how, even though the preview is still in black and white,
it looks different. The text is now readable, but the page has a gray background that will take up a
lot of ink.
5. Change the color setting to Pure Black and White. This setting is good for conserving ink, as it does
not print background colors at all.
Edit Header and Footer
When printing slides or handouts, it is often nice to be able to add a title or an author into the Header
and Footer section of the printout.
1. In the Slides printing options, let’s choose the printing option 3 slides per page in the Handout
section, and change the Orientation back to Portrait.
2. Note in the preview pane that the date and page number can be seen. These items are not part of
the header or footer, but rather they are options that can be defined in the Handout Master View.
3. Click on the Edit Header & Footer link at the bottom of the Settings. A dialogue box opens.
4. Click the Notes and Handouts tab.
5. Note the small preview area where sections of the print areas are called out. Note that the page
number is checked on by default and it is called out in the Preview in the lower right corner.
6. Click in the Header checkbox and note where that section of the print area is called out in the
Preview.
7. In the Header field type our presentation title, which is Band Boosters Meeting.

MICROSOFT POWERPOINT 2016: STEP-BY-STEP GUIDE Revised: 2/27/2018
MC-NPL Computer Lab • 1001 Powell St • Norristown, PA 19401
Page 74 of 84
8. Click in the Footer check box and type your name in the field below it.
9. Click the Apply to All button.
Handout Master Slide Options
Some printable elements that can’t be controlled through the Print functionality can be addressed
through use of the Master Views.
1. Click on the Edit Header & Footer link again.
2. Note that the Page number box is checked. Uncheck the Page number box and click Apply to All.
Note that the page numbers persist in the Preview.
3. To remove the date and page numbers we will need to use another strategy.
a. Click the Back button to return to the presentation.
b. Click on the View tab and find the Master Views group and click on Handout Master.
c. Note how the Handout Master opens in a new Ribbon.
d. Note that the date and page number fields are Placeholders that can be turned off.
e. Click in the checkbox for Date and Page number and then click the Close Master View
button.
4. Go back to the File tab and click Print.
5. Note that the Date and Page numbers are gone.

MICROSOFT POWERPOINT 2016: STEP-BY-STEP GUIDE Revised: 2/27/2018
MC-NPL Computer Lab • 1001 Powell St • Norristown, PA 19401
Page 75 of 84
Adding Background Music
(Still using BandBoostersMeeting.pptx)
1. Go to the slide where you want the music to start playing. We want the music to play during our
entire presentation, so go to Slide 1 .
2. On the Insert tab, in the Media group, click the Audio button and click Audio on My PC.
3. Navigate to your flash drive and click the file named Bach.mp3. Click Insert.
4. An audio control appears in the center of the screen. You may move it to the side so it’s not
covering anything up. It will not be visible during the slide show.
5. With the audio control still selected, click the Playback contextual tab. In the Audio Styles group,
click the Play in Background button. This will configure the audio to continuously play while the
slide show is running.
6. Close the presentation and do not save changes.

MICROSOFT POWERPOINT 2016: STEP-BY-STEP GUIDE Revised: 2/27/2018
MC-NPL Computer Lab • 1001 Powell St • Norristown, PA 19401
Page 76 of 84
Inserting a Video
1. Create a new, blank PowerPoint presentation.
2. Change the layout of the first slide to Blank to remove the placeholders.
(Home tab > Slides group > Layout button > Blank)
3. On the Insert tab, in the Media group, click on the Video button and click Video on My PC.
4. Open the Wildlife.wmv file that’s on your flash drive.
5. Click on the Play button below the video to preview the video.
6. Note that the video will stop playing and turn black when you deselect the video.
7. Note how you can manipulate a video just like you can a picture.
a. Note the resize handles.
b. Note the rotate handle.
c. Note the contextual “Format” tab in the Ribbon. Just like images, you can change things
like the brightness/contrast, add a color filter, and add a border.
8. To add a border, click on the Format tab and use the More button in the Video Styles gallery.
Note the ScreenTip descriptions as you mouse over the styles. When you see “Beveled Oval,
Black”, click it to apply it.
9. Make the video a smaller so it’s not right up against the edges of the slide:
a. Use the corner resize handles to adjust the size.
b. Move the video to the center of the slide.
10. Deselect the video by clicking in a blank space on the slide.
Takes 25min
60min

MICROSOFT POWERPOINT 2016: STEP-BY-STEP GUIDE Revised: 2/27/2018
MC-NPL Computer Lab • 1001 Powell St • Norristown, PA 19401
Page 77 of 84
11. Since this is a video about nature, let’s add a green background to the slide.
a. On the Design tab, in the Customize group, click the Format Background button.
b. In the Format Background pane, click Gradient fill.
c. Under Preset gradients, choose a light green color.
d. Close the Format Background pane.
Trimming Video
Now, say we are creating a presentation about groundhogs, and we only want the video to show the
clip of that animal. We can “trim” the video to show a specific part of it.
1. Click the video if it’s not already selected.
2. Click on the Playback contextual tab, then, in the Editing group, click “Trim Video”.
3. Notice the green and red bars. We will use these to control what part of the video to play.
4. The green bar represents where the clip will start. Click and drag the green bar to the right. We
just want our video to show the clip of the groundhog. Drag it so that it’s about 17.3 seconds into
the video.
a. Tip: Use the up/down buttons in the Start Time field to advance the video frame by frame
for greater precision.
5. The red bar represents where the clip will end. Click and drag the red bar to the left until it’s about
20.7 seconds into the video. Use the up/down buttons in the End Time field for more precision.

MICROSOFT POWERPOINT 2016: STEP-BY-STEP GUIDE Revised: 2/27/2018
MC-NPL Computer Lab • 1001 Powell St • Norristown, PA 19401
Page 78 of 84
6. Click OK to commit your changes.
Poster Frame
The poster frame is the image that will be displayed before the video starts to play. There are two
ways to set the poster frame.
Using a Frame from the Video
You can choose a frame from the video itself.
1. Click the video if it’s not already selected.
2. Click the video’s Play button and pause it as soon as the groundhog’s head pops up.
3. On the Format contextual tab, in the Adjust group, click the Poster Frame button and click Current
Frame from the menu.
4. Notice the confirmation message next to the Play button that says “Poster Frame Set”.
5. Deselect the video by clicking in a clear space. Notice how, instead of turning black, the frame we
just selected is shown.

MICROSOFT POWERPOINT 2016: STEP-BY-STEP GUIDE Revised: 2/27/2018
MC-NPL Computer Lab • 1001 Powell St • Norristown, PA 19401
Page 79 of 84
Using an Image File
You can also choose an image file as the photo frame.
1. Click the video.
2. On the Format contextual tab, in the Adjust group, click the Poster Frame button and click Image
From File.
3. An Insert Pictures dialog appears. Click From a file.
4. Select the Wildlife-frame.png file from your flash drive, and click Insert.
Playing Videos in Presentation Mode
When you run a slide show, and you come to a slide that has a video on it, the video will not play by
itself. You must click on the video in order to play it.
1. Click the Start From Beginning button in the Quick Access Toolbar to start the slide show.
2. Point anywhere on the video and you will see the cursor change to the hand shape. Click the video
to make it play.
3. If we had another slide, we would click somewhere outside of the video to advance to the next
slide.
4. Tap Esc to end the slide show.
Inserting a YouTube video
PowerPoint also supports inserting videos from the Internet. Note that unlike the video we inserted
before (from a file), Internet videos require an active Internet connection in order to play them.
1. On the Insert tab, in the Media group, click the Video button and click Online Video.
2. A dialog appears that gives us two choices. We can search YouTube or insert an Embed Code. We
will be using the Embed Code option because it is broadly supported by many different Internet
websites. It also lets us customize our video more.
3. Close the dialog box.

MICROSOFT POWERPOINT 2016: STEP-BY-STEP GUIDE Revised: 2/27/2018
MC-NPL Computer Lab • 1001 Powell St • Norristown, PA 19401
Page 80 of 84
Choosing a video
First, let’s find the video we want to insert.
1. Using the Start menu, open Internet Explorer.
2. In the address bar, type www.youtube.com, then press Enter .
3. In the search bar at the top of the YouTube homepage, type parrots and press Enter .
4. Click on the Parrots: Majestic Birds (Nature Documentary) video.
5. After a few moments, the video will start playing. Click the pause button to pause it.
6. Find the Share button underneath the video and click it.
7. Then, click Embed. Note the text box that appears below. This contains the code that we will use
to insert the video into our PowerPoint presentation. But before we touch that, we want to further
customize our video.
8. Click Show More below the text box.

MICROSOFT POWERPOINT 2016: STEP-BY-STEP GUIDE Revised: 2/27/2018
MC-NPL Computer Lab • 1001 Powell St • Norristown, PA 19401
Page 81 of 84
9. The video appears again below. Below this second video screen are some checkboxes. These
checkboxes give us control over how the video is displayed. The video above the checkboxes give
us a preview of what the embedded video will look like.
a. Video size: Defines the quality of the video. A higher number means higher quality, but
requires a faster Internet connection (the video is streamed from the Internet as it plays).
b. Show suggested videos…: Will display a list of similar videos when the video is done playing.
c. Show player controls: Shows a play/pause button at the bottom of the video when the mouse
is hovering over the video.
d. Show video title and player actions: Shows the video title when the mouse is hovering over the
video.
e. Enable privacy-enhanced mode: Not relevant to us, since we’re not imbedding this video in a
webpage.
10. We just want a basic video player in our presentation, but maybe we want to have the ability to
skip ahead to other parts of the video. So uncheck everything except “Show player controls”.

MICROSOFT POWERPOINT 2016: STEP-BY-STEP GUIDE Revised: 2/27/2018
MC-NPL Computer Lab • 1001 Powell St • Norristown, PA 19401
Page 82 of 84
Inserting into PowerPoint
Now that we’re done customizing our embedded video, we can insert it into our PowerPoint
presentation.
1. Copy the embed link.
a. Triple-click in the text box above the preview video. This will select all the text.
b. Press Ctrl + C to copy the text.
2. Switch back to the PowerPoint presentation using the Task Bar.
3. On the Home tab, in the Slides group, click on the dropdown arrow below the “New Slide” button
and click Blank.
4. On the Insert tab, in the Media group, click the Video button and click Online Video.
5. Click into the text box next to the From a Video Embed Code option and paste.
6. Click the gray arrow that’s inside the text box.
7. After a view moments, a black box should appear on the slide.
8. To preview the video, double-click the black box to initialize it. Then, when the video appears, click
once to play it.
9. Note that you cannot format an embedded video like you can a video file. Even though the
buttons are available from the ribbon (such as changing the border and color shading), they do not
work!
10. Resize the video object so it fills up the entire slide.
11. Click the Slide Show button in the status bar to show the slide in presentation mode.
12. Wait a few moments for the video to appear.
13. Click on the video to play it. Note that it may take a few seconds to start, because it has to load it
from the Internet.
14. Press Esc to stop the video, and Esc again to end the presentation.

MICROSOFT POWERPOINT 2016: STEP-BY-STEP GUIDE Revised: 2/27/2018
MC-NPL Computer Lab • 1001 Powell St • Norristown, PA 19401
Page 83 of 84
Inserting a Chart
Charts are an effective way to communicate data graphically. They allow your audience to see
the meaning behind the numbers, and they make showing comparisons and trends a lot easier.
In our experience, it is easier to create a chart in Excel and then insert that chart into a PowerPoint
than it is to try to create a chart directly inside PowerPoint. Creating a chart directly inside of
PowerPoint actually involves the use of Excel, but the interface is much more challenging. When you
already have a chart in Excel you can easily copy it and paste it into PowerPoint. The chart will even
remain linked to the Excel file so that when the Excel file is updated, the PowerPoint chart will update
as well. The rules to remember are the same for linking Excel workbooks—you must keep both linked
files named the same and in their original save locations.
Copying and Pasting the Chart
1. Open the My Budget Spreadsheet.xlsx file from the flash drive.
2. Note that there is a worksheet tab named Chart. Click on the chart tab.
3. The chart is linked to data on the January worksheet.
4. Click the chart.
5. On the Home tab, in the Clipboard group, click the Copy button.
6. Do not close the Excel file yet.
7. Open a new PowerPoint file and delete the placeholders on Slide 1 .
8. On the Home tab, in the Clipboard group, click the Paste list arrow. Use the ScreenTips to find the
Keep Source Formatting & Link Data option and click it.
9. Note the chart on the PowerPoint slide. Note the value of the Income section of the chart is $2600.

MICROSOFT POWERPOINT 2016: STEP-BY-STEP GUIDE Revised: 2/27/2018
MC-NPL Computer Lab • 1001 Powell St • Norristown, PA 19401
Page 84 of 84
10. Save the PowerPoint file to your flash drive. Name it Chart Practice.
11. Close PowerPoint.
12. Close Excel.
Updating the Excel File
1. Open the My Budget Spreadsheet.xlsx file from the flash drive.
2. Click on the January worksheet.
3. Change the Income from $2600 to $2700. Don’t forget to commit the change with the enter
checkmark on the formula bar.
4. Close and Save Changes to the Excel file.
5. Open the Chart Practice.pptx file.
6. Note that the January Income data change is not automatically reflected in the chart.
7. Click the chart and note the Chart Tools contextual tab.
8. Click on the Design tab on the Chart Tools contextual tab, and in the Data group click on Refresh
data. Your chart now reflects the change we made to excel.
9. Close PowerPoint and save the changes to Chart Practice.pptx.

MICROSOFT POWERPOINT 2016: STEP-BY-STEP GUIDE Revised: 2/27/2018
MC-NPL Computer Lab • 1001 Powell St • Norristown, PA 19401
Page 85 of 84
Professional-looking Presentations
PowerPoint has so many features and gives you so much control over
your presentation that it can be hard to know how to make a “good”
presentation. It’s easy to make a presentation, but how do you make a
“good” presentation? Here are some tips for how to make your PowerPoint presentations look
professional.
Consistency
• Use the same font face and colors throughout the presentation
• Stick to theme fonts and colors so you can easily switch themes later
• Add variation to attract attention
Use Animations Sparingly
• Animate with a purpose
• Avoid elaborate slide transitions
• Too many animations and transitions can distract from the content
Stay Focused
• Don’t put too much information on a single slide
• Let your slides “breathe”—don’t be afraid to split up a slide into multiple slides
Keep your Audience in Mind
• What do they know?
• What do you need to tell them?
• What do they expect to learn?
• What will be interesting to them?
• What can you teach them?
• What will keep them focused?
Show Slide 11
Next Slide
Next Slide
Next Slide
Next Slide
Next Slide
Mention Handout 3
