
e-Builder Schedule Module
August 2023

e-Builder Schedule Module
Page i
Table of Contents
Schedule ii
Create Schedules ix
Importing Schedules xviii
Export Schedules xxv
Manage Schedule Tasks xxv
Manage Calendars xxix
Manage Templates xxx
Manage Schedule Baseline xxxi
Manage Schedule Snapshots xxxii
Predecessor and Successor Tasks xxxiii
Schedule Mode xxxv
Resource and Manager Roles xxxvi
Task Editor xxxvii
Tasks Page Overview xl

e-Builder Schedule Module
Page ii
Schedule
All scheduling tools include a few fundamental components and concepts, and e-Builder’s Scheduling tool
adheres to these fundamentals.
The level of functionality available to you is determine by the module that your company purchased. Your
security permission determines the actions that you are allowed to perform with schedules.
To access the Schedule
1. On the top navigation tabs, click the Snippet-Label tab.
2. Click the Project drop-down menu and select the project name. The Snippet-Label page is dis-
played.
To access the Schedule page in a project
l
If you are in a project, on the left navigation pane under the Project Menu, click Schedule.
The Schedule page is displayed.
To access the Schedule page from the Schedule module
l
If you are in the Schedule module, click the Schedules sub-menu located on the top-right corner.
Module Attributes
The Schedule module has several levels of functionality that are determined based on what your company
purchased from e-Builder and what attributes have been activated on your account. Each level of func-
tionality builds on the previous level, and they are not reversible to a lower level once activated. These
attributes affect all projects within an account.
1. Schedule: A critical path method (CPM) scheduling tool for project tasks
2. Multiple Calendars (MC): Option to create multiple calendars within each project and assign tasks
to different calendars.
No extra charge. The account administrator can contact Support and request to enable this for your
account.
3. Resource Management (RM): Option to link resources to schedule tasks. Add-on feature available
through Sales.
4. Resource Management with Cost (RMC): Option to link resources or schedule tasks to the cost
module. Add-on feature available through Sales.
Permissions
Each project participant has security permissions that determine what can be seen and done inside the
Schedule module. These permissions are controlled by your account administrator.

e-Builder Schedule Module
Page iii
l
Manage Permissions: On the Schedule tab of the Manage Permissions page, grant members and
roles permission to view schedules, manage templates and manage baselines.
l
Manager Role: On the Details tab of your schedule, users assigned to this role have full access to
create, edit, and update the project schedule. Users without this role (without Manage Template per-
missions on the account level) will not be able to create a schedule but if they have the View Sched-
ule permission, they can view it once the schedule has been created by a Schedule Manager.
Note: A user must be assigned to an administrative type role (such as a Schedule Manager role)
in order to initiate a schedule in a brand new project. Users belonging to this role will have per-
mission only to create schedules and manage schedule templates. This role can only view Cost
information and will not have any other Cost permissions.
l
Task Resource Role: (does not apply to RM or RMC accounts) This role is assigned to individual
tasks. Users in the Resource Role can update the following information on that task:
o
% Complete value
o
Duration
o
Start date
o
Finish date
o
Constraint Type and Constraint Date
o
Add Comment through the Task Editor
Note: A Task Resource contact can also be assigned to a task as an indicator of the key
responsible person for that task. However, that individual does not receive any notifications
or have any special editing rights compared to other users in the Resource role.
l
Task Manager Role: (does not apply to RM or RMC accounts) This role is assigned to individual
tasks. Users in the Manager Role can update the Resource Role and the following information on
that task:
o
Task Name
o
Description
o
Resource Role and Resource User
o
Predecessor relationships
o
Master Task associations
Note: A Task Manager contact can also be assigned to a task as an indicator of the key
responsible person for that task. However, that individual does not receive any notifications
or have any special editing rights compared to other users in the Manager role.
Fundamentals
Tasks
Schedules consist of a list of tasks to be completed for a particular project. Tasks can be linked together
or be dependent on one another according to the specific relationships set by the Schedule Manager.
For example, the Schedule Manager may specify that a 60% Design Document task can only begin after
a previous 30% Design Document task is completed – these are referred to as predecessor and

e-Builder Schedule Module
Page iv
successor tasks. Thus, the Schedule Manager will build the Tasks and the relationships between Tasks
to specify what must be done and by when to ensure a successful project outcome. Additionally, the
Schedule Manager determines the duration or time available to complete each task.
Tasks are the basic building blocks of a project. Each task will have a beginning and a duration, which
will establish the scheduled date for when it is expected to be complete.
Dependencies, Predecessors and Successors
For illustration purposes, let’s take a look at an example project that a residential contractor might
develop to construct a brand new home. In this example, we’ll list some basic components required to
construct a home:
1. Install underground plumbing
2. Install underground electrical lines
3. Form and place the foundation slab
4. Erect the exterior walls
5. Erect the roof framing
6. Install the roof
7. Erect the interior walls
8. Install rough electrical
9. Install rough plumbing
10. Install doors and windows
Each step in the above example is called a task. You can perform some of these tasks at the same time,
and there are some tasks that need to be completed before the next task can begin. For example,
installing underground plumbing and installing underground electrical lines can be accomplished sim-
ultaneously. However, you must erect the exterior walls before erecting the roof framing because the
roof framing sits on top of the exterior walls. When one task depends on the other, the relationships
between the tasks are called dependencies. If a task depends on another task, then the one that has to
finish first is called the predecessor. The task that follows the predecessor is called the successor.
We abbreviate relationships with F = Finish and S = Start. The first letter defines the action of the “Pre-
decessor” Task and the second letter defines the action of the Successor Task. So we use an “FS” or
Finish-to-Start relationship when the Predecessor task must Finish before the Successor task Starts.
Meanwhile, if two tasks can occur simultaneously, they have a “SS” Start-to-Start relationship where the
Predecessor task must Start before the Successor task Starts. Sometimes there is a lag of X number of
days included in the relationship. For instance, the Contractor may schedule a “SS 5” relationship
between Underground Plumbing and Underground Electrical where they want to Start the Installation of
Underground Plumbing 5 days prior to Starting the Installation of Underground Electrical because the
plumbing lines will be installed beneath the Electrical lines.
Finish to Start (FS) - Task 2 cannot start until task 1 finishes
Finish to Finish (FF) - Task 2 cannot finish until task 1 finishes

e-Builder Schedule Module
Page v
Start to Start (SS) - Task 2 cannot start until task 1 starts
Start to Finish (SF) - Task 2 cannot finish until task 1 starts
Additional Example
A STOP sign cannot be positioned until the concrete is laid down. Therefore, laying the concrete is
the predecessor task. In addition to this, the concrete must not dry completely, otherwise, the STOP
sign cannot be installed. In this case, we might include a Lag of 1 hour after the concrete has been
poured out, because the concrete still needs to be moist, but not completely dry. In this scenario, the
Link Type would be Start to Start (SS) because we cannot start the task of placing the STOP sign
until the task of pouring concrete has begun.
You can identify predecessors in the import file by including the task number and the abbreviated link
type, such 2SS or 3 FS; and lag time, such as +5 days, -3days. However, these tasks can be updated
after the schedule has been established. For instructions, see Predecessor Tasks.
Tasks and Subtasks
There can be a number of tasks that make up another task. When a task has many pieces to it and it is
broken down, the pieces are called subtasks. The subtasks then roll-up to a summary task, which
includes the total duration of all the subtasks. For example, Building Shell is a Summary Task that con-
sist of the following sub tasks:
l
Install underground plumbing
l
Install underground electrical lines
l
Form and place the foundation slab
l
Erect the exterior walls

e-Builder Schedule Module
Page vi
l
Erect the roof framing
l
Install the roof
You could organize these subtasks in other ways too - this is just an example.
Duration, Start and Finish Dates
Now it is time to define the timing of each task and the start and finish dates. You can start with an estim-
ate for each task. Referring back to our example, suppose that you make the following estimates:
l
Install underground plumbing – 15 days
l
Install underground electrical lines – 15 days
l
Form and place the foundation slab – 10 days
l
Erect the exterior walls – 20 days
l
Erect the roof framing – 10 days
l
Install the roof – 10 days
The amount of time it will take to complete each task is referred to as the duration. The activities men-
tioned above are all considered tasks.
In addition, there may be certain points in your schedule that are considered important in that these
items are critical for the success of the project. For example, inspections might be scheduled to get
tasks approved. We will refer to these items as milestones. Milestones are tasks with zero duration, and
in e-Builder, because they are zero duration, milestones have the same start and finish date.
Free Slack and Total Slack
The amount of time that a task can be delayed before it affects a dependency or the overall project com-
pletion date is known as slack. Free Slack is the number of days that a task can fall behind schedule
without affecting the start date of its earliest successor task. Total Slack is the number of days that a
task can fall behind schedule without affecting the project completion’s late finish date. These cal-
culations can be useful if a resource needs more time on a task or you need to determine where you can
squeeze in additional tasks that have been added in after the initial schedule was created without affect-
ing the finish date. Often times your project team cannot alter the finish date of the project but you are
required to add scope. In these circumstances, identifying your available slack can help you determine
where to add these additional tasks.
Schedule Baselines
Going back to our example, you may want to take a snapshot of all the planned Tasks and original Start
and finish Dates of each task to establish goals on your schedule requirements from start to finish. This
is often referred to as the baseline. In e-Builder, you can choose to use a baseline as a point of ref-
erence when monitoring your project. So, for example, if the Contractor slips a bit on completing the
Erect exterior walls Task, you have a way to measure the actual status against your baseline. The dif-
ference between the scheduled/actual start or scheduled/actual finish of a task and the baseline start or
finish of that task is referred to as the variance. This is yet another tool to help monitor the schedule’s
health.

e-Builder Schedule Module
Page vii
Terminology
This section defines the terminology used throughout the Schedule module. This topic is a useful resource
to learn the terms and concepts used in the e-Builder Schedule module. The following terms are defined
below:
Baseline
A snapshot of the aspects of a project at the beginning. A baseline is used to compare actual task dur-
ations, start and end times to what was anticipated at the beginning of the project.
Critical Path
The tasks that must be completed on time in order for the project to finish on schedule. A delay in the
completion of these tasks will delay the end date of the project. Critical path tasks are indicated by the
red lettering used for the task name. (Classic UI only)
The three points summarized below define the importance of calculating the critical paths:
The duration of the critical path identifies the total duration of the project.
Since we have identified the critical path, we also know which tasks cannot be delayed without affecting
the finish date of the project.
Conversely, those tasks that are not part of the critical path can in fact be delayed without affecting the
finish date of the project.
Dependencies
When one task depends on another, the relationships between the tasks are called dependencies.
Duration
The amount of time allowed to finish a task.

e-Builder Schedule Module
Page viii
Event
While still treated as a task in regards to duration, start and finish time, an event is classified as a meet-
ing or an approval of item(s). Specifying events gives the System Admin or Schedule Manager the abil-
ity to better manage the schedule by identifying when work is actually being done versus a decision
making or approval process that may or may not impact the schedule.
Free Slack
The number of days that a task can fall behind schedule without affecting the start date of its earliest suc-
cessor task.
Master Process
Master processes are created by the account administrator to categorize and report on Master Tasks.
Project schedules use these processes to filter and view activities in the schedule.
Master Task
Master tasks are a standard set of tasks used in multiple project schedules. The power of master tasks
lies in cross-project reporting. Project schedules typically include a subset of these master tasks and reg-
ular tasks. The account administrator will maintain these processes and tasks.
Milestone
Certain points in the schedule that are considered important in that these items are critical for the suc-
cessful completion of the project. When monitoring multiple projects in e-Builder, it is helpful if all pro-
jects have the same Milestones to be able to report consistently.
Predecessor
In a relationship where one task depends on another task, the task which has another task dependent
on it is called the predecessor, and can also be referred to as the controlling task.
Schedule
Schedules consist of a list of all the tasks to be completed for a particular project.
Schedule Manager
The Schedule Manager is responsible for developing the schedule. This person will determine the order
of the tasks, their duration (the time allotted for each task to be completed), allocate resources to each
task, and then monitor the project while it is underway to compare the projected outcome to the actual
outcome.
Slack
The amount of time that a task can be delayed before it affects a dependency or the overall completion
date of the project.
Subtasks
When a task has many pieces to it and it is broken down, the pieces are called subtasks.

e-Builder Schedule Module
Page ix
Successor
In a relationship where one task depends on another task, the dependent task is called the successor.
Summary Task
This is a high-level task with subtasks underneath it. For instance, Design might be a summary task the
there are tasks the make up design. Summary task views gives you an overall picture of when an area of
the project will be completed.
Task
Tasks are the basic building blocks of a project schedule; tasks make up the schedule. After the sched-
ule manager builds out the schedule, they will assign resources to each of the tasks. Based on the dur-
ation assigned and the placement of the task, a start and end date is automatically applied.
Task Manager
The person responsible for managing the tasks of a particular project phase, such as Design or Con-
struction phase tasks.
Task Resource
The person responsible for completing an individual task. This person will typically report to the task
manager.
Template
A predefined pattern or makeup that you can use as the basis for setting up a future project. Templates
are created by an Account Administrator and they can choose to apply this template to the project,
which will automatically give you a basis to start with when building out the project schedule. If a tem-
plate is not applied to the project, the Account Administrator can make schedule templates available for
the schedule manager to use. Available template options display in a drop-down menu when applying a
schedule template.
Total Slack
The number of days that a task can fall behind schedule without affecting the project completion’s late
finish date.
Variance
The difference between the scheduled/actual start or scheduled/actual finish of a task and the baseline
start or finish of that task.
Create Schedules
Only one schedule is permitted per project. If you are creating a schedule for a project, you will see the Create
Schedule page where you can complete the details of the schedule, which is a preliminary step before adding
tasks. Setting up schedule details means defining the days that make up the work week, the start date of the
project, number of hours per work day and choosing the schedule manager role and user. From here, you will
also determine whether or not an external scheduler will be used conjointly with the e-Builder Schedule mod-
ule.

e-Builder Schedule Module
Page x
To access the Schedule page
1. On the top navigation tabs, click the Schedule tab.
2. Click the Project drop-down menu and select the project name. The Schedule page is displayed.
To create a schedule
1. Open the Schedule page.
The Create Schedule page is displayed if a schedule has not been created for the project.
2. On the Create Schedule page, complete the details of the schedule.
3. Click Save.
The Schedule page is displayed.
Tasks Tab
Tasks Pane
Contains a list view of tasks by row and of fields by columns. Field availability is based on module attrib-
utes for the account, and edit capabilities are based on user roles. Changes made to the Tasks pane are
saved for the user per project.
a. Project summary: Displays a total of the tasks duration. It also reflects the earliest start date and
latest end date for all the tasks in the schedule.
b. Task Summary: The blue arrow indicates there are tasks grouped under this task. Click to show
all the tasks under the task.
c. Work Breakdown Structure (WBS) number: Represents the task’s relative place in the sched-
ule hierarchy.
d. #: Represents the task number. This is the number referenced in the Predecessor and Suc-
cessor columns. This column does not appear by default and will need to be manually added to
the Tasks pane.
e. Status indicator: Each color indicates the status of the task.
o
Blue = Complete
o
Red = late

e-Builder Schedule Module
Page xi
o
Yellow = early
o
Orange = no baseline
o
Green = on time
On the Tasks pane, you can:
l
Resize pane: Drag the splitter line between the Task pane and the Gantt chart left or right to
change the visible space in each area.
l
Add a column: Click Add New Column and select a column name from the dropdown list.
l
Remove a column: Click on the column header down arrow and uncheck the column name.

e-Builder Schedule Module
Page xii
l
Move a column: Click on the column header and drag to the desired location. A green check
mark appears when you are dragging the column to an acceptable location.
Gantt Chart
Contains a graphical time-scaled view of task durations and relationships.
On the Gantt chart, tasks are represented by the following graphical components:
l
Summary task: Green bar
l
Task: Blue bar
l
Task Baseline: Gray bar
l
Milestone (zero duration): Green diamond
l
Relationships: Blue arrows
l
Critical Path: Tasks and arrows highlighted in red
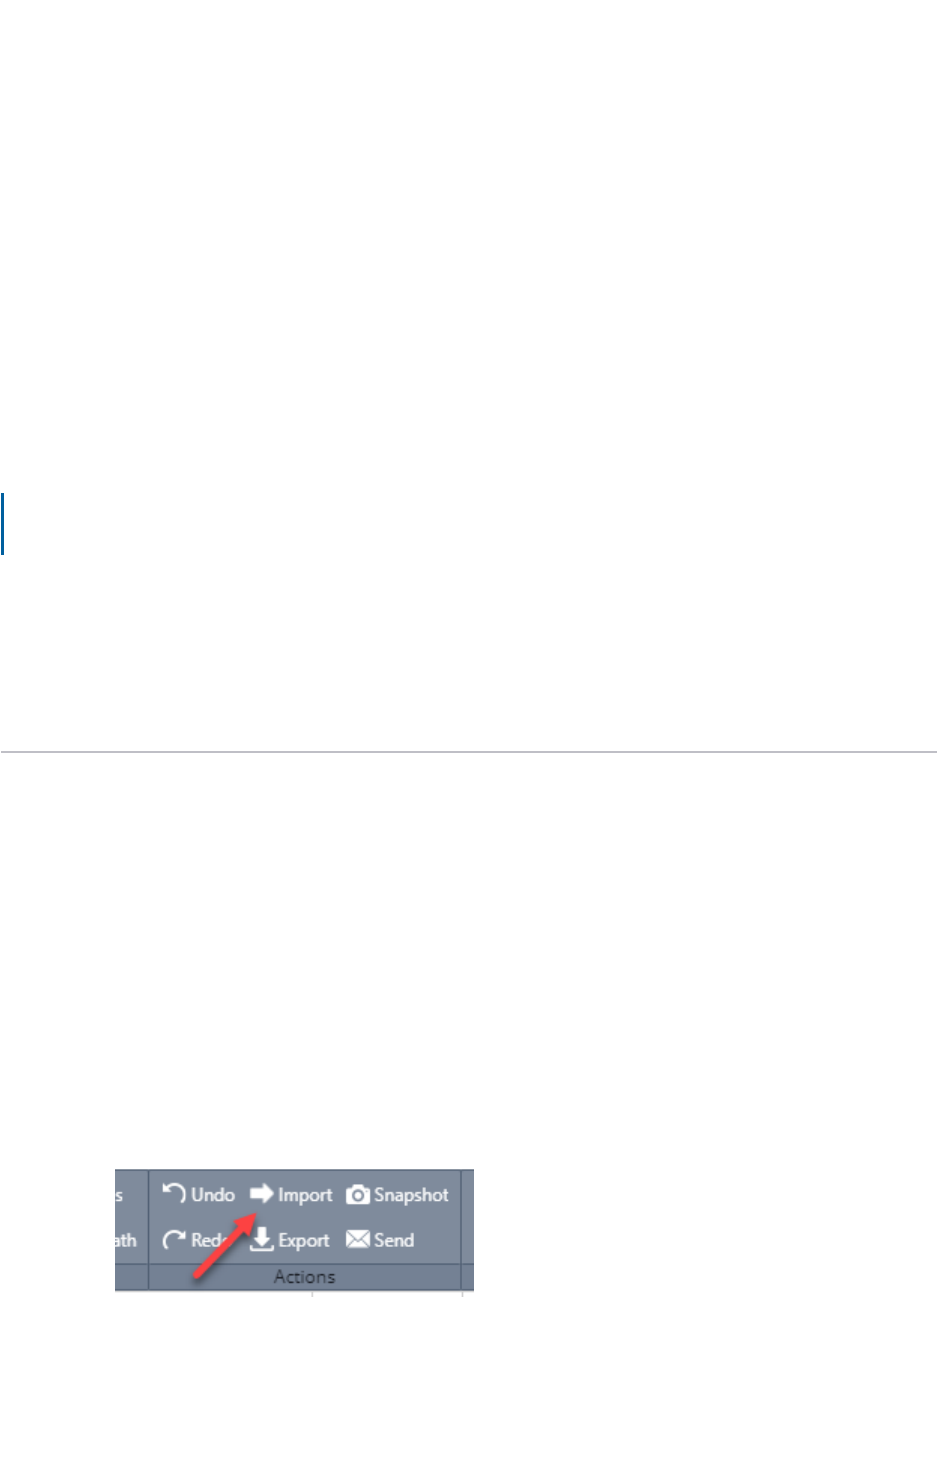
Toolbar Buttons
The gray toolbar that contains buttons for navigation and actions. Depending on your user roles, the fol-
lowing buttons are available:
l
Add Task: This button is not visible to Task Resources. Only Schedule Managers and Task Man-
agers are able to see this button. Click to add a single task.
l
Outdent: Decreases the indentation level of the selected task in the tree. This button is only avail-
able to Schedule Managers or users with Manage Templates permission. For instructions, see
Move Tasks within the Schedule.
l
Indent: Increases the indentation level of the selected task in the tree. This button is only avail-
able to Schedule Managers or users with Manage Templates permission.
l
Undo: Click to undo the last action. This button is only available to Schedule Managers or users
with Manage Templates permission.
l
Redo: Click to undo the last action. This button is only available to Schedule Managers or users
with Manage Templates permission.

e-Builder Schedule Module
Page xiii
l
Import: Click to import tasks using an .MPP file (Microsoft Project 2003, 2007, 2010, 2013). This
button is only available to Schedule Managers or users with Manage Templates permission. For
details or instructions, see Working with Schedule Imports.
l
Expand: Shows all the tasks and subtasks.
l
Collapse: Collapses the subtasks under their tasks.
l
Previous / Next: Moves the time axis backward / forward in time in units specified by the current
view.
l
Zoom In/Out/Fit: Click to zoom in or out the timeline. Click Fit to change the timeframe of the
scheduling chart to fit all the events in it.
l
Working Time: Click to open the Manage Calendars dialog box. If your account has the
Resource Management (RM) or Resource Management with Costs (RMC) option enabled, you
have the ability to manage calendars.
l
Templates > Apply Template: Select the schedule template that has been created by your e-
Builder account administrator or someone with manage templates permissions. Templates give
schedule managers a basis for starting the project schedule. This button is only available to
Schedule Managers or users with Manage Templates permission. For instructions, see Manage
Templates.
l
Templates > Save as Template: Click to save the current schedule as a personal template or
as an account template to be used throughout the account. This button is only available to Sched-
ule Managers or users with Manage Templates permission. For instructions, see Manage Tem-
plates.
l
Critical Path: Click to highlight in red the critical paths that can affect the end date of the project.
l
Export: Click to export e-Builder schedule as a PDF or as an .XML file, which can then be
uploaded to Microsoft Project. This button is only available to Schedule Managers or users with
Manage Templates permission. As a Schedule Manager, if you use Microsoft Project conjointly
with e-Builder as your scheduling tool, through the import and export options, you can work seam-
lessly with both utilities. For instructions, see Export Schedules.
l
Send: Click to send the schedule or the selected tasks to users in the project or external users
using their email address. The Send Schedule dialog also allows you to send a message to the
recipients.
l
Snapshot: Click to save a snapshot of the schedule. A snapshot can be taken at any time.
Ideally, you should save a baseline before the project gets underway to give you a basis for com-
paring your progress. In most cases, after the baseline is saved, a snapshot if taken on a monthly
basis. Saving a Schedule Snapshot will keep a "picture" in e-Builder of where a Schedule was as
the time the snapshot was taken. Snapshots can then be compared to the baseline or later snap-
shots for progress analysis. To see all the snapshots that have been taken, click the Snapshot
tab toward the bottom of this page. This button is only available to Schedule Managers or users
with Manage Templates permission. For instructions, see Schedule Snapshots.
l
Set: Click to save a baseline of your schedule. For instructions, see Manage Schedule Baseline.

e-Builder Schedule Module
Page xiv
l
Toggle: Click to show or hide the baseline.
Columns Available in all Schedules
l
Task Name: Displays the name of the task
l
Duration: Task duration in days (Note: for parent tasks, the units automatically changes to
Weeks for Duration >20 days, and changes to Months, for Durations >26 Weeks)
l
Predecessors: The tasks that precedes the task (Options are FS, SS, FF, SF)
l
Successors: The tasks that succeeds the task (Options are FS, SS, FF, SF)
l
Start: The planned start date for a task.
l
Finish: The planned finish date for a task.
l
% Complete: The manually updated progress, as a percentage of duration, on a task (may also
be automatically calculated as of the current date, if the schedule setting is enabled to "Auto-
matically calculate the % complete").
l
Early Start: The earliest date that a task can start based on any dependencies and constraints.
l
Early Finish: The earliest date that a task can finish based on the Early Start date plus Duration,
as well as any dependencies and constraints.
l
Late Start: The latest date that a task can start in order to meet any successor Milestones (such
as a Project Finish No Later Than Constraint on a Project Finish milestone)
l
Late Finish: The latest date that a task must finish in order to meet any successor milestones
(such as a Finish No Later Than Constraint on a Project Finish milestone).
l
Baseline Duration: The duration in days on each selected task at the moment that the baseline
was last set.
l
Baseline Start Date: The start date on each selected task at the moment that the baseline was
last set.
l
Baseline Finish Date: The finish date on each selected task at the moment that the baseline
was last set.
l
Baseline % Complete: The manually updated progress, as a percentage of duration, on each
selected task at the moment that the baseline was last set.
l
Calendar: Select from the available project calendars.
l
Constraint: Select the type of constraint to be applied to a task (Options are: None, As late as
possible, As soon as possible, Finish no earlier than, Finish no later than, Must finish on, Must
start on, Start no earlier than, Start no later than)
l
Constraint Date: Select the date that is desired to coincide with the constraint type. To remove a
constraint, you must first change the Constraint Type to "None".
l
Critical: Indicates that a task is on the critical path (longest path) for the project schedule.
l
Start Variance: Start Variance = Start - Baseline Start Date
Values are either: N days Late, N d Early, or 0d (Example: 2d Early, 3d Late)
l
Finish Variance: Finish Variance = Finish - Baseline Finish Date

e-Builder Schedule Module
Page xv
Values are either: N days Late, N days Early, or 0d (Example: 2d Early, 3d Late)
l
Free Slack: The number of days that a task can fall behind schedule without affecting the start
date of its earliest successor task.
l
Total Slack: The number of days that a task can fall behind schedule without affecting the pro-
ject completion's late finish date.
l
Master Process: When configured on the account, select the Master Process number that you
wish to associate with a task.
l
Status: The status of a task compared to its Baseline Finish Date (Statuses are: Draft, Not
Baselines, On Time, Early, Late, Complete)
l
Manual mode: When enabled, it allows users to change a task's dates manually and ignore
schedule dependencies. To enable it, click on the cell and select the check box.
l
Master Task: When configured on the account, select the Master Task that you wish to asso-
ciate with a task.
l
Milestone: Indicates whether the task is a zero duration milestone.
l
Rollup: Indicates all parent tasks (Values are Yes, No)
Additional Columns
Based on which schedule modules that have been enabled on your account, the following columns may
be available:
l
Assigned Resources: Select a resource from the resource pool on the account. From the
Assigned Resource column, you may also select the role from the available Resource Roles on
the account, and adjust the units, which is the desired % of an assigned resource's work day.
l
Mode: The scheduling mode which dictates how e-Builder will calculate either the task's Dur-
ation, Work, or Units. For more information, see Schedule Mode.
l
Calendar: Select one of the calendars for the selected task.
l
Budget Line Item: The Account Code selected for Resource Cost
l
Work: The total resource hours on a task.
l
Baseline Work: Total resource hours on a task at the moment that the last baseline was last set.
l
Planned Work: Resource hours on a Task that are linked to Budget Line Items.
l
Actual Work: Work x % Complete
l
Remaining Work: Work – Actual Work
l
Cost – Total Resource Cost: Each Assigned Resource's Work x their corresponding (Rate +
Burden)
l
Baseline Cost: Total Resource Cost on a task at the moment that the last baseline was last set.
l
Planned Cost: Total Resource Cost on a task that are linked to budget items.
l
Actual Cost: Cost x % Complete
l
Remaining Cost: Cost – Actual Cost

e-Builder Schedule Module
Page xvi
l
Estimated Work at Completion: Sums the greater of Planned Work or Actual Invoice Work for
every assigned resource.
l
Approved Invoice Work: Resource Hours from Approved or Paid Invoices
l
Remaining Invoice Work: Estimated Work at Completion – Approved Invoice Work
l
Estimated Cost at Completion: Sums the greater of Planned Cost or Actual Invoice Cost for
every assigned resource.
l
Approved Invoice Cost: Resource cost from Approved or Paid Invoices
l
Remaining Invoice Cost: Estimated Cost at Completion – Approved Invoice Cost
l
Work Variance: Work – Baseline Work
l
Cost Variance: Cost – Baseline Cost +Over,-Under
Details Tab
General
l
Manager Role: Select the role that the schedule manager belongs to from roles that have "View
Cost" permissions. Doing so will enable the subsequent drop-down menu, which allows you to
choose the appropriate user in this role. Users in the designated Schedule Manager role can cre-
ate the schedule and tasks, edit schedule details, create and apply templates, and update tasks.
These permissions are not limited to only the individual named in the Schedule Manager User
field.
l
Manager User: This menu is enabled only after a role is selected from the preceding Manager
Role drop-down menu. Click the drop-down arrow to assign the manager user. This field is inten-
ded as a reference to the primary project contact for the schedule. Any user in the project having
the same role as the “Manager Role” will be able to edit the schedule and manage resources on
the schedule.
l
Use External Scheduler: Select whether or not an external scheduler will be used.
This feature should be turned on only if another scheduling software, such as Primavera 6, is
your primary scheduling tool and e-Builder will only be used to make scheduling information avail-
able to internal staff, or if the schedule is being pulled into Cash Flow projections. If set to Yes , all
action buttons will be disabled in the e-Builder Schedule module and you will only be able to
import and export tasks in an Excel spreadsheet. This setting also makes it possible to update
multiple project schedules in a single import. This can be disabled at anytime.
For information and instruction on working with another scheduling tool, see Enable External
Scheduler.
l
Automatically calculate the % complete: When selected, e-Builder calculates the % complete
on a pro-rated basis for any task with a Start Date and/or Finish Date in the past (before the cur-
rent date). If the Task Finish Date is in the past, the Task is updated to 100% complete.
l
Link Resource Cost to the Budget: This option is available only when 'Resource Management
with Cost' has been enabled on the account.
None: Default setting - This setting is disabled.

e-Builder Schedule Module
Page xvii
Tasks to Budget Line Item: Allows Schedule Manager to select a single Budget Line Item for
Resource Costs on a Task.
Tip: Choose this option for projects where all the resources who are assigned to a single task
charge their time to the same budget line item or account code.
Resources to Budget Line Item: Allows the schedule manager to select a single budget line
item per resource assigned to any task. Can result in multiple budget line items for resource
costs on a task if resources are linked to different budget line items.
Tip: Choose this option for projects where different resources working on the same task can
charge time to different budget line items or account codes.
Calendar
l
Start Date: Click the calendar icon to choose a project start date. You can also use free-text
entry in mm/dd/yyyy format.
l
Hours per day: Enter the number of hours that will make up the work day. By default, the work
week is Monday - Friday, 8 hours per day, and 40 hours per week.
Tip
If Saturday and Sunday are added to the work week, increase the hours per week to 56 and
days per month to 30. Otherwise, task durations will automatically adjust to the days and
hours per week entered.
l
Hours per week: Enter the number of hours that will make up the work week. By default, the
work week is Monday - Friday, 8 hours per day, and 40 hours per week.
Tip
If Saturday and Sunday are added to the work week, increase the hours per week to 56 and
days per month to 30. Otherwise, task durations will automatically adjust to the days and
hours per week entered.
l
Days per month: Enter the number of working days per month. By default, the work week is
Monday - Friday, 8 hours per day, and 40 hours per week.
l
Calendar: Only available to MC, RM and RMC account attributes. Select one of the calendars or
click Manage Calendar to create another one.
l
Manage Calendar: Only available to MC, RM and RMC account attributes. Use the Manage Cal-
endars dialog box to edit or create a new calendar. From here you can set the working days and
hours, as well as set the exceptions (e.g., holidays).
Custom Fields Tab
If applicable, this tab lists the schedule custom fields. Custom field values can be modified by editing
schedule details.
Snapshots Tab
Lists all saved snapshots and gives you the ability to compare multiple snapshots to one another. To save
and compare snapshots, see Manage Schedule Snapshots
e-Builder Schedule Module
Page xviii
History Tab
Provides a history of the activities and actions taken in the Schedule module. This tab is a great resource
for the auditing process.
Importing Schedules
e-Builder supports multiple methods for updating schedules. Schedules may be updated manually through the
e-Builder schedule interface or changes may be imported from one of two supported file types. Microsoft Excel
(exported from Primavera 6) and .mpp files (exported from Microsoft Project) are both compatible with e-
Builder imports, but each file type import affects the use of the project schedule differently.
Important Note
When a project team decides to use the "External Scheduler" setting, e-Builder assumes that you are using an
advanced scheduling program such as Primavera P6 to handle all logic and calculations outside of e-Builder.
Note: To use an external scheduler, admin users must enable this feature. Admin users must first contact
Support to activate this feature at their account level.
To enable a project schedule for Excel imports
1. Open the Schedule page.
2. On the Details tab, in the General section, next to the Use External Scheduler drop-down, select
Yes.
3. Click Save.
Import Microsoft Project Imports ( .mpp)
If Microsoft Project (MS Project) is used in conjunction with the e-Builder Schedule module, you can easily
keep your project schedule updated in e-Builder, which gives you the ability to work seamlessly with both
tools. The .mpp file import is the standard e-Builder schedule import, therefore it can be used to override an
existing schedule or reconcile changes. However, in order to do subsequent updates to the schedule, an ini-
tial import of the schedule must first be completed. Typically, importing a project schedule is standard when
starting a new project schedule. This import type identifies differences between both schedules and
updates the e-Builder schedule accordingly. Pertinent e-Builder data such as cash flow links and custom
field values can also be maintained through this schedule import.
To import .mpp project schedules
1. Open the Schedule page.
2. On the Tasks tab, in the schedule toolbar, click Import.

e-Builder Schedule Module
Page xix
Note:
l
If this is your first schedule import, update options are not displayed.
l
For subsequent updates, choose the default update option: 'Synchronize all tasks with
my e-Builder schedule'. If you choose the second option of adding tasks to the existing
schedule, you will no longer be presented with options while updating and the imported
tasks will automatically appended to the existing schedule.
3. On the Import Schedule page, click Choose File.
4. Select your .mpp file and click Open.
5. Click Next.
6. If necessary, map built-in e-Builder fields with those in your .mpp file.
7. Click Next.
8. After reviewing the import summary, click Import.
Import Schedule Using Excel
This type of import is ideal for clients who are using another tool as their primary scheduler, such as
Primavera 6 (P6).
Multiple projects can be updated in a single import by including a column for the Project Identifier - values
would include either the project name or project number. The table below lists all required and optional
fields that should or can be included in the import file.
Note: If your project schedule is enabled to use an External Scheduler, only Excel files may be imported.
List of required and optional fields for import file
e-Builder Field
Name/ Import
File Column
Header
Description Required/Optional
Project Iden-
tifier
Select a Project Identifier. This is a unique ID
that will identify which project the schedule
import is for. e.g., project name, project num-
ber. This ID must match the Project ID or Name
of the e-Builder project.
When importing tasks for multiple projects, this
field must be mapped.
To learn more about project numbers, see
Create Project Number Custom Field.
Required
Task Name Map this field with its corresponding column in
the Excel spreadsheet.
Required

e-Builder Schedule Module
Page xx
e-Builder Field
Name/ Import
File Column
Header
Description Required/Optional
Task ID The Task ID is only visible in BI reports. It must
be unique, cannot end with letters, and cannot
contain special characters other than a period.
Max. 50 characters.
Required
Duration Task duration refers to the amount of time it will
take to complete a task. If there are no start
and end dates specified, they will be auto-
matically populated based on the duration, the
project's timeframe and the sequence of the
task within the schedule.
Required
Sequence Num-
ber
Sequence number refers to the number
assigned to the sequence of the task. It can
use the same field as Task ID or a separate
custom field. Can use decimals to establish rol-
lup task hierarchy (e.g., 1, 1.1, 1.2, 2, 2.1). No
alpha characters (A-Z) are allowed.
Max. 10 integers for each level.
Required
Start Date This column denotes the date the task will
begin. If a start date is not specified, the start
and end dates will automatically populate
based on the duration, the project's timeframe
and the sequence of the task within the sched-
ule.
Note: P6 does not auto-populate a Start
Date on Finish Milestones)
Required
Finish Date This column denotes the date the task will end.
If a finish date is not specified, the start and
end dates will automatically populate based on
the duration, the project's timeframe and the
sequence of the task within the schedule.
Required

e-Builder Schedule Module
Page xxi
e-Builder Field
Name/ Import
File Column
Header
Description Required/Optional
Note: P6 does not auto-populate a Finish
Date on Start Milestones)
Baseline Start
Date
Map this field to its corresponding column in
the Excel spreadsheet. A baseline start date
can be set for the overall project schedule, or
particular project phases.
Optional
Baseline Finish
Date
Map this field to its corresponding column in
the Excel spreadsheet. A baseline finish date
can be set for the overall project schedule, or
particular project phases.
Optional
Baseline %
Complete
Map this field to its corresponding column in
the Excel spreadsheet. A baseline percentage
complete can be set for the overall project
schedule, or particular project phases.
Optional
Actual Duration Map this field to its corresponding column in
the Excel spreadsheet. This figure denotes the
time it actually took to complete this task.
Optional
Actual Start
Date
Map this field to its corresponding column in
the Excel spreadsheet. This figure denotes the
date that the task actually began.
Optional
Actual Finish
Date
Map this field to its corresponding column in
the Excel spreadsheet. This figure denotes the
date that the task was actually completed.
Optional
% Complete Map this field to its corresponding column in
the Excel spreadsheet. This figure is the task's
completion percentage.
Optional
Constraint
Type
Map this field to its corresponding column in
the Excel spreadsheet. Constraint types set
the parameters as to the timing of the task.
Optional

e-Builder Schedule Module
Page xxii
e-Builder Field
Name/ Import
File Column
Header
Description Required/Optional
Options include:
l
As Late as Possible
l
As Soon as Possible
l
Finish no Earlier Than
l
Finish no Later Than
l
Finish On
l
Start No Later Than
l
Start On
Constraint Date Map this field to its corresponding column in
the Excel spreadsheet. Constraint date is only
necessary for the following constraint types:
l
Finish no Earlier Than
l
Finish no Later Than
l
Finish On
l
Start No Later Than
l
Start On
Enter the date the appropriate dates based on
the selected constraint type.
Optional
Milestone Map this field to its corresponding column in
the Excel spreadsheet.
Include a check mark in this column for all
tasks that are considered milestones. Mile-
stones are tasks that are considered critical for
successful project completion, such as receiv-
ing the certification of occupancy, for example.
Optional
Type Map this field to its corresponding column in
the Excel spreadsheet.
Specify whether the task is an event or a task.
Although an event is still treated as a task in
Optional

e-Builder Schedule Module
Page xxiii
e-Builder Field
Name/ Import
File Column
Header
Description Required/Optional
regards to duration, start and finish time, an
event is classified as a meeting or an approval
of item(s). Specifying events gives the sched-
ule manager the ability to better manage the
schedule by identifying when work is actually
being done versus a decision making or
approval process that may or may not impact
the schedule.
Master Task
Name
Map this field to its corresponding column in
the Excel spreadsheet.
Master tasks are created by the account admin-
istrator and used to identify similar project
phases that may be referred to by different
names across multiple projects.
Example
One project might use the term, Closeout
and others may use Final Completion', Pro-
ject Close Out or Closeout/Occupancy.
The master task is a unique identifier that uni-
fies all of these project phases so that account
administrators and Executives can report on
the status of these phases across all projects.
All master tasks have a numerical prefix that
allows you to link similar project phases to one
another.
A subtask will not likely be tied to a master
task, only the primary project phase or Sum-
mary Task, such as Pre-Design, Design, Con-
struction or Closeout.
Optional
Master Task
Number
Map this field to its corresponding column in
the Excel spreadsheet.
Optional

e-Builder Schedule Module
Page xxiv
e-Builder Field
Name/ Import
File Column
Header
Description Required/Optional
Task Resource
Role
Map this field to its corresponding column in
the Excel spreadsheet.
This column includes the name of the e-Builder
role the task resource belongs to.
Optional
Task Resource Map this field to its corresponding column in
the Excel spreadsheet.
This column includes the name of the task
resource.
Optional
Task Manager
Role
Map this field to its corresponding column in
the Excel spreadsheet.
This column includes the name of the e-Builder
role the task resource belongs to.
Optional
Task Manager Map this field to its corresponding column in
the Excel spreadsheet.
This column includes the name of the task man-
ager.
Optional
Predecessors Map this field to its corresponding column in
the Excel spreadsheet.
This column includes task number and con-
straint type of predecessor tasks. For example,
6FF.
Optional
To import a schedule for multiple projects
1. Open the Schedule page.
2. In the Quick Links section, click Import Tasks.

e-Builder Schedule Module
Page xxv
Note: If the Import Tasks link is not available, contact your e-Builder Technical Support to
enable this option.
3. Click Choose File to search for and select the import file.
4. Click Next.
5. If necessary, map built-in e-Builder fields with those in your Excel file.
6. Click Next.
7. Review the Import File Summary.
8. Click Import.
Export Schedules
Schedules can be exported to an XML file, which can be opened in Microsoft Project. The XML export is ideal
for schedule managers who track their schedules using both e-Builder and MS Project. Schedules can also be
exported into a PDF, which is useful for printing.
To export the schedule as an XML file
1. Open the Schedule page.
2.
In the Actions section of the toolbar, click Export.
3. Select XML.
The schedule is exported as an XML file.
To export the schedule as a PDF
1. Open the Schedule page.
2.
In the Actions section of the toolbar, click Export.
3. Select PDF.
4. Review the print settings and click Print.
The schedule can now be printed or saved as a PDF.
Manage Schedule Tasks
You can perform the following actions on tasks:
Add Individual Tasks
In most cases, tasks can be imported using Microsoft Project. However, if you have permission to create
tasks, you can add tasks to the schedule one at a time.
To add individual tasks
1. Open the Schedule page.
2. In the Tasks section of the toolbar, click Add Task.
The task is added to the bottom of the schedule
3. Edit the task inline.
4. Click Save.

e-Builder Schedule Module
Page xxvi
Note: To edit a task's details, double-click on the task to open it in the Task Editor.
To add an individual task from the list of tasks
1. Open the Schedule page.
2. Right click on a task where you would like to add your new task.
3. Select Add from the drop down, and then choose where you wish to add the new task.
The task is added and ready for inline editing.
4. Click Save.
Activate Schedule Tasks
After tasks have been added to the schedule via an import, they are in draft status until activated. Note that
project participants can still view draft tasks.
To activate tasks
1. Open the Schedule page.
2. Right-click on the tasks you want to activate and select Activate.
Move Tasks
Tasks can be moved within the schedule to update either the sequence or WBS.
To move tasks within a schedule
1. Select the task you wish to move by clicking on the task's number.
2. Do any of the following:
o
Drag it up or down within the schedule.
o
To make it a subtask, move it directly below the parent task, and then click the Indent in
the Tasks section of the toolbar.
o
To move a subtask out of a parent task or to make it a summary task, click the Outdent in
the Tasks section of the toolbar.
Update Tasks
Tasks can be updated by modifying details such as title, dates and duration. You can also reassign, activ-
ate or complete multiple tasks at a time.
To update a single task using inline editing

e-Builder Schedule Module
Page xxvii
1. Open the Schedule page.
2. Click on the task you wish to edit.
The input fields become editable.
3. Make all necessary changes.
Note: Task durations can also be modified by selecting the right side of the Gantt bar for the
related task and moving it left or right to decrease or increase the task duration.
4. Click Save.
To update multiple tasks
1. Open the Schedule page.
2. Click and hold the fill handle in the bottom right corner of the cell that contains the value.
3. Drag the fill handle to select the cells that you want to contain the same value.
4. Click Save.
To update tasks using the Task Editor
1. Open the Schedule page.
2. Right-click on the task and select Task Details.
The Task Editor dialog is displayed.
3. Make all necessary changes.
4. Click OK.
If approval is required for date changes or percent complete, a message displays informing you
that an approval request was sent to the Task Manager. Click Continue.
Note: For a description on each of the fields, see Task Editor.
Assigning Resources to a Task
This feature is available only if you have the Resource Management feature enabled.
To assign tasks

e-Builder Schedule Module
Page xxviii
1. Open the Schedule page.
2. Click the Assigned Resources column next to the task you want to assign a resource to.
Tip
If the Assigned Resources column is not visible, click Add new column and select the new
column.
A dialog with a list of resources is displayed.
3. Select the check box(es) of the resources to be assigned to the task.
4. For each of the selected resources, select their role, the percentage of work that the resource's time
is assigned to a task, and the total work hours.
5. Click Close.
Mark Tasks Complete
Users with access to the project schedule can mark tasks as complete. Marking tasks complete is equi-
valent to updating the percent complete to 100.
To mark tasks as complete
1. Open the Schedule page.
2. Right-click on the task and select 100% Complete.
3. Click Save.
To mark tasks as using the Task Editor
When marking a task as complete, you can also provide additional details.
1. Open the Schedule page.
2. Right-click on the task and select Task Details.
The Task Editor dialog is displayed.
3. On the General tab, set % complete to 100.
4. Enter additional details.
5. Click OK.
6. Click Save.

e-Builder Schedule Module
Page xxix
Delete Tasks
If a task becomes obsolete, delete it from the schedule.
To delete tasks
1. Open the Schedule page.
2. Right-click on the task and select Delete.
3. Click Delete.
Note: Tasks that are linked to the cash flow cannot be deleted. If these associations exist, these
tasks will be listed and you will only be able to cancel this action.
4. Click Save.
Manage Calendars
This feature is available in the New Schedule interface. Accounts with Resource Management (RM) or
Resource Management with Costs (RMC) include the ability to manage calendars by default. Administrators
can contact Support and request to activate the Multiple Calendars feature.
Use the Manage Calendars to set the calendars for this schedule. Three standard calendars are available: 24
hours, 7 Day week and Standard. You can edit their working time or create new calendars.
To access the Manage Calendars dialog box
1. Open the Schedule page.
2.
On the Tasks tab, in the Calendars section of the toolbar, click Working Time.
To add a new calendar
1. On the Manage Calendars dialog box, under the Calendar section, click Add.
2. Enter a name for the new calendar.
3. Select to either make a copy of an existing calendar or select to add a new calendar.
4. Click Add.
The new calendar is added.
5. Select the calendar to edit it.
6. To make it the default calendar, select the Default Calendar check box.
7. To edit the working time:
a. Click Edit Working Time.
b. Select the working days.
c. Click on the working hours to edit them or click Add to add new hours.
d. Click OK.
8. To add non-working days as exceptions to your calendar:
a. In the Exceptions section, click Add.
b. Enter a descriptive name for the exception.

e-Builder Schedule Module
Page xxx
c. Select whether it is a working or non-working type of exception.
d. Edit the Start and Finish dates to define a date range.
e. To add a single day, select the date on the calendar and then click Add.
f. To remove an exception, select the exception row and click Remove.
9. Click Apply to save your changes.
To remove a calendar
1. On the Manage Calendars dialog box, under the Calendar section, select the calendar to remove.
2. Click Remove.
Manage Templates
Schedule templates are created by users with Manage Template permission. Schedule templates give the
schedule manager a blueprint for starting the project schedule. Typically, the schedule manager applies the
template at the onset of planning out the schedule. Templates can include very little or a gamut of task inform-
ation. Using templates is highly recommended to help you save time when building out the schedule and keep
you in sync with your account administrator.
After the schedule has been finalized, users with Manage Templates permission can save it as an account-
wide or personal template. Account templates are accessible to everyone in all projects. Your personal tem-
plates are tied to your username and are available in any project that you have access to.
Note: Constraints are not saved to schedule templates.
To save a schedule as a template
1. Open the Schedule page.
2.
In the Tasks section of the toolbar, click Templates.
3. Click Save as Template.
4. Enter a name for the template in the Name field.
5. Next to Template Type, choose whether to save the template as an account or personal template.
Note: Schedule Managers or users with Manage Template permissions are able to make this tem-
plate available throughout the account and anyone with access is able to save it as a personal tem-
plate. Account templates will be available in all projects for all users to access. Personal templates
are tied to your username and will be available in any project that you have access to by going to
Setup > My Settings > Schedule > My Schedule Templates.
Tip: The Duration indicates the amount of time it will take to complete all tasks on the template
schedule.
6. Click Save.
To apply a template
1. Open the Schedule page.
2.
On the Tasks tab, in the schedule toolbar, click Templates.

e-Builder Schedule Module
Page xxxi
3. Click the drop-down arrow to choose the template you want to apply.
4. On the Apply Template page, do the following:
a. Choose a place in the current schedule to add the tasks in the template. Template tasks can
be added to the end of the schedule, or in between other tasks by choosing one of the place-
ment options.
b. Choose what to do with duplicate calendars.
c. If you chose to copy and rename the existing calendar, you can preview the duplicate cal-
endar in the Manage Calendars dialog box.
5. Click Apply.
Manage Schedule Baseline
The baseline is the planned, ideal roadmap for the project schedule. In order to give you a point of reference
for measuring deviations to the baseline, a baseline should be saved after the schedule has been finalized but
before the project gets underway. You can baseline the entire schedule at one time or subsets of the schedule
as they are completed, such as the design tasks, construction tasks, or close-out tasks. Baselines can only be
saved after the task(s) has been activated. A snapshot is automatically created upon saving the baseline.
To save a schedule baseline
1. Open the Schedule page.
2. To save a baseline of the entire schedule, select the header of the number column.
—Or—
To save the baseline of just a few tasks, press CTRL and click the number column of the tasks you
wish to include.

e-Builder Schedule Module
Page xxxii
3. In the Baseline section of the toolbar, click Set.
The Set Baseline dialog is displayed.
4. Select either to set a baseline for the entire project or only the selected tasks.
5. Click OK.
To reset a baseline
1. After a baseline has already been set, in the Baseline section of the toolbar, click Reset.
—Or—
Right-click on the tasks you wish to reset and select Reset Baseline.
2. In the Reset Baseline dialog, choose to either set the baseline for the entire project or the selected
tasks.
3. When prompted to confirm, click OK.
Manage Schedule Snapshots
Taking a snapshot of your schedule allows you to track progress.
Save snapshot
Snapshots should be saved periodically. In most cases, schedule managers save a snapshot of the sched-
ule at least once a month but they can be taken at any point in the project and used to review the progress
of the schedule at different points in time.
To save a snapshot of the schedule
1. Open the Schedule page.
2. In the Actions section of the toolbar, click Snapshot.
3. On the Save Snapshot dialog, enter a name for the snapshot, such as the date or project phase.
4. Click Save.
View snapshot
After taking a snapshot of your schedule, you can view a list of all snapshots on the Snapshots tab.
To view saved snapshots
1. Open the Schedule page.
2. Click on the Snapshots tab.
3. Click to view a saved snapshots.
A snapshot of the schedule opens on a separate tab.
Compare snapshots

e-Builder Schedule Module
Page xxxiii
The Compare Snapshots page gives Schedule Managers a way to see the difference in task duration, start
and finish dates or percent complete in one or more snapshots. This page lists all tasks in a collapsible
view, with each selected snapshot nested underneath the task so you can see if there have been any
changes over time. The current schedule is also listed in the list of snapshots to support real-time analysis.
Changes appear in red text. If a snapshot entry is missing from any of the tasks, it's because the task was
not included in the schedule at the time the snapshot was taken.
To compare snapshots
1. Open the Schedule page.
2. Click the Snapshots tab.
3. Select the check box next to the snapshots you want to compare.
Note: If only a single snapshot is selected, it will be compared to the current schedule.
4. Click Compare.
The Compare Snapshot dialog displays a comparison of the two snapshots.
Note: Changes in snapshots are displayed in red.
Field Description
A description of the fields are described below:
Compare snapshots
l
Snapshot Name: Lists the name of the task first as a collapsible header. The names of the snap-
shots are listed beneath the task name.
l
Duration: The task durations, which is the amount of time allotted for the completion of the task.
l
Start: The actual start date of the task
l
Finish: The actual finish date of the task.
l
% Complete: The percentage complete of the task.
Deleted Tasks
l
Snapshot Name: The name of the most recent snapshot the deleted item was last saved in.
l
#: Task number
l
Task name: The name of the task
l
Duration: The amount of time allocated for the task's completion.
l
Start: The date the task was started or schedule to begin, if it had not yet began.
l
Finish: The date the task was finished or schedule to finish, if it had not yet been completed.
l
% Complete: The task's percentage complete before it was deleted.
Predecessor and Successor Tasks
Tasks can be either linked together or dependent on one another. The tasks involved in these interdependent
relationships are either predecessor or successor tasks. Predecessor tasks come first and successor tasks fol-
low. Predecessor tasks refer to tasks that must be completed or at least begin before another task can start.

e-Builder Schedule Module
Page xxxiv
Successor tasks are those that follow the predecessor. Schedule managers have the ability to specify what
must be done and by when to ensure a successful project outcome. For example, the Schedule Manager can
designate that one task can only begin 20 days after a previous task is completed.
Link types are used to establish the relationship between these dependencies and they are as fol-
lows:
Finish to Start (FS) - Task 2 cannot start until task 1 finishes
Finish to Finish (FF) - Task 2 cannot finish until task 1 finishes
Start to Start (SS) - Task 2 cannot start until task 1 starts
Start to Finish (SF) - Task 2 cannot finish until task 1 starts
If predecessors are not defined in the import file or they need to be updated on the fly, schedule managers can
do so by editing the individual task. You are able to define up to five predecessor tasks for an individual task
record.
To define predecessor tasks
1. Open the Schedule page.
2. Right-click on the task that you want to define predecessors for and select Task Details.
The Task Editor dialog is displayed.
3. Click the Predecessors tab.
4. To add a predecessor task, click Add New.
5. In the new row, select the task that you want to add as a predecessor.
6. In the Lag column, enter the amount of time in days, weeks or months that this task must endure
before the subsequent task, or the task you've selected can begin or end.
7. In the Type column, select one of the following options:
o
Finish to Start (FS) - Select this option if task 2 cannot start until task 1 finishes
o
Start to Start (SS) - Select this option if task 2 cannot start until task 1 starts
o
Finish to Finish (FF) - Select this option if task 2 cannot finish until task 1 finishes
o
Start to Finish (SF) - Select this option if task 2 cannot start until task 1 finishes
8. Click OK to save your changes.
To add new predecessor tasks
1. Open the Schedule page.
2. Right-click on the task that you want to add a new predecessor for.
3. Select Add > Predecessor.
4. Enter additional task information inline.
5. Click Save.

e-Builder Schedule Module
Page xxxv
Schedule Mode
The Scheduling Mode choice will dictate how e-Builder will calculate either the task's Duration or Work, or a
resource’s Units.
When you see the following words, interpret them as:
l
Fixed: Set by a User
l
Duration: Days
l
Work: Hours
l
Units: % of a Resource’s Work Day that are assigned to a task
Fixed Duration mode (default)
The work of the task will change when a user assigns or removes resources.
User Changes Duration Task Work Units
Start user changed recalculate unchanged
Finish user changed recalculate unchanged
Duration user changed recalculate unchanged
Task Calendar unchanged unchanged unchanged
Add/Remove Assignment unchanged recalculate user changed
Assignment % unchanged recalculate user changed
Fixed Work mode
The duration of the task will change when a user assigns or removes resources. Also known as “Effort
Driven” mode in some scheduling software.
User Changes Duration Task Work Units
Start unchanged unchanged unchanged
Task Calendar unchanged unchanged unchanged
Add/Remove Assignment recalculate unchanged unchanged
Assignment % recalculate unchanged user changed
Task Work recalculate user changed unchanged
Fixed Duration and Task Work mode
The Units (Resource allocation %) will change when a user assigns or removes resources.

e-Builder Schedule Module
Page xxxvi
User Changes Duration Task Work Units Assignment Work
Start user changed unchanged recalculate unchanged
Finish user changed unchanged recalculate unchanged
Duration user changed unchanged recalculate unchanged
Task Calendar user changed unchanged recalculate unchanged
Add/Remove Assignment unchanged recalculate recalculate user changed
Resource Work unchanged recalculate recalculate user changed
Resource and Manager Roles
For accounts that do not have Resource Management (RM) or Resource Management with Cost (RMC), a
Resource Role is automatically created on project schedules.
Resource Roles
Note: The Resource Role has no relationship to e-Builder's Account-level roles or e-Builder Project-level
roles. It only applies to the Schedule module.
The resource user and any other user on the project who is in the same role as the "Resource Role" can
perform the following actions:
Task Edits
The resource user and any other user on the project who is in the same role as the Resource Role can
perform the following actions on tasks where their role is the Resource Role:
l
Edits on the General tab of the Task Editor:
o
Change the task's % Complete value (between 0% and 100% complete)
o
Change the task's Duration (which will automatically update the task’s Finish date from
the task’s Start date).
o
Change the task's Start date (which will automatically update the task’s Finish date using
the task Duration).
l
Edits on the Advanced tab of the Task Editor:
o
Change the Constraint Type and the Constraint Date (which will automatically update
the task’s start and finish date to align with the constraint selected).
o
Mark the Task as a Milestone (which will automatically change the task's Duration to 0
days and adjust the task’s start and finish dates to equal each other).
l
Add comments on the Comments tab of the Task Editor.
For more information, see the Task Editor Page Overview.
Schedule UI Toolbar Actions

e-Builder Schedule Module
Page xxxvii
The resource user can perform the following actions from the toolbar:
l
Export the Schedule in XML or PDF format (for printing)
l
Send the Schedule via e-mail to other users or external users
l
Toggle the Critical Path on and off on the Gantt chart
l
Toggle the Baseline bars on and off on the Gantt chart
l
View the Calendar from the Working Time icon.
For more information, see the Toolbar Buttons section on the Schedule Details Page.
Project Schedule View Edits
l
The resource user can add new columns and hide existing columns from their View of the Project
Schedule.
Snapshots and Schedule History
l
The resource user can view Snapshots from the Snapshots tab.
l
The resource user can view the Schedule History from the History tab.
Manager Roles
In addition to the tasks granted to Resource Roles, users in the Manager Roles can change the following
fields on a task:
l
Change the Resource Role and Resource User assigned to tasks
l
Change the Task Name on their tasks
l
Change the Predecessor relationships for their tasks
l
Change the Master Task association for their tasks
Task Editor
Use this page to include every task detail, such as notes, documents, forms and processes.
To update tasks using the Task Editor
1. Open the Schedule page.
2. Right-click on the task and select Task Details.
The Task Editor dialog is displayed.
3. Make all necessary changes.
4. Click OK.
If approval is required for date changes or percent complete, a message displays informing you that
an approval request was sent to the Task Manager. Click Continue.
A description of each of the fields are listed below:
General

e-Builder Schedule Module
Page xxxviii
l
Name: Task name
l
Description: A brief description of the task
l
% Complete: The completion percentage of the task.
l
Duration: The duration of the task.
Note: If the Schedule Mode (under Advanced tab) is set to 'Fixed Work', the duration auto-
matically adjusts the number of days based on the resource's units (i.e., % Allocation)
l
Dates Start: The task start date.
l
Dates Finish: The task finish date.
l
Baseline Start: If baseline was saved, this field displays the start date of this task as it was saved in
the baseline.
l
Baseline Finish: If baseline was saved, this field displays the finish date of this task as it was
saved in the baseline.
l
Baseline % Complete: If baseline was saved, this field displays the finish date of this task as it was
saved in the baseline.
l
Baseline Status: The status of the baseline.
Predecessors
l
Add New: Click to add a new predecessor.
l
Task Name: Select the task to add as a predecessor.
l
Type: Select the type of relationship.
l
Lag: Select the time frame for when this new task or additional predecessor tasks can begin or end.
Resources (with RM or RMC)
The following options are available if your account has Resource Management (RM) or Resource Man-
agement and Cost (RMC) enabled.
l
Add New: Click to add a new resource.
l
Resource Name: Name of the resource.
l
Role: The role assigned to the current resource for the specific task. For a list of actions available to
the resource role, see Resource and Manager Roles .
l
Units: The percentage of how much of the resource's availability that is dedicated to this task.
l
Work: The number of hours the resource is dedicated to this task. This value auto-adjusts after you
change the units.
Note: If the Scheduling Mode (under the Advanced tab) is set to 'Fixed Work', the resource's work
is not editable.
Resources (without RM or RMC)
The following fields are available if your account does NOT have Resource Management (RM) or Resource
Management and Cost (RMC) enabled.
l
Resource Role: Select the role that will have permission to update the task. All members of this role
will inherit the permission.

e-Builder Schedule Module
Page xxxix
l
Resource - Responsible Resource: Select the user who will be the main point of contact. This
user has to be a member of the selected resource role. For a list of actions available to all users of
the selected resource role, see Resource and Manager Roles .
l
Manager Role: Select the role that will have permission to update the task. All members of this role
will inherit the permission.
l
Manager - Responsible Resource: Select the manager who will be the main point of contact. This
user has to be a member of the selected resource role. For a list of actions available to all users of
the selected manager role, see Resource and Manager Roles
Advanced
l
Calendar: Select from the available project calendars.
l
Constraint Type: Select the type of constraint to be applied to a task.
l
Constraint Date: Select the date that is desired to coincide with the constraint type. To remove a
constraint, you must first change the Constraint Type to "None".
l
WBS Code: The WBS code of the task
l
Rollup: When selected, indicates the task will rollup to the parent tasks
l
Manually Scheduled: When enabled, it allows users to change a task's dates manually and ignore
schedule dependencies. To enable it, click on the cell and select the check box.
l
Critical: Indicates that a task is on the critical path (longest path) for the project schedule
l
Milestone: Indicates whether the task is a zero duration milestone.
l
Auto-adjust uncompleted: When selected, it moves a milestone to its next available calendar date
if the start date for the milestone is in the past and the milestone is 0% complete.
Example:
A Committee Meeting is set to re-occur on the first Monday of the month. This meeting did not
take place on the 1st Monday of February and was at 0% complete. When the schedule is loaded
the next day, it automatically adjusts the meeting date to the 1st Monday of March.
l
Master Task: Select the master task.
l
Master Process: Select the master process.
l
Scheduling Mode: Select the schedule mode.
Comments
l
Add Comment: Type task-related comments and click Add.
l
Check Spelling: Checks the spelling of the comment and provides suggestions.
l
Request Comment: Select the user who you wish to receive a comment on the selected task.
Custom Fields
Displays any configured custom field for the selected task.

e-Builder Schedule Module
Page xl
Tasks Page Overview
The Tasks page starts off as a blank canvas. You can pick the items you would like to see on this page by cre-
ating custom views. If you have access to multiple projects, the Tasks page gives you a program-wide view of
task details.
ExampleSchedule and task managers can create a view of all the tasks they manage whose percent complete
is greater than 50 %. This would allow managers to focus in on just those items that are near completion or
most critical to them.
The following tabs are available:
l
Task list: Lists all the tasks in the projects that you have access to. Click each task to view it in the Task
Editor.
l
Week: Lists the tasks that are scheduled for the selected week.
l
Month: Lists the tasks that are scheduled for the selected month.
To access the schedule Tasks page
l
On the top navigation tabs, click the Schedule tab. The Tasks page is displayed.
To open a project’s schedule
l
From the Tasks page, select the project from the ‘All Project’s drop-down list on the top-right. The
(Create) Schedule page is displayed.
