
Art & Design Scheme of Work
Perranporth C P School
Year 2 Autumn Term
AUTUMN 1
st
Half
Autumn 2
nd
Half
Theme
Mary Anning Rocks! Marvellous Maps
British Key
Question
Who has shaped the world we live in? Who sailed the seas?
Enhancements
No extracurricular trips planned. Visit to the maritime museum.
Books
Great Women Who Changed the World- Kate Pankhurst Non fiction books on
Addressing
Stereotypes
Women’s suffrage and segregation. Civil rights movement – Rosa Parks
Why were only men allowed onboard ships? - (explore and
challenge superstition that women were bad luck aboard a ship).
British Values
Democracy – What is democracy? – discuss when exploring Emmeline Pankhurst and Rosa Parks
Rule of Law – What Rosa Parks right to break the rule of law when sitting on the wrong part of the bus?
Individual Liberty – Explore the freedom to make our own choices about what we believe is right and wrong ‘You
must never be fearful about what you are doing is right’ R Parks.
Mutual Respect and Tolerance – Explore Rosa Parks and the civil rights movement – ‘everyone born equal’
Democracy – Was there democracy on board ships? How did the
hierarchy work?
Rule of Law – How was order kept on board ships? Why would
rules onboard ship be especially important? What could go wrong?
Individual Liberty –
Mutual Respect and Tolerance – Explore the diversity of sailors,
made up of multiple nationalities and religions.
Art & Design
(All NC subject
content
covered)
Children will be taught to use a range of materials creatively to design and make products,
to use drawing, painting to develop and share their ideas experiences and imagination.
They will begin to develop a wide range of art and design techniques in using colour, pattern, texture, line, shape,
form and space when paintings portraits of significant individuals and themselves. We will study the work of a
range of portrait painters, describing the differences and similarities between different practices and disciplines,
and making links to their own work.
(No content - Design Technology Unit)
Key Art &
Design
Skills to be
Taught
Knowledge of Artists & Designers /Exploring Ideas/ Evaluating work
(
A-
Y2K1.1, A-Y2K1.2, A-Y2K1.3, A-Y2K1.4, A-Y2K1.5, A-Y2K1.6, A-Y2K1.7, A-Y2K1.8, A-Y2K1.9, A-Y2K1.10)
Recognise the styles of artists, craft makers or designers and use this to inform
their own work.
Talk about the similarities and differences between different artists, craft makers
or designers.
Develop and record their ideas through painting, drawing, sculpture in response
to first hand observations, e.g. real objects, photographs, artefacts, and
experiences.
Talk about and answer questions about the starting point, and choices they have
made, e.g. chosen tools, media, materials.
Show confidence in working creatively e.g. with a range of media on different
scales.
Talk about the techniques, materials and equipment used in their work and the
work of others, e.g. ‘I have used a cotton bud to add dots’.
Describe what they like about their own work and the work of others using
appropriate language e.g. ‘I like the way a fine tip brush is used to add detail’.
Drawing (A-Y2D1.1, A-Y2D1.2, A-Y2D1.3, A-Y2D1.4)
Layer different media, e.g. crayons, pastels, felt-tips, charcoal
and ballpoint.
Understand the basic use of a sketchbook and work out ideas
for drawings.
Draw for a sustained period of time from the figure and real
objects, including single and groups objects.
Experiment with the visual elements: line, shape, pattern and
colour.
Painting (A-Y2P1.1, A-Y2P1.2, A-Y2P1.3, A-Y2P1.4, Y2P1.5)
Mix a range of secondary colours, shades and tones.
Experiment with tools and techniques, inc. layering, mixing
media, scraping through etc.
Name different types of paint and their properties.
Work on a range of scales e.g. large brush on large paper etc.
Mix and match colours to artefacts and objects.

Adapt and make changes to their work and the tools they use as it develops.
Describe how they have changed and adapted their work for a specific purpose,
e.g. use of specific tools to create more texture.
Information
and knowledge
about the Art/
artist,
techniques art,
movement etc.
Portraiture – drawing and painting inspired by multiple works including:
Pablo Picasso Weeping Woman 1937
Begin by studying the different portraits of individuals we are learning about in
history (see list below). We are going to discuss how the portraits may be very
different from how the individuals look and why this might be the case. We
will explore the different media, paints and techniques used for these
portraits. The children will share their views on the pictures and evaluate each
one.
A portrait is a painting or a photograph of a person's face and its expression. The purpose of a portrait is to show the
likeness, personality, and even the mood of the person. For this reason, in photography, a portrait is actually not a
snapshot, but a calm image of a person in a still position. A portrait normally shows a person looking directly at the
painter or photographer. Portraiture is a very old art form going back at least to ancient Egypt, where it flourished from
about 5,000 years ago. Before the invention of photography, a painted, sculpted, or drawn portrait was the only way to
record the appearance of someone.
Portraits have always been more than just a record. They have been used to show the power, importance, virtue,
beauty, wealth, taste, learning or other qualities of the sitter.
In more recent times, photography became the most important
medium of traditional portraiture, bringing what was formerly an
expensive luxury product affordable for almost everyone. Since
the 1990s artists have also used video to create living portraits.
But portrait painting continues to flourish.
Experiment and Investigate – sketchbook work
We are then going to learn how to draw different facial features,
we will start with the eyes and nose, then learn how to draw a mouth and lips and ears, before finally learning how to
draw a face. How to draw a portrait - BBC Teach
The children will then use these skills to draw a picture of their own face. From this they
will then paint their portrait in a similar style to one of the portraits we have evaluated
earlier in the topic.
Look at the abstract, cubist portraits of Pablo Picasso and compare with the more
traditional. Explore the similarities and differences – why are they so different? Children
try to create their own abstract portraits inspired by Picasso. Experiments in Art
Education: Abstract Portraits
Information: Picasso was so experimental, and created so many different kinds of art. One
of his most famous periods is the cubist period. The painting below is one of his cubist
pictures. Cubism is when the artist paints an object, like a bottle, from lots of different
angles all in the same picture. So you see the front, the back and the sides of the bottle at
the same time. In a way, it’s a bit like having x-ray eyes! (Image - Pablo Picasso
Weeping Woman 1937 Tate) In 1937 the Spanish Civil War broke out. The picture above is called The Weeping Woman,
and it was painted in protest to the bombing of a town called Guernica in Spain. The woman is crying but her face is all
mixed up. This is because it is a cubist painting. If you look closely you can see that Picasso has painted both the front
of the woman’s face and the side of her face. Hold your hand up to the picture and cover the left side of her face. Can
you see that she is now in profile? Picasso was trying to show us what pain and unhappiness looks like. What do you
feel when you look at this painting?
(No content - Design Technology Unit)

Phase 1
I can understand what a portrait is and the
different ways it can be used to represent a
person.
Begin by asking children - What is a portrait?
Work with children in discussion to develop an
understanding of what a portrait is and the
history of portraits (information above). Show
different portraits of Significant People from the
topic and others too (suggested PPT in resource
folder). Discuss the images that are being
represented and what, we as the audience, might see and what the artist wanted us to see or believe/understand
about the person/sitter/subject. Compare and contrast the images of Mary Anning, Henry VIII and Neil Armstrong.
Discuss the powerful stance of the king, his huge shoulders and fine clothing, his facial expression etc How do this
compare to Neil Armstrong or Mary Anning? What might the audience of these images want us to see? Provide
children with some small images of different portraits and ask them to stick them in their sketchbook to create a
Portrait Page. Children should record their thoughts and feelings about the different images - comparing what they
think, what the artist wanted them to see and what type of impression the subject wanted to portray.
(No content - Design Technology Unit)
Phase 2
I can draw detailed observational drawings of human features.
Using small mirrors, ask children to look carefully at their different facial features. Ask them to describe what they can
see to a partner. Share the video: How to draw a portrait - BBC Teach
and discuss. Demonstrate sketching and drawing techniques, showing children how
to achieve a detailed observational drawing of different parts of the face (eye,
mouth, nose). Teach children that ‘looking’ is the most important skill and that they
should ‘draw what they see – not what they think they know’. Discuss light and dark
areas and demonstrate how the pencil can be used to shade and show darker or
lighter areas. Ask children to begin sketching the different elements of the human
face learning how to draw through experimentation and investigation. They should
record their drawing in their sketchbooks, noting in words and pictures their ideas
as they work. Provide children with different media (biros, fine liners, pencil crayons). Ask them to explore the different
mark making effects that different tools can achieve. Again, ask children to record in words, ideas and pictures their
experiments.
(No content - Design Technology Unit)
Phase 3
3. I can use drawing and sketching techniques to draw facial features. In this session,
children will develop their observational drawing skills further by drawing their own face – a
self portrait, well half of one! Prior to the session, take a photograph of each child’s face -
‘face on’ so that the child’s face is directly facing the camera. This should be printed off
(roughly A4 size and in black and white). Introduce the session by discussing the skills
learned in the last sessions, look over several of the detailed sketches and share aspects that
have been successful. Remind children that ‘looking’ is key to successful observational
drawing. Using the visualiser, demonstrate cutting a picture of face (it could be yours) in
half, then sticking down the half that is opposite to the hand used (e.g. a right handed child
with need to have the left hand side of the face stuck in the sketchbook – this means that
the drawing hand is not covering the image). Demonstrate marking feint lines across the image to the blank side where
the eyes, mouth and bottom of the nose would be – this helps to get proportions correct. Next teach children, using a
light touch sketching hand, how to carefully sketch the other side of the face. Carefully draw in the facial features and
remind children to keep looking at the image side so that a mirror image is created to make up the whole face. Look for
light areas and dark areas, tone and shadow. Show children how to develop their shading and tonal drawing skills.
Now provide each child with their half face image (it is easier if these are in sketchbooks prepared already) and ask
them to build upon their observational drawing techniques to sketch the remaining half of their face, by copying the
image side in reverse. Once complete ask children to compare and evaluate their portraits with those of peers – Can
(No content - Design Technology Unit)

children talk about the features they like in their own work and in the work of others? Talk about what they might
change in their own work? These could be recorded in sketchbooks.
Phase 4
4. I can develop my drawing techniques, inspired by the abstract cubist work of Picasso.
Introduce the children to the work of Pablo Picasso and share some background
information about the artist, his inspirations and motivations. Discuss Picasso’s cubist
works and what cubism was (see above information above an PPT in resources folder).
Share some of his works and ask the children to discuss how the pieces make them feel
and what they think of them – (children could record these thoughts in sketchbooks along
with some of Picasso’s images). What do you see when you look at this painting? How has the
painting been made? What kind of images does Picasso use? How would you describe these colours?
What shapes can you see? What kind of lines can you see? How do you think Picasso was feeling when
he painted this? How does the painting make you feel? Do you like it? Why?
Next focus on the Weeping Woman and discuss the painting.
Ask children to look at the face and how it is different to the images we’ve seen of faces so
far in other portrait lessons? Discuss how the features are very different but still
recognisable. In this painting, Picasso has painted the front and the side of the woman’s face
in the same picture. Try covering up half of the picture with your hand or a piece of paper.
Can you see which part of the painting shows the front of her face
and which part shows the side of her face?
Demonstrate how we can draw facial features, but with a more
simplified cubist approach, trying to draw from different angles and
using shapes and blocks of colour (see: Picasso Faces - Easy Art for
Kids - Arty Crafty Kids). Using mirrors, ask children to experiment in their sketchbooks, creating
cubist inspired facial features, recording their thinking and ideas. They can then begin to build
up an image of their own face, using coloured pencils or pens to bring colour to their parts.
(No content - Design Technology Unit)
Phase 5
5. I can draw and paint a self portrait using drawing techniques I have learned - (inspired by cubism and Picasso). I
can use colour to reflect my personality and feelings.
In this session, children will use the influences and techniques
they have learned to create their own cubist inspired self
portrait. Begin by showing children some different examples of
cubist self portraits. Explain how an image like these can be
created and how the facial features can be changed in unusual
ways. Using larger sheets of paper, demonstrate how a cubist
portrait could be created – follow: Experiments in Art
Education: Abstract Portraits for inspiration if needed. Next,
explore and demonstrate how colour could be used the
represent the subject’s personality or feelings (refer back to
Y1 lesson on Mark Rothko). Provide children with the
necessary resources – large paper, pencils, to draw out their cubist portrait. Children should then
paint over the sections of their portrait with black lines and allow to dry. Once dry, children can
then use paint and colour mixing techniques to create the right colours to reflect their feelings
and characters in their portrait. As an alternative, oil pastels could be used to colour and blend
colours.
(No content - Design Technology Unit)
Phase 6
6. I can reflect, evaluate, and provide feedback on my art work and that of other’s.
Children work in groups to share the images of their portrait artworks throughout their sketchbooks and their final
cubist inspired portraits from the previous sessions. Ask children to take it in turns to discuss their initial ideas, share
their thoughts at the time and after making their artwork. Ask children to share their development of ideas and the
(No content - Design Technology Unit)

making of their pieces and material choices, colour choices etc with their group reflecting on the process and using
evaluative language: I really like the way I …….I wish I had…….I still need to work on……This helped me understand….I am most
proud of….The tricky part was… ...Next time I need to…… Group members should also provide constructive feedback:
I really like how you…I think you have managed to ….Maybe next time you could…
Vocabulary
Vocabulary
Portrait
Observe/observational drawing
Facial features
Subject (as in the person/face)
Expression
Tone – light and dark
Shading
Shadow
Abstract
Cubism/cubist
Pablo Picasso
Helpful Definitions:
Cubism: Cubism is a style of art which aims to show all of the
possible viewpoints of a person or an object all at once. It is
called Cubism because the items represented in the artworks
look like they are made out of cubes and other geometrical
shapes.
Abstract art: Abstract art is art that does not attempt to
represent an accurate depiction of a visual reality but instead
use shapes, colours, forms and gestural marks to achieve its
effect. Abstract art can take several forms, such as painting,
textiles and sculpture, and although the piece does not often
look like something specific, it is almost always inspired by a
real subject matter.
portrait
observational drawing
facial features
abstract
Cubism
Pablo Picasso

Year 2 Spring Term
Spring 1
st
Half
Spring 2
nd
Half
Theme
All Creatures Great and Small Cornish Beachcombers
British Key
Question
Should we respect all animals like we should respect all people? How has industry in Perranporth changed?
Enhancements
Bug hunting and pond dipping in the Forest School Area. Visit to beach, businesses and visit from fishermen
Books
Fiction - Argh Spider- Lydia Monks, Anansi the Spider- Gerald McDermott, The Giant Jam Sandwich- Janet
Burroway and John Vernon Lord, The Very Quiet Cricket- Eric Carle
Non-fiction - The Bee Book- Charlotte Milner, Yucky Worms- Jessica Ahlberg and Vivian French
Fiction- There’s a hole in the bottom of the sea, Commotion in the
ocean, Sharing a Shell, Sally and the Limpet, Lucy and Tom at the Seaside
Non-fiction- Seaside and what can live on the beach
Addressing
Stereotypes
Are insects disgusting or beautiful? – what is beauty?
Did women help fishermen? What was the role of a fishwife?
What do fishermen/women look like? Where are they from? Explore
that fishing is a global industry and need.
British Values
Democracy – What rights and responsibilities are there within the insect society?
Rule of Law – What rules exist to protect nature?
Individual Liberty –
Mutual Respect and Tolerance – Discuss the team work of bees – working together for a common goal.
Democracy – Who makes decisions in Perranporth? (broadly explore
Parish Council)
Rule of Law – What rules would help to make Perranporth better?
Individual Liberty – Who protects us in Perranporth?
Mutual Respect and Tolerance – Is it a good thing that Perranporth has
so many visitors?
Art & Design
(All NC subject
content covered)
The children will begin to use a range of materials creatively to design and make products. They will use drawing,
painting and sculpture to develop and share their ideas, experiences and imagination. They will begin
to develop a
wide range of art and design techniques in using colour, pattern, texture, line, shape, form and space when
creating prints. They will learn about the work of a range of artists, craft makers and designers, describing the
differences and similarities between different practices and disciplines, and making links to their own work.
(No content - Design Technology Unit)
Key Art & Design
Skills to be Taught
Drawing (A-Y2D1.1, A-
Y2D1.2, A-Y2D1.3, A-
Y2D1.4)
Layer different
media, e.g. crayons,
pastels, felt-tips,
charcoal and
ballpoint.
Understand the
basic use of a
sketchbook and
work out ideas for
drawings.
Draw for a
sustained period of
time from th
e figure
and real objects,
including single and
groups objects.
Experiment with
the visual
Form and Sculpture
(A-Y2F&S1.2)
Manipulate clay for a variety of
purposes, inc. thumb pots, simple
coil pots and models.
Build a textured relief tile.
Understand the safety and basic
care of materials and tools.
Experiment with, construct and
join recycled, natural and man-
made materials more confidently.
Knowledge of Artists & Designers /Exploring
Ideas/ Evaluating work (A-Y2K1.1, A-Y2K1.2, A-
Y2K1.3, A-Y2K1.4, A-Y2K1.5, A-Y2K1.6, A-Y2K1.7, A-Y2K1.8, A-
Y2K1.9, A-Y2K1.10)
Recognise the styles of artists, craft makers or
designers and use this to inform their own work.
Talk about the similarities and differences
between different artists, craft makers or
designers.
Develop and record their ideas through painting,
drawing, sculpture in response to first hand
observations, e.g. real objects, photographs,
artefacts, and experiences.
Talk about and answer questions about the
starting point, and choices they have made, e.g.
chosen tools, media, materials.
Show confidence in working creatively e.g. with a
range of media on different scales.
Talk about the techniques, materials and
equipment used in their work and the work of
Collage and Textiles A-
Y2T&C1.2
Create textured collages
from a variety of media.
Breadth of Study
(A-Y2BoS1.1, A-Y2BoS1.2, A-
Y2BoS1.3)
Work on their own and
collaboratively with others
on projects in 2 and 3
dimensions and on
different scales.
Use ICT Investigate different
kinds of art, craft and design

elements: line,
shape, pattern and
colour.
others, e.g. ‘I have used a cotton bud to add
dots’.
Describe what they like about their own work
and the work of others using appropriate
language e.g. ‘I like the way a fine tip brush is
used to add detail’.
Adapt and make changes to their work and the
tools they use as it develops.
Describe how they have changed and adapted
their work for a specific purpose, e.g. use of
specific tools to create more texture.
Information and
knowledge about
the Art/ artist,
techniques art,
movement etc
Collage, sketching, drawing and 3d sculpting - minibeasts: – sketchbook work Children will
sketch different insects/minibeasts from detailed illustrations of them. The children will
develop observational drawing skills alongside pencil shading methods to add tone to their
minibeast, showing texture and shape.
3D Sculpture – Children will use their observational drawing studies to
create a 3d clay sculpture table of a chosen insect. They will use a mixed
of hand and tool marking and moulding to create the desired effects.
Collage: We will learn about the collage artworks of Megan Coyle.
Megan Coyle is an artist and illustrator who resides in Brooklyn. She
creates collages entirely from magazine strips with a process that she calls “painting
with paper.” Find out more about Megan and her artwork:
https://megancoyle.com/about/artist-bio/
There are also numerous YouTube videos of Megan creating her collages step by step
for children to view and learn from: click here
Experiment and Investigate – sketchbook work
The children will create their own collage of a minibeast
or animal collage of their choice by cutting out coloured
paper from magazines and arranging it with colours
inspired by the work of Megan Coyle.
(No content - Design Technology Unit)
Phase 1
I can use observational drawing techniques to create detailed sketches of insects.
Begin by sharing several different images and photographs of insects with the children.
While looking at the pictures of insects, discuss the three main sections of their bodies–
head, thorax, and abdomen. Point out that the compound eyes are located on the sides
of the heads; two antennae protrude from the front of the head; six legs extend from
the thorax; and some insects even have stingers. Show the children a sketches of an
insect and then model how this can be achieved through lightly sketching using several
layers of lines (not just one) to form the shapes of the insect’s body, head, thorax,
abdomen etc. Demonstrate the simple shapes that can been seen in the insect to help
the children see how the form can be drawn. Move on to showing children how they
can use pencil drawing techniques of shading and begin to introduce cross hatching,
stippling etc to create tone and texture in their drawing.

Provide the children with images of real insects, drawn insects and detailed diagram
images. Ask children to use their sketchbooks to try their own careful observational
drawings, looking at shape and form. Children should be encouraged to draw with
different media (pencil, black pens, biro, felt tips, coloured pencil crayon etc) whilst
creating a range of sketches. They can try to build in shading techniques to show light and
dark and textures. Children should also record their thoughts on their drawings as they
work.
Phase 2
I can manipulate modelling clay in a variety of ways, e.g. rolling, kneading and shaping to create an insect tile.
Refer back to the observational drawing created in the last session. Share some of these on the screen and discuss
the intricate details of the drawings. Explain to the children that in this session, they will be using their previous
studies to help them create a 3D insect clay tile using air
drying clay.
Roll out a flat clay base, roughly 10cm x 10cm. Remind
children of the 3D modelling that they had learned about in Y1
(Beatrix Potter project) and the different marking techniques
they experimented with. Using an insect image as stimulus,
demonstrate to children a variety of different moulding and
modelling techniques that can be used to form different
shapes, sizes, textures and patterns to slowy build up the
different body parts of the insect . Demonstrate how different
finger/hand movements/tools and pressures can be used to
achieve different effects and patterns.
Ask children to look back through their sketches from the previous session and select one image from which to
make their 3D clay tile. Ask them to create their own base tile by rolling out a flat section of clay. Then use the
different modelling and sculpting techniques and tools that have been shared to create their own 3D insect tile.
Photographs of these and the development of skills should be taken for sketchbooks and later evaluation.
Phase 3
I can understand collage techniques, inspired by the work of Megan Coyle.
I can using drawing techniques to explore composition studies.
Introduce the children to the work of Megan Coyle and share some background information about the artist, her
inspirations and motivations. Discuss Coyle’s animal collage works and what collage is and how it is created. Watch
one her time lapse videos of her creating an animal collage: https://youtu.be/GotarHxT32I Share some of her
works and ask the children to discuss how the pieces make them
feel and what they think of them – (children could record these
thoughts in sketchbooks along with some of Coyle’s images). What
do you see when you look at this collage? How has the collage been made?
What kind of images does collage use? How would you describe these media
that been used? What shapes can you see? What kind of textures can you
see? What might’ve inspired Coyle to create this piece? Do you like it? Why?
Share some different images of animals with children and then
explain that in the next session children will be creating their own
collage like Coyle has. Firstly, it is important to explore the possible
composition of the collage and the subject. Demonstrate how to
build up a series of sketches in the sketchbook, trying out different drawings of animals, parts of their body, their
patterns or form, shapes etc making notes to explain these. Look at how Coyle varies her compositions –
sometimes the whole animal, sometimes just a focal part (head and neck for example).

Provide children with a collection of different images of animals from which they should produce drawing studies
in their sketchbooks. In the same way that Coyle sometimes focuses her drawings on a certain part of the animal –
it’s head and neck for example, children should create a series of drawings of different animals, practising their
drawing and working towards a final image to be use later for a Coyle inspired collage. Ask the children to make
notes alongside their drawing, explaining their ideasm choices of composition and thoughts for their final collage.
Phase 4 I can use collage techniques, inspired by the
work of Megan Coyle.
Refer back to the composition studies that children
produced in the last session. Ask them to look back
through these and decide which animal drawing they
will choose as the basis for their final collage. Ask
them to note down in their sketchbook the reasons
for this choice.
Next, rewatch one of the Megan Coyle collage videos
and discuss the technquies and material she uses to
create the collage. Demonstrate transfering a smaller
preliminary sketch into a large A3 sized sketch – drawing the imaged scaled up so that collage will be easier on a
larger scale. Then using a collection magazines etc, demonstrate how to search
for appropriate colours and images that will form the colours and textures of
the chosen animal (it maybe necessary to look back at the orginal image for
the colours). Demonstrate tearing technqiues and how to make small tears to
get more intricate edges or using scissors for straight cuts if that’s what is
needed – both technqiues achieve different effects! Demonstrate how to
carefully glue a background colour or image and the different aspects of the
animal too.
Ask children scale up their chosen animal image to A3 size. Then children
should use the different collage technqiues – the search for appropriate
colours, patterns, images, tearing and cutting, glueing etc to b
uild up their own
animal collage.
Phase 5
I can reflect, evaluate, and provide feedback on my artwork and that of other’s.
Children work in groups to share the images of their different art creations from the previous sessions – their
sketchbooks, clay tiles and collages. Ask children to take it in turns to discuss their initial ideas, share their
thoughts at the time and after making their artwork. Ask children to share their development of ideas and the
making of their pieces and material choices, colour choices etc with their group reflecting on the process and using
evaluative language: I really like the way I …….I wish I had…….I still need to work on……This helped me understand….I am most
proud of….The tricky part was… ...Next time I need to…… Group members should also provide constructive feedback: I
really like how you…I think you have managed to ….Maybe next time you could… An evaluation writing frame could be created
to help children record their evaluations, and those of their peers in their sketchbooks alongside images of their finished
pieces.
Vocabulary
Vocabulary
:
Megan Coyle
Layer
Hatching
Cross hatching
Stippling
Shading
collage
cross hatching
composition

Tone
Modelling
Manipulate
Collage
Rolling
Kneading
Shaping
modelling
shading
manipulate
Megan Coyle

Year 2 Summer Term
Summer 1
st
Half
Summer 2
nd
Half
Theme
Kings, Queens and Castles Safari
British Key
Question
How have castles in Britain shaped our history? What are National Parks and why do we have them?
Enhancements
How to train a dragon theme day.
Visit - Roleplay castle, Restormel Castle/Pendennis Castle
Visit to Newquay Zoo
Books
The Three Wishes
Castles texts (Ackworth Library)
English Heritage booklet
Paperbag Princess
Princess Smartypants
The Knight and the Dragon
The Princess and the Wizard
Tell me a Dragon
Fiction
Lila and the Secret of Rain- David Conway and Jude Daly, The Hunter- Paul Geraghty, Sleep Well Siba and Saba-
Nansubuga Nagadya Isdahl & Sandra van Doorn
Non-fiction
One day on our blue planet: In the Savannah, Africa is not a country- Mark Melnincove and Margy Burns Knight
Addressing
Stereotypes
Boudicca – barriers about being a female warrior
Queen Elizabeth I – barriers about being a female monarch
Stephanie Frappart –
European female football referee to ref a
male final
Do all people in Africa live in poverty?
British Values
Democracy – Is a king or Queen voted into power?
Rule of Law – What powers of rule do monarchs have?
Individual Liberty – Would you like to be a monarch (explore
the pros/cons)
Mutual Respect and Tolerance –
Children to understand and
value the differing opinions of others.
Democracy – Discussion based on the subject of zoos - should we have them?
Rule of Law – Are the rules for animals the same as people?
Individual Liberty – Should animals have their liberty restricted in zoos?
Mutual Respect and Tolerance – Children understanding the different views within the class and respecting other’s
views.
Art & Design
(All NC subject
content covered)
(No content - Design Technology Unit)
Children will learn to use a range of materials creatively to design and make products, including Massia patterns. They
will use drawing, painting and sculpture to develop and share their ideas, experiences and imagination. They will also
learn to develop a wide range of art and design techniques in using colour, pattern, texture, line, shape, form and space.
The children will learn about the work of a range of artists, craft makers and designers, describing the differences and
similarities between different practices and disciplines, and making links to their own work.
Key Art & Design
Skills to be Taught
Knowledge of Artists & Designers /Exploring Ideas/
Evaluating work (A-Y2K1.1, A-Y2K1.2, A-Y2K1.3, A-Y2K1.4, A-
Y2K1.5, A-Y2K1.6, A-Y2K1.7, A-Y2K1.8, A-Y2K1.9, A-Y2K1.10)
Recognise the styles of artists, craft makers or designers
and use this to inform their own work.
Talk about the similarities and differences between
different artists, craft makers or designers.
Develop and record their ideas through painting,
drawing, sculpture in response to first hand observations,
e.g. real objects, photographs, artefacts, and
experiences.
Drawing (A-Y2D1.1, A-Y2D1.2, A-
Y2D1.3, A-Y2D1.4)
Layer different media, e.g.
crayons, pastels, felt-tips,
charcoal and ballpoint.
Understand the basic use of
a sketchbook and work out
ideas for drawings.
Draw for a sustained period
of time from the figure and
real objects, including single
and groups objects.
Form and Sculpture
(A-Y2F&S1.2)
Understand the safety and
basic care of materials and
tools.
Experiment with, construct
and join recycled, natural
and man-made materials
more confidently.
Painting (A-Y2P1.1, A-Y2P1.2, A-
Y2P1.3, A-Y2P1.4, Y2P1.5)
Breadth of Study
(A-Y2BoS1.1, A-Y2BoS1.2, A-
Y2BoS1.3)
Work on their own and
collaboratively with
others on projects in 2
and 3 dimensions and on
different scales.
Use ICT Investigate
different kinds of art,
craft and design

Talk about and answer questions about the starting
point, and choices they have made, e.g. chosen tools,
media, materials.
Show confidence in working creatively e.g. with a range
of media on different scales.
Talk about the techniques, materials and equipment
used in their work and the work of others, e.g. ‘I have
used a cotton bud to add dots’.
Describe what they like about their own work and the
work of others using appropriate language e.g. ‘I like the
way a fine tip brush is used to add detail’.
Adapt and make changes to their work and the tools they
use as it develops.
Describe how they have changed and adapted their work
for a specific purpose, e.g. use of specific tools to create
more texture.
Experiment with the visual
elements: line, shape, pattern
and colour.
Mix a range of secondary
colours, shades and tones.
Experiment with tools and
techniques, inc. layering,
mixing media, scraping
through etc.
Name different types of
paint and their properties.
Work on a range of scales
e.g. large brush on large
paper etc.
Mix and match colours to
artefacts and objects.
Information and
knowledge about
the Art/ artist,
techniques art,
movement etc
recalled
(No content - Design Technology Unit)
Repeating Pattern
–
Mark Making
Painting
Experiment and Investigate
We will start by studying the different patterns used by African people in
their decoration. We will be focusing on the colours and repeating
patterns that feature heavily in their fabrics, house painting and beads.
The children will learn to recreate the patterns by drawing and painting.
They will try to recreate these patterns using colour mixing and painting skills.
We will explore the work of Geoffree Mugwe an African
artist. Mugwe is a secretive artist and little is known about his
life or who he is. His art features in one gallery in Nairobi. It is
vibrant and realistic paintings of African landscapes and
animals. Mugwe paintings with both fascinating detail and a
unique observation of both form and light. His compositions
are unlike any other artist in that they are vibrantly coloured
and dynamic in the depiction of Africa. Cast in a rich warm
light, the elements of the paintings are fantastic to look at.
The children will use Mugwe’s work as inspiration to start
sketching different African creatures and will then learn to
layer colour to show the depth and light in the pictures. They
will then create their own paintings.
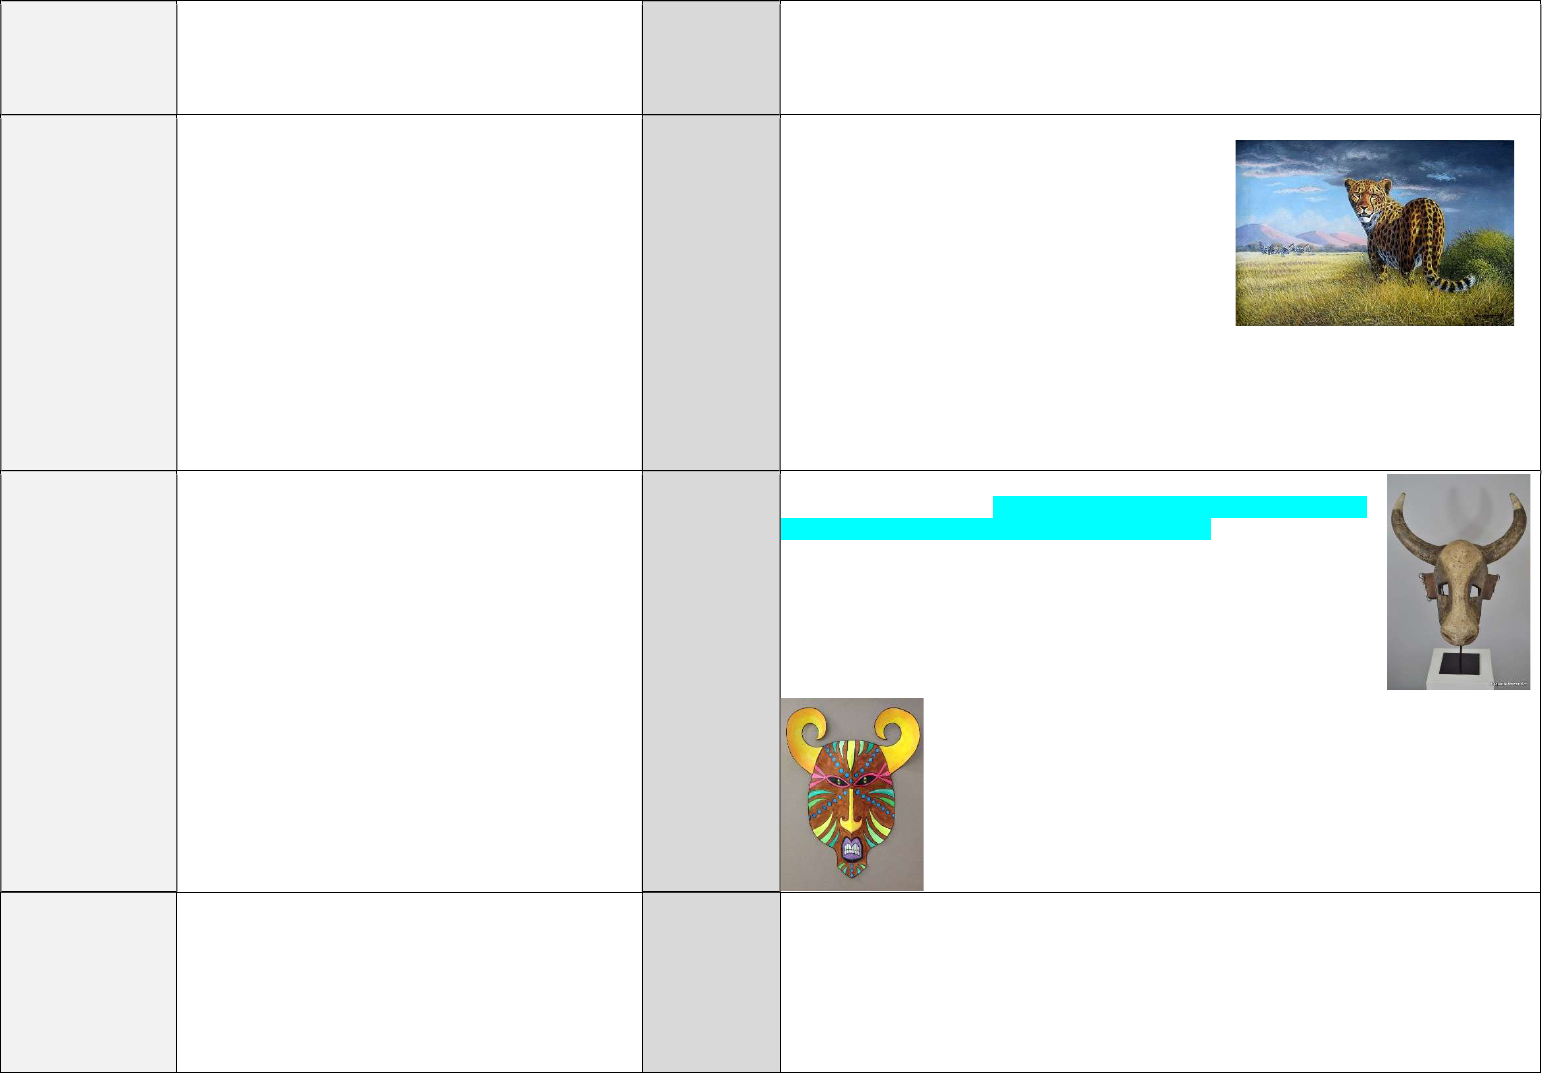
3D Sculpture – children will research and learn about the African tribal culture of masks and their significance and uses. Children will
explore the different shapes, forms and patterns that are used in these masks. Children will craft their own African style mask and
decorate it using the influences from the African patterns they have learned about (both man made and animal inspired)
Phase 1
I can create repeating patterns inspired by traditional African designs. Explore
the wide range of different patterns used in African culture, clothing, decoration
– even houses! Show children African Pattern PowerPoint & Ndebele (Y2
resources folder) and talk through the different types seen, the colours used,
how many are based on geometirc designs and the variety of patterns and
images. Discuss how the patterns repeat themselves in different ways. Discuss
the variety of colours that are used and the significance that some of these might
have. Discuss how many colours are natural, earthy colours and why this might be. Demonstrate
drawing and creating some patterns of your own, showing children how different pattern can be
created through thin and thick lines, different shapes and colours – emphasize how all of the patterns
repeat! Provide children with African Pattern Resource Sheet - ask children to use their sketchbooks to
try out some of the patterns of their own using the different designs they have seen as inspiration.
Ask them to record notes explaining their use of shapes, lines, pattern, colour and what they have
based them on. Children can use either coloured pencils, felt-tip pens, crayons or poster paint for
colour and colour mixing.
Ask children to select a pattern design to ‘blow up’ onto larger paper. Children will need to draw out
their design to fill the entire sheet. They will then need to use paint colour mixing techniques to colour
their pattern using the influences from the African designs researched earlier.
Phase 2
I can mix colour to create an animal painting inspired by
the work of Geoffree Mugwe.
Explore the work of Geoffree Mugwe an African artist.
Mugwe is a secretive artist and little is known about his life
or who he is. His art features in one gallery in Nairobi. His
paintings are vibrant and realistic of African landscapes and
animals. Mugwe paintings with both fascinating detail and
a unique observation of both form and light. His
compositions are unlike any other artist in that they are
vibrantly coloured and dynamic in the depiction of Africa.
Cast in a rich warm light, the elements of the paintings are fantastic to look at. Ask children to use
Mugwe’s work as inspiration to start sketching different African creatures in their sketchbooks –
noting down the composition, the colours that might be used and the positioning of the animal.
Demonstrate how children can transfer their sketches into a larger scale piece. Show children how
paint their animals and with layers of colour to show the depth and light in the pictures.
Children can then select their sketch to enlarge into a final Mugwe inspired piece.
Phase 3
I can use African animal influences to create mask design sketches.
3D Sculpture – Mask Making (prior to the session, ask children to start collecting
junk modelling
materials suitable for animal mask making).
Begin by showing the children some examples of African masks that use animals
as their inspiration – see (PPT African Masks in resource folder). Discuss the
different patterns, shapes and forms the masks take and the materials they
would be made from. Ask the children to think through the different animals
they have come across in their art and topic learning. Ask them to recall the
different colours and patterns they have seen. Explain that, using the influences
from African pattern and the studies of animals from the Mugwe paintings,
children will be making their own 3D animal mask.
Ask the children to use their sketchbooks to create possible designs of masks
that they might want make in the next phase. They should use their combined
knowledge and skills learned from the previous studies to help direct their
designs. Sketches should be accompanied by notes explaining the children ideas,
the colours they may use and the influences they have taken from. Discuss with
children how their mask designs do not have to look exactly like any particlaur
animal, they just have animal influences and inspiration. This could be tusks
from a wart hog, or patterns from a giraffe, not replicating the animal entirely.
Phase 4
I can use 3D model making skills to create my own African animal inspired mask. Making – using the
designs from the previous session, ask children to select a chosen design for their animal mask.
Demonstrate how children can use different papers, junk materials and methods of joining (using
masking tape) to help form their 3D animal inspired mask. Reind children that their masks do not have
to look exactly like any particualr animal – they are just influenced by them.
When children have finished their mask, they can paint them with a base colour – this should be
something neutral so that in the next session they can apply their African inspired colours and
patterns.

Phase 5
I can use the influences of African colour and pattern to decorate my mask.
Ask children to look back through their sketchbooks at the different African
patterns and animal skin patterns they have studied. Ask them to look at their
mask designs and think about their use of colour. It might be a good idea to re-
show children the African mask PPT from the previous session to remind them
of the colours and patterns used. Children should now children to paint their
masks using the African colours, patterns and forms they have learned about
in previous sessions.
Phase 6
I can reflect, evaluate, and provide feedback on my art work and that of other’s.
Children work in groups to show their masks from the previous sessions – their sketchbooks and
Mugwe inspired animal paintings. Ask children to take it in turns to discuss their initial ideas, share
their thoughts at the time and after making their artwork. Ask children to share their development of
ideas and the making of their pieces and material choices, colour choices etc with their group
reflecting on the process and using evaluative language: I really like the way I …….I wish I had…….I still
need to work on……This helped me understand….I am most proud of….The tricky part was… ...Next
time I need to…… Group members should also provide constructive feedback: I really like how you…I
think you have managed to ….Maybe next time you could… An evaluation writing frame could be
created to help children record their evaluations, and those of their peers in their sketchbooks
alongside images of their finished pieces.
Vocabulary
Vocabulary
Geoffree Mugwe
Pattern
Repeating
Geometric
Mask
Composition
Earthy (colours/tones)
Vibrant (colours/tones)
Layering
Decorate
pattern
geometric
Mask
vibrant
Earthy (tones/colours)
layering (of colour)
