
Page 1
CI125020
A Match Made In Coordinates: Bringing Revit, Civil 3D,
and InfraWorks Together At Last
Donnie Gladfelter, CADD Microsystems
Purvi Gandhi Irwin, AIA, CADD Microsystems
Description
Many building site projects live in 2 worlds: everything inside the building, and everything
outside the building. The 2 worlds only come together after an excessive amount of swearing
and hours of unnecessary time spent. But does it have to be that way? Absolutely not.
Coordinating Revit software and AutoCAD Civil 3D software doesn’t have to require a degree in
nuclear physics, and this session will show you how. Co-presented by a Revit and an AutoCAD
Civil 3D specialist, you will gain an understanding of the expectations for each platform, and
learn how to configure them. With coordinated model locations in place, we’ll define effective
practices for exchanging data between Revit software and AutoCAD Civil 3D software. Using
the full potential of each coordinated design model, you will learn how to assemble your project
in the context of its surroundings using InfraWorks software, and you’ll learn how to generate a
virtual reality scene.
Learning Objectives
• Learn how to establish shared coordinates between Revit and AutoCAD Civil
• 3D Learn how to incorporate Revit model data in AutoCAD Civil 3D and
AutoCAD Civil 3D model data in Revit
• Learn how to assemble design-model data into an immersive InfraWorks model
• Learn how to generate virtual reality scenes of your complete project model

Page 2
Speaker(s)
Donnie Gladfelter aka “The CAD Geek” is a highly visible and respected thought leader in the
CAD community, and Autodesk Expert Elite member. He is well known for the CAD Geek blog
(www.thecadgeek.com), has written many articles for AUGIWorld magazine, presented at
Autodesk University for eleven consecutive years, and authored six Autodesk Official Press
books. He has worked with the development team at Autodesk, Inc., to help shape future
versions of AutoCAD software. Gladfelter also helps to empower CAD professionals across the
world as a technical product and online manager for CADD Microsystems (an Autodesk
Platinum Partner) and as a former member of the Autodesk User Group International (AUGI)
board of directors.
donnie.gladfelter@caddmicrosystems.com
www
.linkedin.com/in/dgladfelter
https://twitter.com/thecadgeek
https://thecadgeek.com
Purvi Gandhi Irwin, AIA is a Senior Applications Specialist at CADD Microsystems, in
Alexandria, VA, where shesupports the integration of software and technology in the building
trades. Previously, she was a preservation project architect, where she specialized in using
innovative technology to facilitate the documentation and rehabilitation of institutional buildings.
Purvi has 9+ years of Revit experience working with existing buildings most of them also
historic, and has used Revit from conceptual design, through construction administration and
project close-out. She has a Bachelors of Architecture from The Cooper Union and a MS in
Historic Preservation from the University of Pennsylvania. In her spare time, Purvi is the Vice
Chair of the Parker Gray Historic District Board of Architectural Review in Alexandria, VA, and a
member of the Association for Preservation Technology International Technical Committee on
Documentation.
Purvi.Irwin@CADDmicrosystems.com
htt
ps://www.linkedin.com/in/purvi-irwin-aia/
http://caddmicrosystems.com/blog

Page 3
Software Overview
During this class we’ll present a workflow that is both grounded, and collaborative. To
accomplish this we’ll be using four separate applications including:
• AutoCAD Civil 3D
• Autodesk Revit
• Autodesk Navisworks
• Autodesk InfraWorks
In addition to the applications outlined above, we’ll also utilize two essential plugins that are
freely available to those subscribing to the Architecture, Engineering, and Construction (AEC)
Collection, or individual products:
• Autodesk Shared Reference Point Extension
• Site Designer for Revit
You’ll find each of these plugins on the Product Enhancements page within the Autodesk
Account site (http://manage.autodesk.com)
Process Overview
The purpose of this class is to define an end-to-end workflow to coordinate all of the model data
for a project. We have structured this workflow into five steps designed to align with the different
stages of a typical project. These steps are defined as:
Step 1: Setting up Coordinates in Revit
The architect will properly establish the project base point relative to the Revit origin.
Step 2: The Handoff
Here the architect will establish the building footprint for the proposed design, exporting
it to a DWG file for use by the civil engineer.
Step 3: Establishing Coordinates [Civil Engineer]
Here the civil engineer will use the building footprint DWG file created by the architect to
establish where the building will be placed on the proposed site. The civil engineer will
then share this location data with the architect.
Step 4: The Architects’ Set-up [Architect]
With a location established, the architect will then import the location data created using
Civil 3D into the Revit model, and apply that location as the True North configuration for
the project.
Step 5: Synchronizing the Design Models
With both the Revit and Civil 3D models sharing a common location point, here we’ll
incorporate the Revit model into the Civil 3D model, and import topographic elements of
the Civil 3D model into the Revit model.
Step 6: Visualizing with InfraWorks
The final step focuses on telling the story of the proposed design by creating an
InfraWorks model that includes existing structures in addition to our proposed Civil 3D
and Revit models.

Page 4
Step 1: Setting up the Coordinates in Revit
To ensure that the Revit and Civil 3D files talk nicely to each other, first, we must understand
the locations of three points – the Revit Origin, Project Base Point, and Survey Point.
Revit Origin – the invisible 0,0,0 point in Revit that cannot be moved but that you also
cannot see. The coordinates of other two points are relative to this location.
Project Base Point – Measurable location on your building, typically the intersection of
two grids, or the exterior corner where two exterior walls meet.
Survey Point – Measurable location on your site that can be used to align multiple
models on a site.
Most people know about the last two, but not about the Revit Origin. The Revit Origin is invisible
and it cannot be changed. When you create a new Revit file, these three points are all in the
same location. When you unclip them and move them, the coordinates appear relative to the
Revit Origin. For your models to graphically display correctly, you need to keep your modeled
objects close to the Revit origin. To ensure that this happens, we recommend keeping the
Project Base Point in the original OOTB location, on top of the Revit Origin.
When Revit and Civil 3D files coordinate these points above, the “Survey Point” in the Revit file
and the “Origin” in the CAD file align with each other.
Ideally, you would set up your architectural model with these points in mind from the beginning,
so that you can coordinate much easier with Civil and hence with Navisworks and Infraworks.
Follow these steps to configure these coordinates:
1. Open Autodesk Revit.
2. Open a new project from your company template file. Autodesk Revit opens with a new
model.
3. Open a first floor or site plan view from Project Browser. The selected view displays.
4. Choose Visibility/Graphics from the Graphics panel of the View Ribbon tab. The
Visibility/Graphic Overrides for <view name> dialog box opens.
Page 5
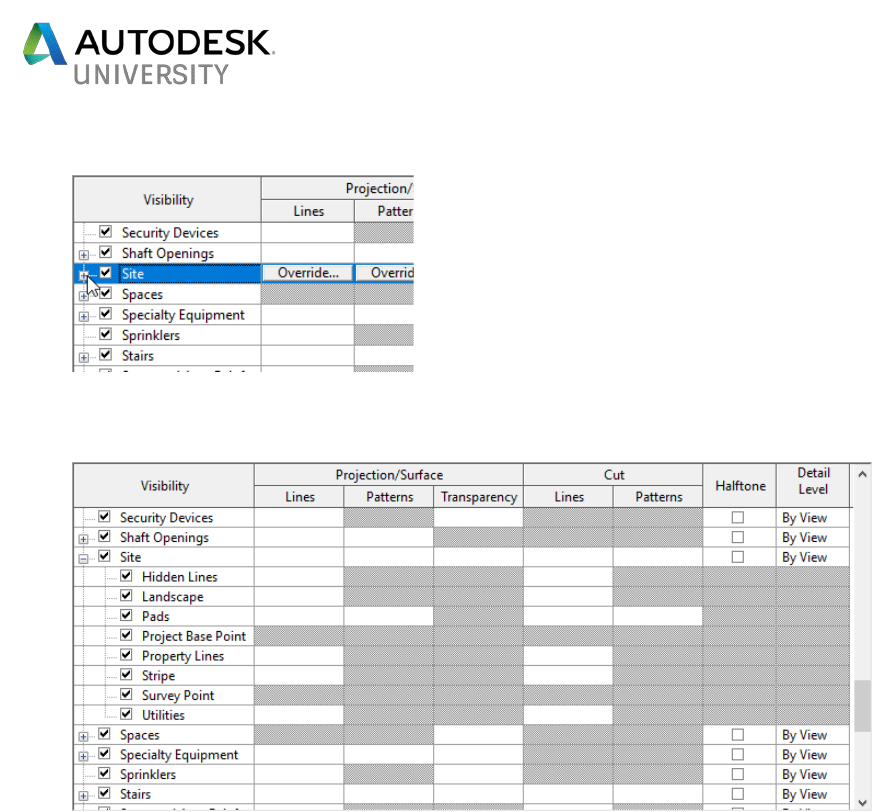
5. Scroll to the Site visibility node of the list, and click [+] to expand the visibility. The sublist
of site elements displays.
6. Select Project Base Point and Survey Point from the list of site elements. Click OK to
apply the updated visibility, and return to your model view.

Page 6
Step 2: The Handoff [Architect]
Exporting the Building Outline from Revit to AutoCAD Civil 3D for Site Placement.
To begin our match made in coordinates we first need to share our proposed building design
with the civil engineer who is using AutoCAD Civil 3D. Since the civil engineer only cares about
the overall footprint of the building (not the internal walls), we’ll simplify the DWG we export to
include only essential information.
Follow these steps to export the building footprint from Revit:
1. Create a new floor plan for your coordination view. To start out with the cleanest
plan possible, create a new plan from scratch, don’t duplicate from an existing
view.
2. Choose Plan Views Floor Plan from the Create panel of the View Ribbon tab.
The New Floor Plan dialog box opens.
3. Configure the new floor plan view by selecting Floor Plan as the Type; choose
the appropriate level (1
st
Floor), and uncheck Do Not Duplicate Existing Views
from the New Floor Plan dialog box.

Page 7
4. Right-click the newly created view within the Project Browser and select Rename
from the contextual menu. Enter 1
st
Floor – Civil Coordination.
To reduce confusion among other project team members, it’s best to designate
the new view as one for coordination with the civil engineer.
5. Open the Visibility/Graphics dialog box from the Ribbon (View Graphics
Visibility/Graphics), or by entering VV on your keyboard. The Visibility/Graphic
dialog box opens allowing you to turn off the elements you do not want to see.

Page 8
6. Select the All button at the bottom of the Visibility/Graphic dialog box to turn off
the visibility of all modeled objects. The checkbox next to each element type is
unchecked.
7. Select the checkbox next to Walls, click OK. The visibility of all modeled objects
except for walls is turned off.
8. Choose Filters from the Graphics panel of the View Ribbon Tab to begin creating
a filter to hide the interior walls; displaying only the exterior walls for your project.
The Filters dialog box opens.
9. Choose the New button from the bottom left corner of the Filters dialog box. The
Filter Name dialog box opens.

Page 9
10. Enter a name for your filter, Walls – Exterior Only in this example, select the
Define Rules radio button, and click OK to create the filter.
11. Choose Walls from the Categories group a the center of the Filters dialog box.
It’s important to note, for this to work correctly, the function of each wall type in
your model must be appropriately designated.
12. Configure the options within the Filter Rules group on the right of the Filters
dialog to match the image below:

Page 10
13. Open the Visibility/Graphics dialog box (type VV or VG on the keyboard, or View
Graphics Visibility/Graphics from the Ribbon) to apply this filter to your
view.
14. Browse to the Filters tab of the Visibility/Graphic Overrides dialog box, click the
“Add” button. The Add Filters dialog opens to display a list of available filters in
the current model.
15. Select the Walls – Exterior Only filter under the Rule-Based Filters group within
the Add Filters dialog box (shown above). Click OK to return to the
Visibility/Graphic Overrides dialog box.
16. Uncheck the Visibility checkbox for the Walls – Exterior Only filter. This makes all
walls without a function of Exterior not visible.

Page 11
17. Browse to the “Annotation Categories” tab and uncheck the Show Annotation
Categories In This View box at the top to turn off all annotation objects for the
current view. Click OK to finish.
18. Verify the Footprint view is current, and that it is composed similarly to the
illustration below.
19. On the File menu, choose Export CAD Formats DWG to begin the process
of exporting the current view to an AutoCAD drawing file. The DWG Export dialog
opens.

Page 12
20. Verify <current view/sheet only> is selected from the Export drop-down list of the
DWG Export dialog box, and match the settings below:
21. Browse to your project directory, and specify a name for your DWG file from the
Export CAD Formats dialog – Save to Target Folder. Click OK.
.

Page 13
Step 3: Establishing Coordinates [Civil Engineer]
Our Civil 3D project has been setup in relation to a geographic coordinate system which is very
different from the model reference point found within Revit. With a DWG file establishing the
outer footprint, the civil engineer can begin positioning the building on their site. Since little if any
site design has been completed at this stage in the process, this exercise is likely to focus on
establishing both the horizontal and vertical (elevation) positions for the building.
Insert the Building Footprint & Establish a Finished Floor Elevation
Using the DWG file exported from Revit, we’ll begin by placing the proposed building onto our
site.
1. Open AutoCAD Civil 3D.
2. Use the INSERT command to insert the building footprint DWG file provided by
the architect into your Civil 3D site design.
TIP: To maintain a clean Civil 3D drawing, we recommend opening the DWG
file provided by the architect to ERASE any extraneous or unnecessary
objects from the file before inserting it into one of your design drawings.

Page 14
3. Use the MOVE and ROTATE commands to find the best horizontal and vertical
position for the building on your site. Verify the building footprint has an elevation
greater than 0.
TIP: Apply an Elevation Banding style to your existing ground surface, and
create ranges using a Range Interval at Datum to quickly visualize the
necessary earthwork for the finished floor elevation you choose.

Page 15
Create a Shared Reference Point File
At this point the building has been precisely located on the civil engineering site, but that
information has not yet been communicated back to Autodesk Revit. The Autodesk Shared
Reference Point extension (free for Autodesk subscribers) helps streamline this process by
creating an XML file that we’ll later import into Revit.
1. Continue using AutoCAD Civil 3D with the drawing file created in the previous
exercise.
2. Switch to the Toolbox tab within the Toolspace palette to expand the
Subscription Extension Manager > Autodesk Shared Reference Point > Export
Shared Reference Points for Autodesk Revit.
TIP: If the Toolbox tab is not visible within the Toolspace interface, click the
Toolbox tool on the Palettes panel of the Home Ribbon tab.
Follow the prompts of the Export Shared Reference Points command by first selecting
the Origin point of the building.
TIP: To ensure the proper elevation is set, make sure your building footprint
you snap to when selecting the origin is elevated to the proper finished floor
elevation.

Page 16
3. Continue the Export Shared Reference Points command by choosing another
corner of the building that represents a positive Y-axis.
TIP: It’s imperative the architect selects the same points in Revit that the civil
engineer selects in Civil 3D. To avoid confusion during this process, we
recommend taking a screen shot of your drawing that highlights which points
you selected. Techsmith’s Jing (http://www.techsmith.com/jing.html) and
Evernote’s Skitch (https://evernote.com/skitch/) are two free tools that will
allow you annotate screenshots.

Page 17
4. From the Select Units and Confirm dialog, select the appropriate drawing units
and verify the coordinate values acquired using the Shared Reference Point
command. Click OK.
Our sample project is located in Richmond, VA and has the North American Datum 1983
(NAD83) Virginia State Plane South Foot (VA83-SF) coordinate system applied to it.
Projects in this region should have a Northing value of 3-million and an Easting value of
11-million. Since positive coordinates along the x-axis point due east, and positive
coordinates along the y-axis point due north, the Northing value is represented by the Y
coordinate in this dialog, and the X coordinate represents the Easting value.
5. Select a location to save an XML file containing the information acquired from
your drawing with the Shared Reference Points command from the Save As
dialog. Click Save.
Although you can select any name you choose, the file name you choose for the XML
file will become the name of the Shared Reference Point that will be created in Revit.
After completing the steps above, you may view the contents of the XML file by opening
it using Notepad:

Page 18
Step 4: The Architects’ Set-up [Architect]
Applying the Civil 3D Shared Reference Point to the Revit Model
Now that the civil engineer has located our building on the site, we’re ready to incorporate that
location data into our Revit model. To accomplish this, we’ll use the Shared Reference Point
add-in for Revit (available from the Autodesk Subscription website) to import the location data
exported from Civil 3D.
Follow these steps to import Civil 3D location data into Revit:
After you use this Add-in, you will want to make sure that you are establishing the same
points as the Civil Engineer. As suggested above, this is an essential step in the process
to make sure that both Civil and Architecture are aligned. (Example: First click: Bottom
corner of my building at intersecting grids 1 and A. Second click: Top right of my building
at intersecting grids 6 and F).
After picking your points, a popup window will appear that allows you to select the XML
file provided by the Civil Engineer.
1. Open Autodesk Revit and your building model.
2. Choose the Import Shared Coordinates from XML file tool from the Shared
Reference Point panel of the Add-Ins Ribbon tab. The status bar Choose the
XML file sent to you by the civil engineer. Click Open.
3. The location data from Civil 3D imports into the Revit model as a shared
reference point.
Applying that Shared Coordinate throughout Revit
Currently, the location data we imported from Civil 3D is just another point in our Revit model.
We have not yet told Revit that it should represent the Survey point in our model.
Follow these steps to configure the imported reference point as the survey point in the
Revit model:
1. Continue using Revit with the building model used in the previous exercise.
2. Switch to the Manage tab within Revit, and select the Location tool from the
Project Location Ribbon panel. The Location Weather and Site dialog opens.

Page 19
3. From the Site tab of the Location Weather and Site dialog, and select the
Reference point imported (named ElevatedCivilPoint in this example) during the
previous exercise, and click Make Current. Click OK to return to your model view.
4. With the model view current, set the Orientation parameter on the Property
palette to Project North. The view orientation updates to display the true geo-
referenced location of your building model.

Page 20
The Revit view will update by rotating to display the True North location of the project.
It’s important to note this has not affected the Project North typically configured in an
orientation best suited for design documentation. The True North location is an entirely
separate part of the model.
You will see your survey point move to the new Shared Coordinate location established
by the Civil Engineer. If you go to your properties of the site view and change the
Orientation to “Project North” you should also see the site orientation change
accordingly.
In this zoomed out 3D view I am showing the new coordinates of the Project Base Point
Northing/Easting in relation to the Survey Point.

Page 21
Step 5: Synchronizing the Design Models
Recognizing the design models authored by the architect (Revit) and civil engineer (Civil 3D)
were initially configured with very different locations, our focus to this point has been adjusting
these models so they were each spatially aware of the other.
Exporting the Building File with Applied Shared Coordinates back to Civil 3D.
With the Revit model spatially located to the same coordinates as the civil engineer, we’re ready
to provide a 3D representation of the Revit model to the Civil engineer. Since AutoCAD Civil 3D
cannot read or import RVT files, we’ll export the model as a Navisworks file.
Follow these steps to export the Revit model to a Navisworks NWC file:
1. Continue using Revit with the building model used in the previous exercise. Make
sure in this case you have a 3D view open.
2. Choose Export NWC from the File Menu to open the Export Scene As dialog
box.

Page 22
3. Select the Navisworks Settings button at the bottom of the Export Scene As
dialog box. The Navisworks Options Editor – Revit dialog box opens.
4. Select File Readers Revit from the panel on the left, and then verify Shared is
set as the Coordinates value from the panel on the right.
5. Enter a file name for your Navisworks file, and click Save.
6. Choose a name and location for your Navisworks NWC file export from the
Exports Scene As dialog box. Click OK to save the file.

Page 23
Importing the Building Model into Civil 3D
Now that the architect has geo-located their model within Revit, it’s possible to incorporate a 3D
representation of the model inside AutoCAD Civil 3D. Assuming the location and elevation data
is configured correctly, the 3D DWG file provided by the architect should insert at its precise
location on the Civil 3D site.
Follow these steps to insert a Navisworks NWC file of the building model into Civil 3D:
1. Open Civil 3D if it’s not already.
2. Start the ATTACH command from the Reference panel of the Insert Ribbon tab.
The Select Reference File dialog box opens.
3. Choose Navisworks Files (NWC, NWD) from the Files Of Type drop-down menu
at the bottom of the Select Reference File dialog box.
4. Browse to and select the NWC file exported by the architect from Revit. Click
Open to display the Attach Coordination Model dialog box.
5. Specify how to insert the Navisworks NWC file into your drawing by specifying
the following:
a. Path Type: Relative Path
b. Insertion Point: X = 0, Y=0, Z=0
c. Scale: Uniform Scale = Checked, X=1
d. Rotation: Angle=0
Since the NWC export from Revit was configured to use the appropriate drawing units,
and the Shared Reference Point established earlier in this document, we can insert the
building using default insertion values.

Page 24
6. Clicking OK from the Insert dialog places the Navisworks NWC file at its precise
horizontal and vertical location.
Exporting Civil 3D Terrain to Revit with LandXML
With the building from Revit incorporated into the civil model, the next step is to provide the
architect with key information from Civil 3D. We’ll accomplish this my using an open data
exchange format known as LandXML. Similar to the way the IFC format allows building data to
be exchanged between different building applications like Revit and ArchiCAD, the LandXML
format allows civil engineering data to be exchanged between different civil applications. To
generate a LandXML file from Civil 3D:
1. Open Civil 3D is it’s not already.
2. Click the Export to LandXML tool on the Export panel of the Output Ribbon tab.
The Export to LandXML dialog opens.
3. Select the Civil 3D objects you would like to include in the LandXML file. Since
terrain is the focus of this exercise, I have limited this export to only include
surfaces.
4. After selecting the objects to include, click OK and specify a location to save the
XML file.

Page 25
Importing Civil 3D Terrain as a Revit Toposurface
For this next step we are going to create a toposurface inside of Revit from the information
handed to us from the Civil Engineer. Be sure to note the Site Designer plugin (available from
Autodesk Subscription Center) is necessary to complete this exercise.
Follow these steps to import the LandXML terrain from Civil 3D into Revit as a
toposurface:
1. Open Autodesk Revit.
2. Click the Import LandXML tool on the Import/Export panel of the Site Designer
Ribbon tab. The Import LandXML dialog opens.
WARNING: The Site Designer tab is only available within Revit after the Site
Designer plug-in has been installed. Log into the Autodesk Subscription center
to download and install the plug-in.
3. Click the ellipsis button from the Import LandXML dialog box to browse to and
specify the LandXML file provided by the civil engineer.
4. Configure the Import LandXML dialog as follows to import only the surface from
the LandXML file:
a. Import Toposurfaces Found In LandXML File: Checked.
b. Import Alignments Found In LandXML File: Unchecked
c. Positioning: By Survey Point

Page 26
5. Click OK to accept the Import LandXML settings outlined above. The
Toposurface Selection dialog box displays.
6. LandXML files may contain any number of surfaces. Select the surface(s) you
would like to import from the Toposurface Selection dialog, and click OK. The
Toposurface Information dialog opens.
7. The Toposurface Information dialog box specifies how the toposurface will be
added to our Revit model. For the Existing Ground surface we’ll configure this
dialog box as follows:

Page 27
a. Add As A New Toposurface: Selected
b. Toposurface Name: Accept default name acquired from the LandXML file.
Existing Ground in this example.
c. Phase Created: Existing
8. Click OK within the Toposurface Information dialog box to begin the import
process. The LandXML file is read, and the following confirmation is displayed
once the process is successfully completed:

Page 28
You should be able to see the site imported to the correct spot in Revit along with your new
toposurface.
Putting Coordinate Data to Work
Revit Tools such as “Spot Elevation” and “Spot Coordinate” can now pick up data from either
the survey point or project base point.

Page 29
Step 6: Visualizing with InfraWorks
While there are many tools for visualizing designs, few are able to efficiently include those
designs in the context of their surroundings. The power of InfraWorks rests with its ability to
visualize projects in the context of its surroundings.
Even though the most recent versions of InfraWorks can import native RVT files, InfraWorks
cannot place the native Revit model using the geographic coordinates it includes. For this
reason we will use the FBX format to take our Revit model to InfraWorks.
Generating a Geo-Referenced FBX File from the Revit Model
The FBX format is intended to provide a simple way to exchange 3D model data between
different software applications. Today nearly every Autodesk application with 3D features is
capable of both reading and writing FBX files.
While Revit can indeed create FBX files, it does not include the export options necessary to
create a geo-referenced FBX file. For this reason, we will first export the Revit model to
Navisworks, using the more robust FBX export tools it provides to create the actual FBX file
we’ll import into InfraWorks.
Follow these steps to create a geo-referenced FBX file:
1. With the geo-referenced Revit model open, choose File > Export > NWC. The
“Export scene as…” dialog opens.

Page 30
2. Choose a name and location for your Navisworks file from the Export Scene As
dialog. The NWC Exporter dialog opens and generates the NWC file.
3. Open Navisworks, and Append the NWC file you exported from Revit to a new
Navisworks model.
4. Choose Export > FBX from the Navisworks Application Menu. The FBX Options
dialog opens.
5. With the FBX Options dialog open, set the Convert Units To setting within the
Advanced Options group to Feet. Click OK to open the Export dialog.

Page 31
6. Provide a name for your FBX file from the Export dialog, and click Save.
Importing a Geo-Referenced FBX File into InfraWorks
With a geo-referenced FBX file in place, we can now incorporate it into our final InfraWorks
model. To ensure our building model is placed in the correct location, it’s important to know
what coordinate system the Civil 3D and Revit projects were configured for.
In this example the Civil 3D and Revit projects were configured to use the NAD 83 Virginia State
Planes, South Zone, US Foot (VA83-SF) coordinate system.
Follow these steps to import the geo-referenced FBX into InfraWorks:
1. With the InfraWorks model open, choose the InfraWorks Home Button > Manage
> Data Sources. The Data Sources panel opens.
2. On the Data Sources panel, click the small triangle to expand the Add File Data
Source menu. Click 3D Model. The Select File dialog opens.

Page 32
3. Use the Select Files dialog to browse to the geo-referenced FBX file exported
from Navisworks. The FBX file is added to the Data Sources tree with the
classification <No Feature Type>
4. Double click the FBX file from the Data Sources panel to configure it. The Data
Source Configuration dialog opens.
5. Configure the following from the Data Source Configuration dialog:
a. Type: Buildings
b. Coordinate System: Select the coordinate system used in Civil 3D &
Revit. VA83-SF in this example.
c. Position Coordinate System: This should default to the InfraWorks Model
coordinate system, and does not need to be changed.
d. Click Close and Refresh
6. InfraWorks processes the FBX file, and places it into the model.

Page 33
Congratulations, you have now established a “match made in coordinates” between Civil 3D,
Revit, and InfraWorks!
